Leo Megamenu Module
Prestashop module to build professional megamenu
- Created: 06/01/2017
- latest Update: 06/01/2021
- By: Leotheme
First of all, we would like the thank you for using our work.
Leotheme - a website where you can find the best Prestashop theme and Extensions as well. We are proud of our professional themes, extensions. With years of experience working on Opensource, we have created number of great extensions for both Joomla and Prestashop like: Leo Prestashop Framework, Leo Prestashop Megamenu Module ...
This is Modern and Functional menu for your store. Help your customers in an easy and friendly way to navigate between pages. Easy-to-use menu that does not have to add each category because the entire menu is generated automatically. Menu is an advanced solution for your store so you can add your own links or use the auto links for cms links. Menu running on a mobile device at any resolution. In the price of the product is updates and support during 1 year. Therefore, you can always ask us for help. The module will help you in obtaining higher revenue through an efficient and user-friendly navigation. You can view your pictures so that the shop will be more friendly and readable.
Leotheme is also famous for custom work, if you have trouble or help with your website, coding, .... you can find us then we will support you or give you suggestions.
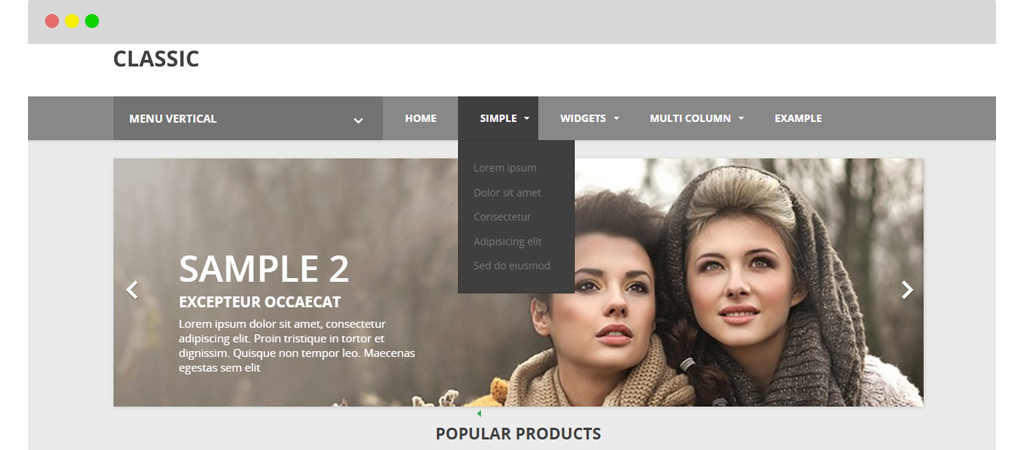
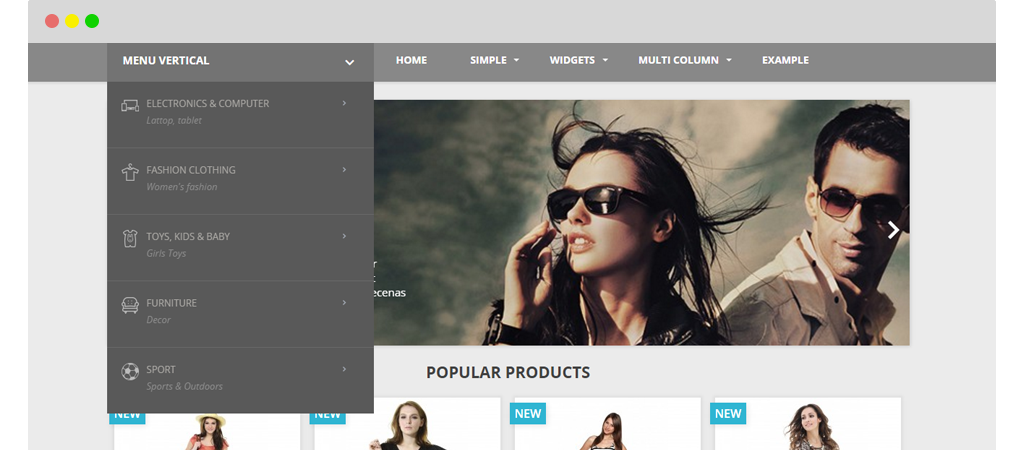
Megamenu sample
Menu Horizontal
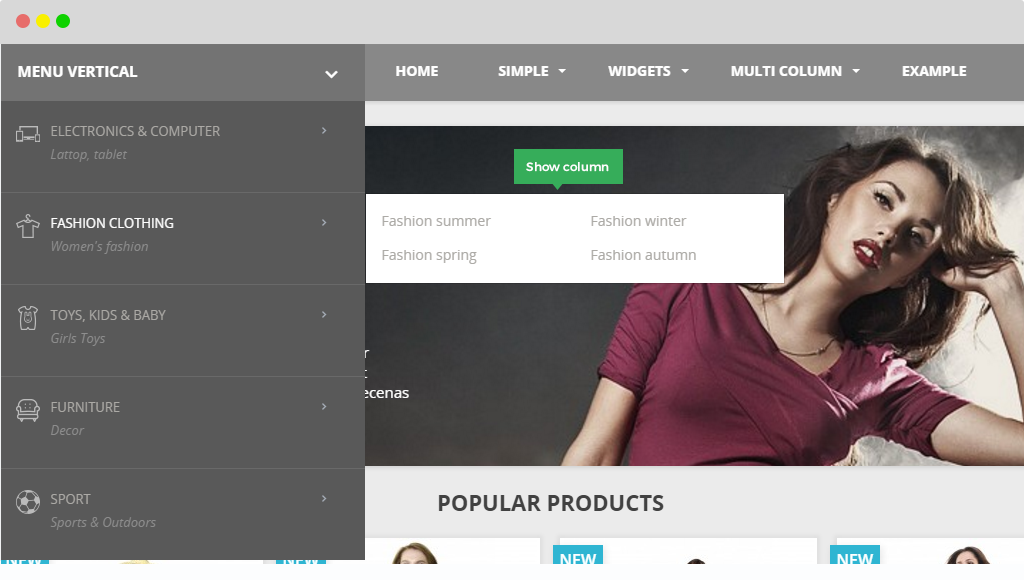
Menu Vertical
Download and Install
Download
Currently, the module will only be included in the pretashop theme that support the module by default. So you have to download the theme package then the module will be there for you to use.
Install
You can install the module as any other pretashop module. If you are new to prestashop, you can check How To Install Prestashop Module Video Tutorial
Publish the module
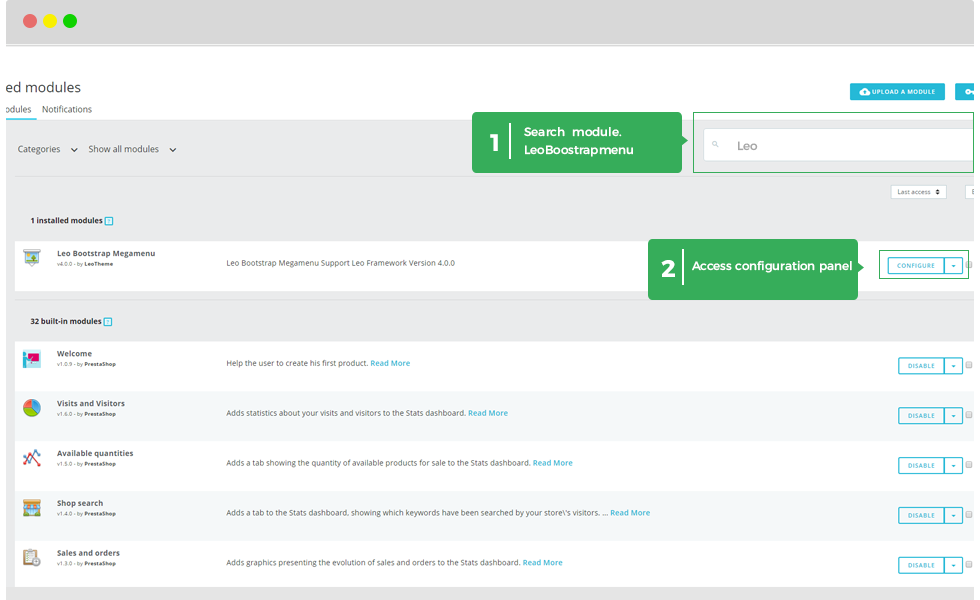
After install the module successfully, go to Modules then search Leo Megamenu module, enable the module then access its configuration panel.
I. Megamenu
The menu tree management system allows you to: update/delete any menu item, change menu item position, create new menu item, view and create new widget that can be assign to column or row in megamenu.
To create complete Menu for your store, user should follow 2 steps below:
1.Creat group list menu
2.Creat item menu
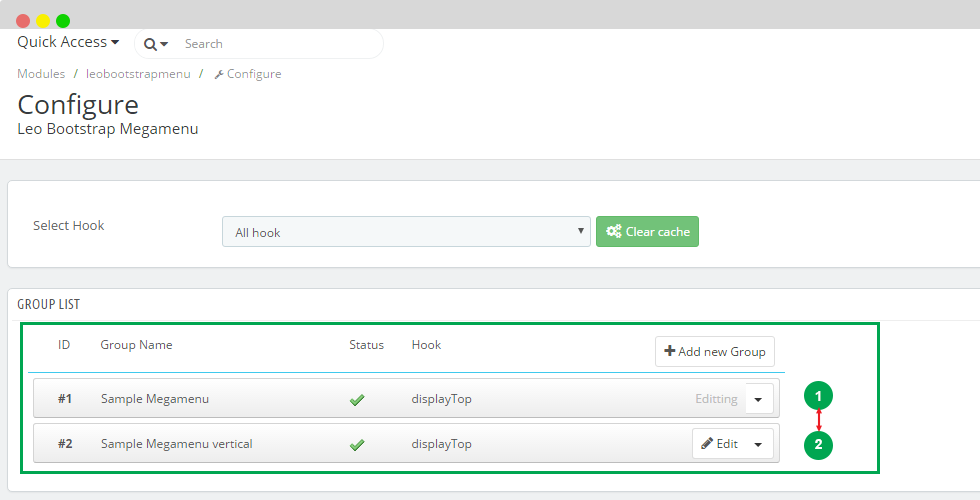
1. Creat group list menu
A. Add new group
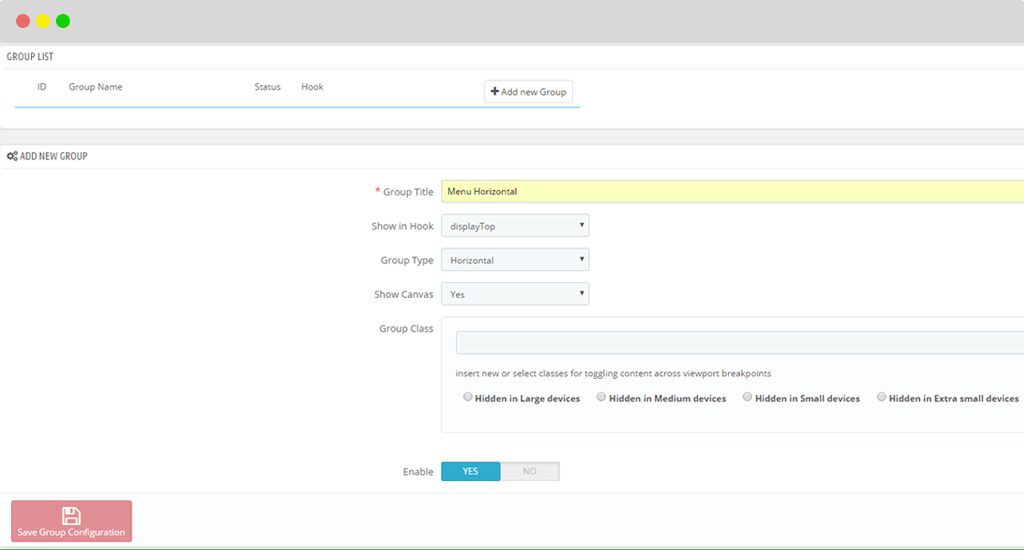
Press "Add new Group" to create new group.
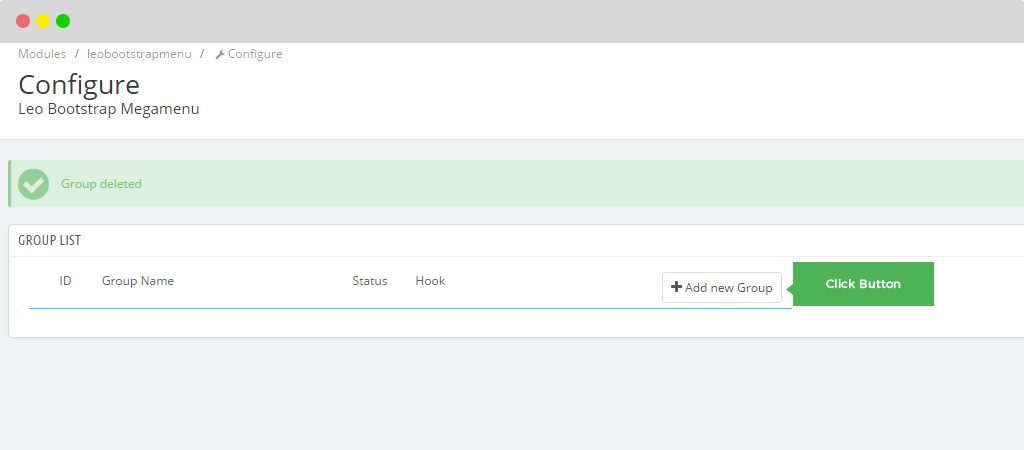
After user click button, the table will be existed (as our images).
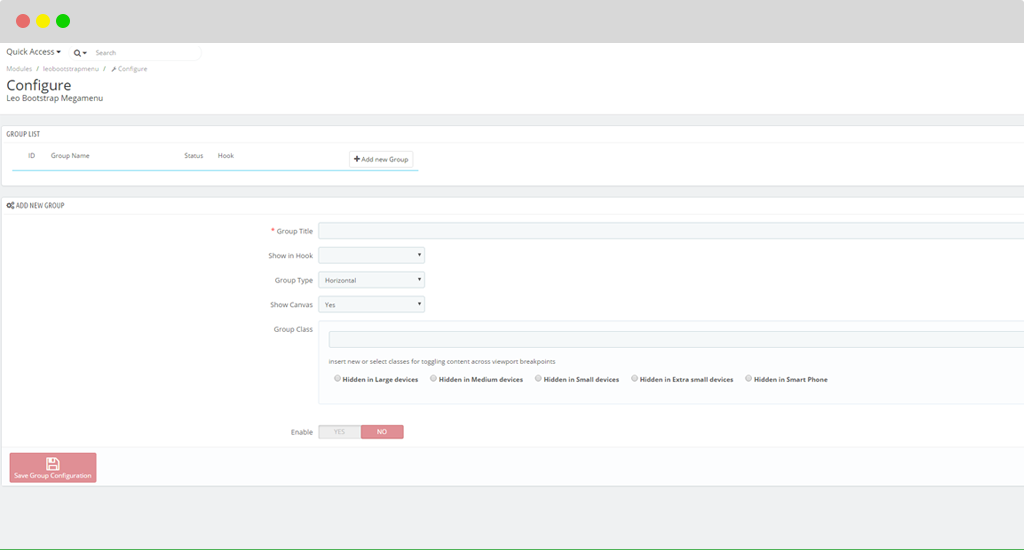
The next step, you need to fulfill the table with your information.
- Group title: To display the Name of Group.
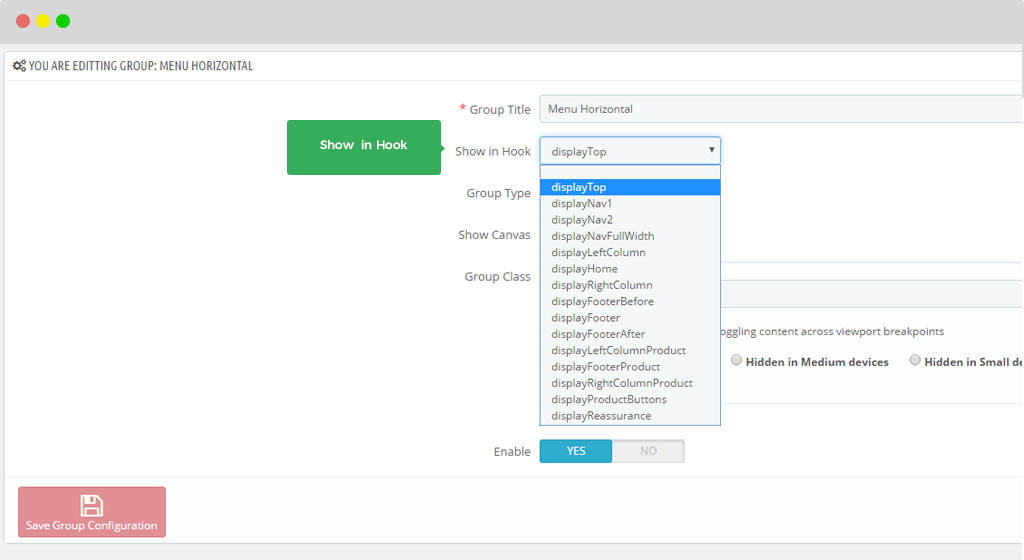
- Show in hook : To display the position in frontend.
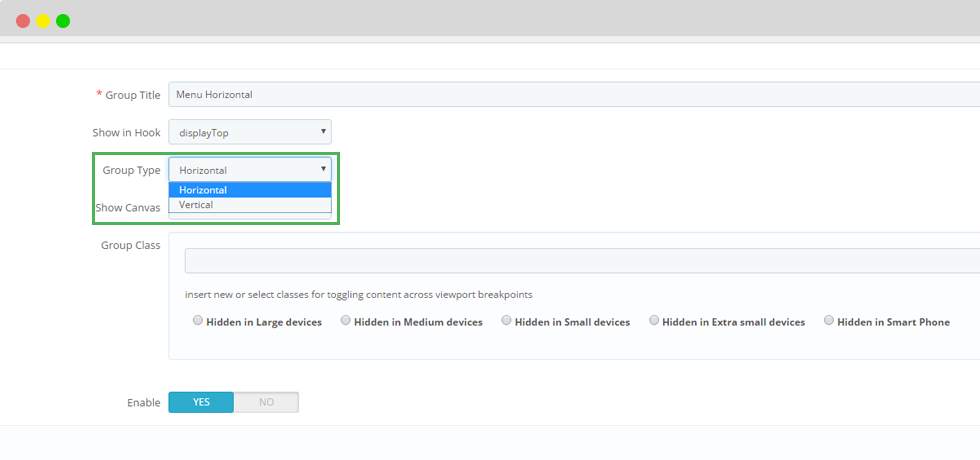
- Group type: There are 2 types of display. Horizontal Menu and Vertical Menu
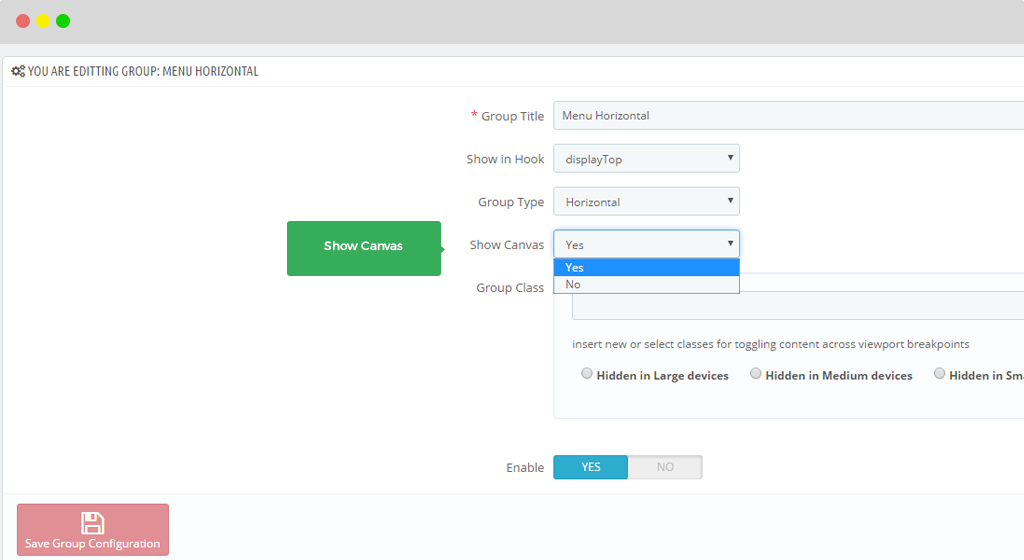
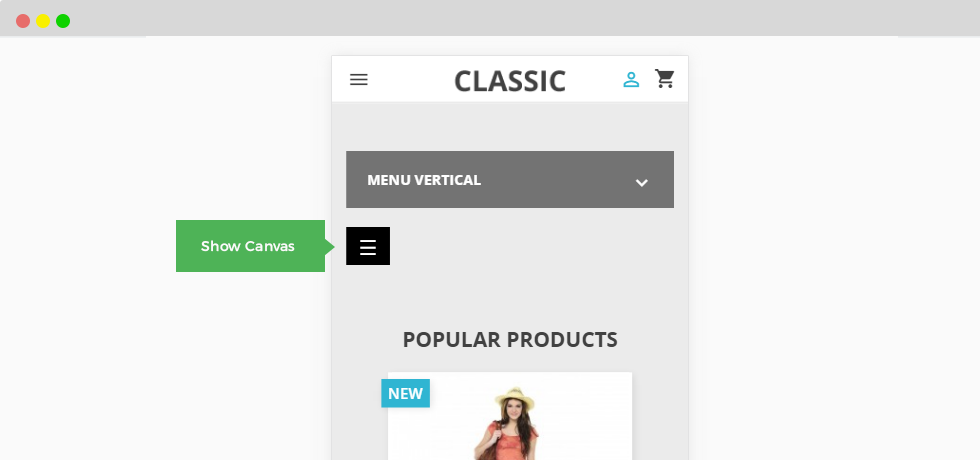
- Show canvas: This function is only provided for Group Type Horizontal to display for smaller screens as Mobile or Tablet.
If user choose Group Type is Vertical, "Show Canvas" Function will be hidden.
This is example for displaying Canvas Function on Frontend with mobile screen.
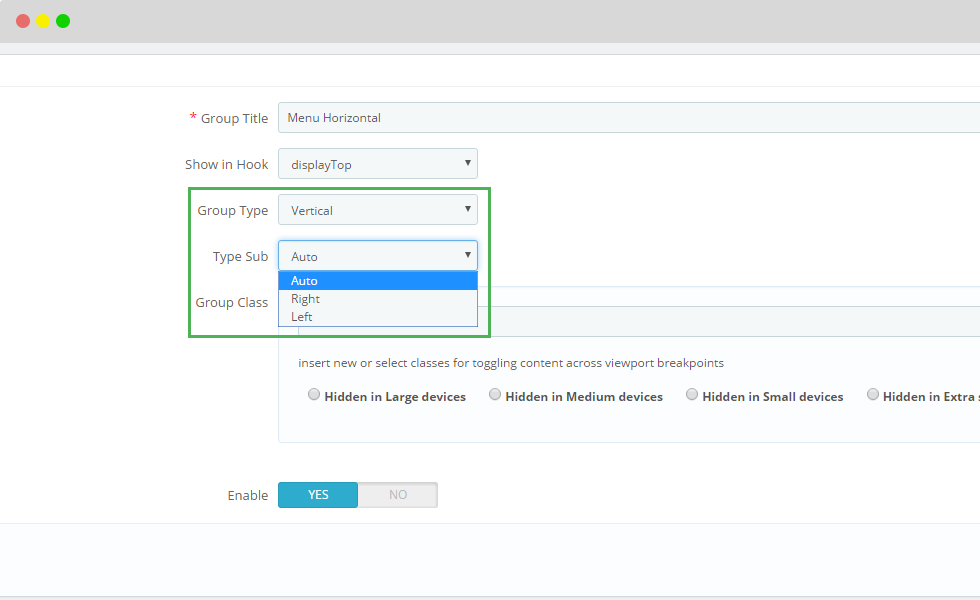
- If customer choose Group Type is "Vertical"
We can choose type sub: right, left or auto
Example in Front:
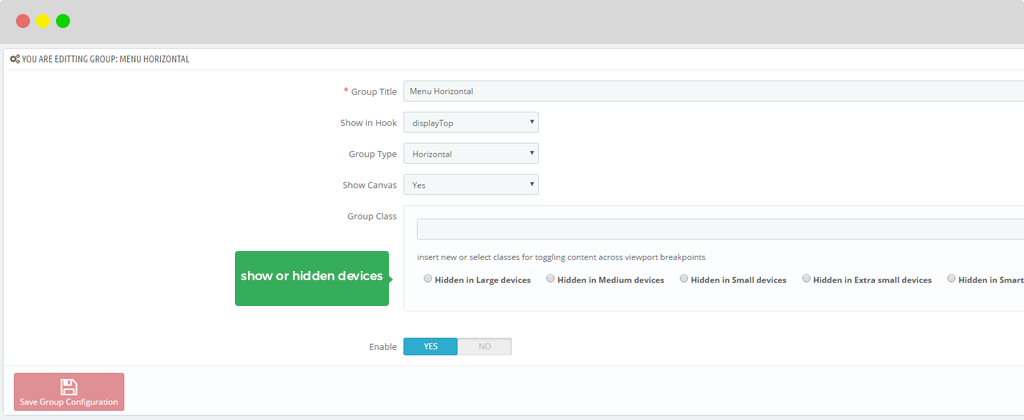
- Group class: This field let user add more class to configure style of group menu.
We also create a checkbox with different choices to HIDE in different devices (in default, the class will be shown in all devices). For example: You only choose show in Desktop and Mobile, you will Hide in tablet so choose option "Hidden in Medium devices"
- Enable: When you complete information, this button is neccessary to decide Display or Not for the new group which you edit from above.
Please remember"Save group configuration" button to save data.
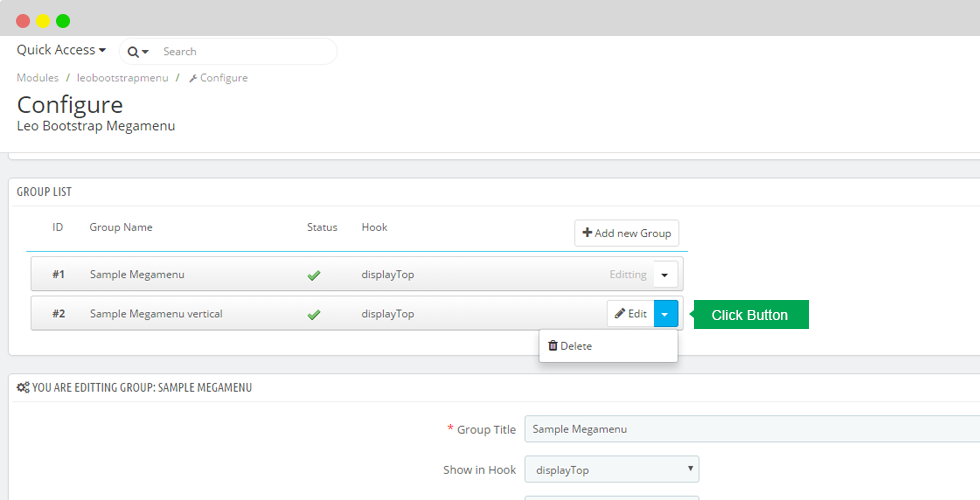
B. Edit Group Megamenu

C. To change postion of Group Megamenu
User can easily drag and drop with mouse to change the position based on your ideal.
D. Delete Group Menu
2. Create Menu Item
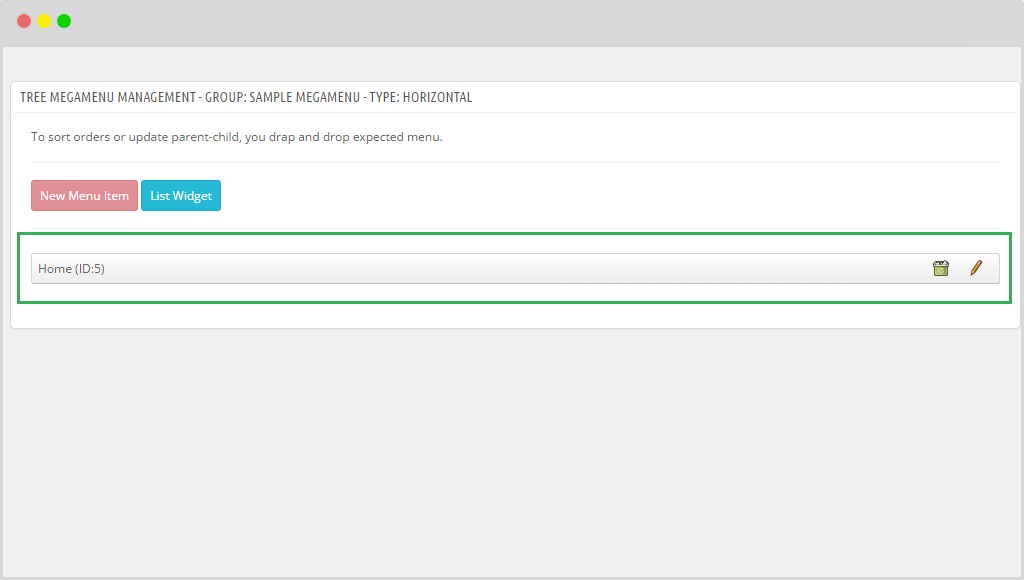
You click button "New Menu Item" to start.
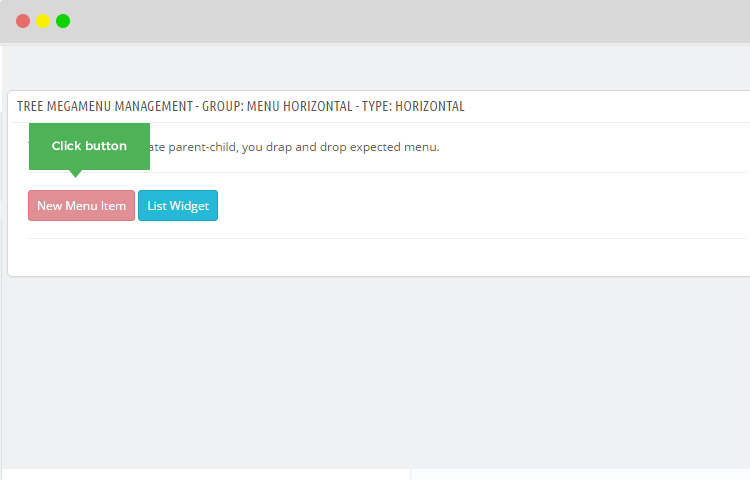
After that, The table of information on the left screen.
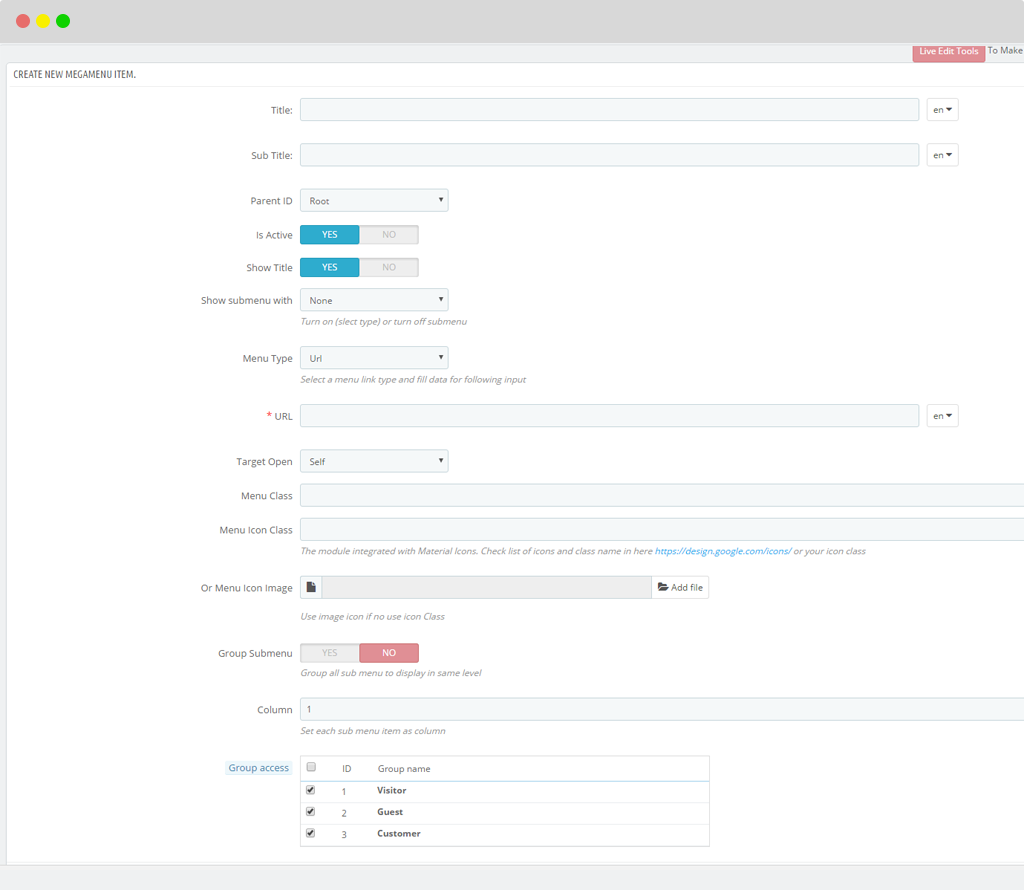
- Title:To display Name of Menu.
- Sub Title: To display name as a desciption for title.
- Parent ID: To choose level.
- Is Active: The status of Menu Items.
- Show title: To display title
- Show Submenu With: To display following and show menu widget
+ Case 1: Show submenu with: "None". This is default situation, If you do not choose any option, Our module will choose is "None" as default. Thus there is no submenu in frontend.
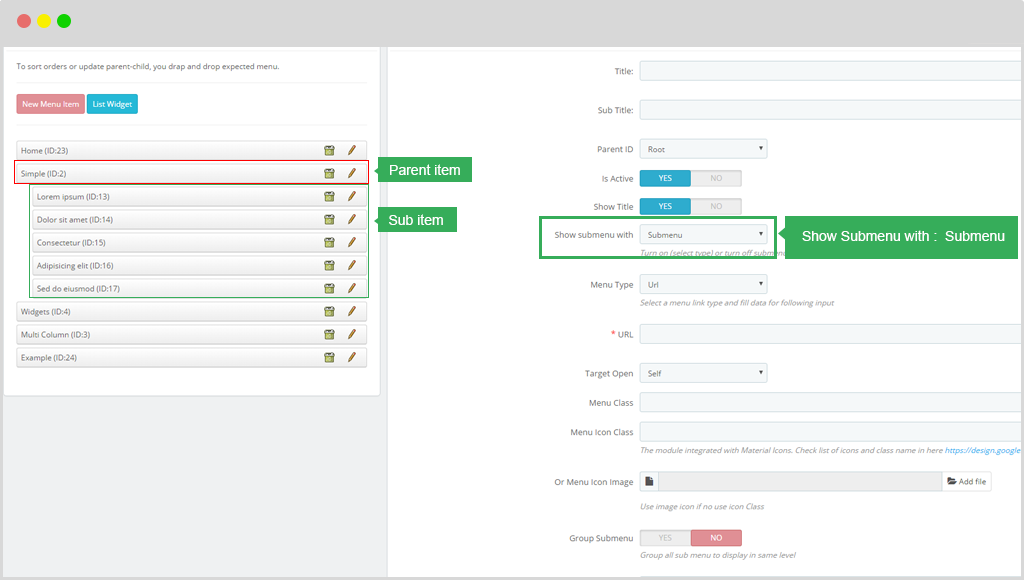
+ Case 2: Show submenu with: "Submenu", Display menu and submenu in frontend.
How to create submenu: We need to create a menu item section, after that user drag the item to the list contains submenu.
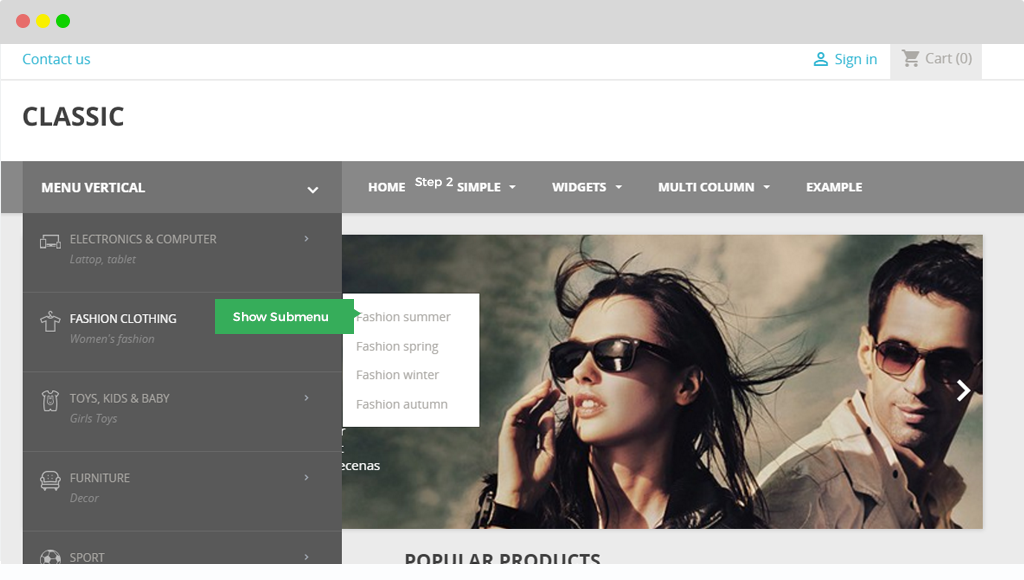
"Submenu" displayed in Frontend.
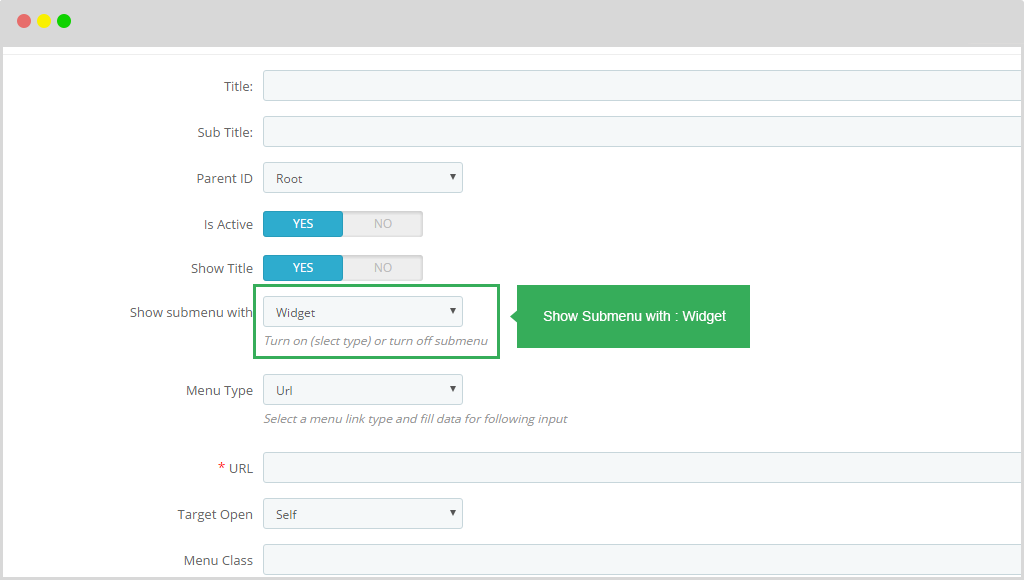
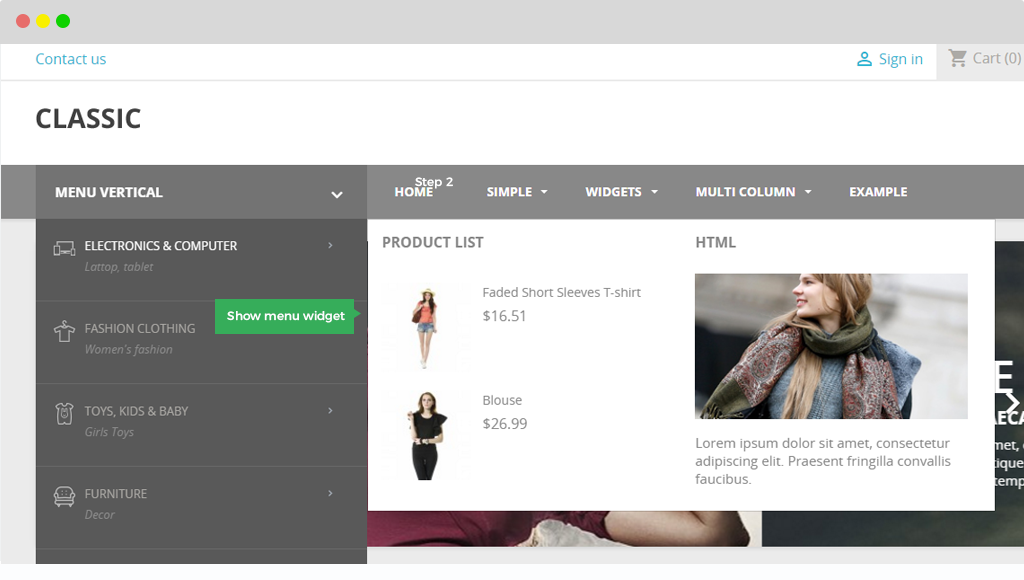
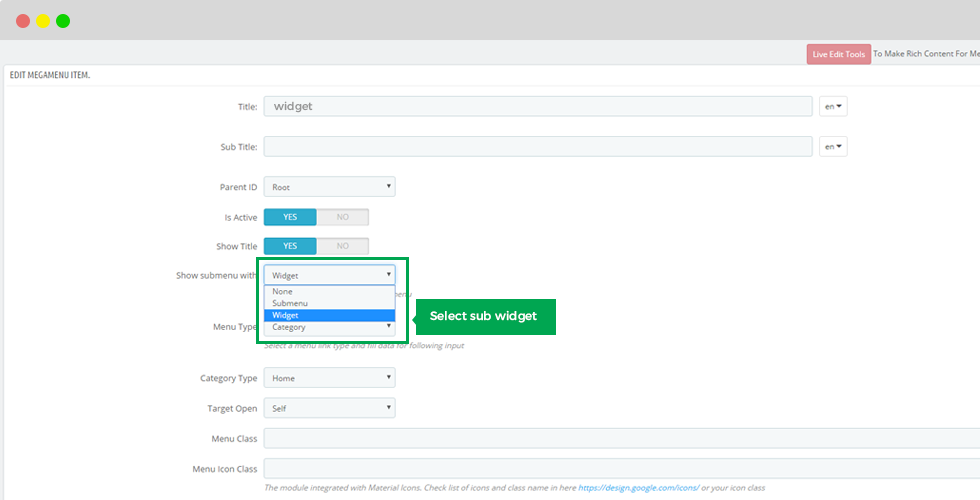
+ Case 3: Show submenu with: Widget.
Display follow "Widget" style: It means that our module will get data follow widgets.
Display in front end.
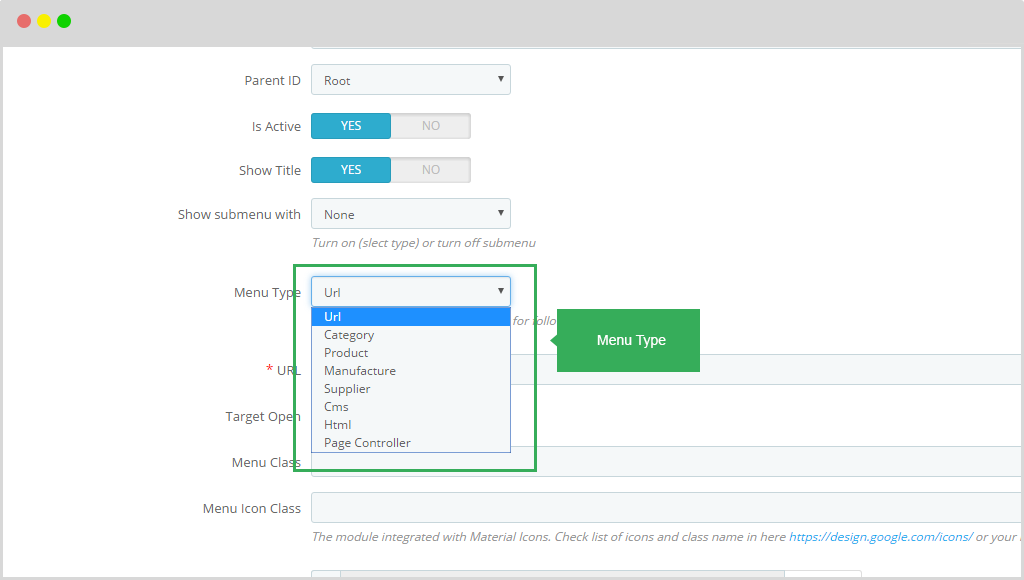
- Menu Type: Select a menu link type and fill data for following input.
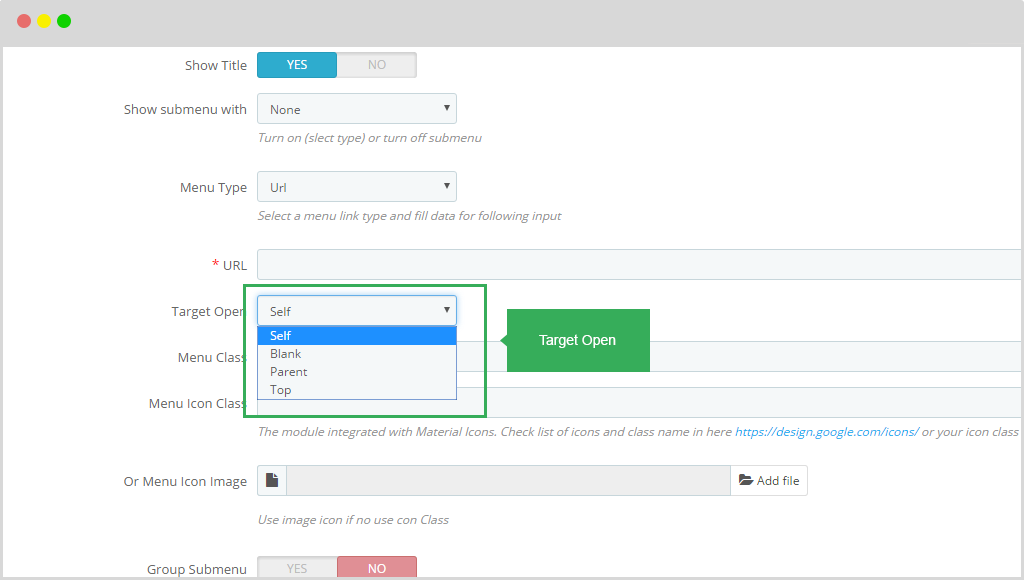
- Target Open: User can choose display links into new tab.
- Menu Class: This function let user add more class to display differernt styles.
- Menu Icon Images:To display icon, you should to click button to upload images.
After you click in this button" Add images" , in your screen will have a table show the path location file images.
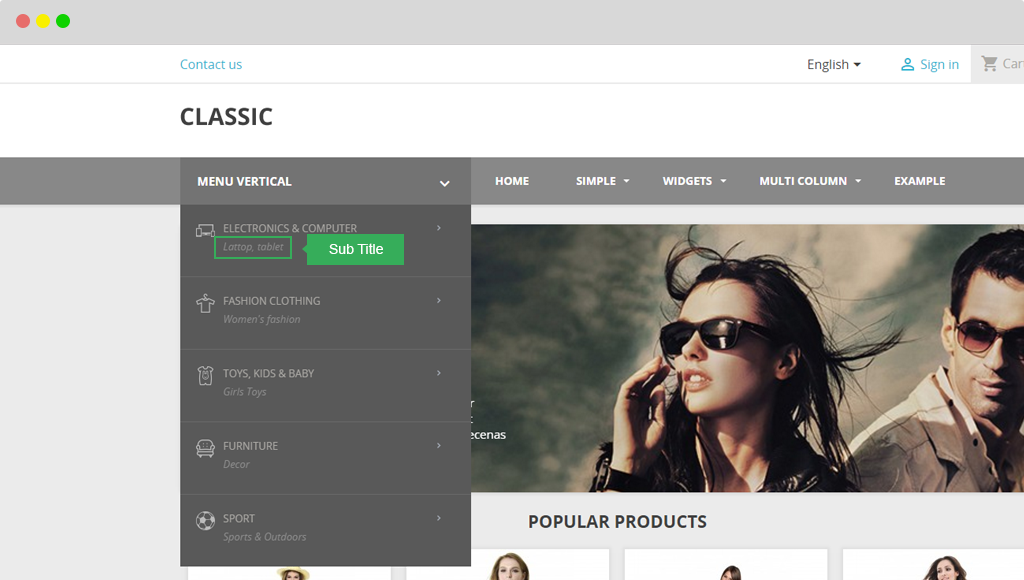
- Below is our image for example about sub title , menu icon image in frontend.
- Group Submenu:To Turn ON or OFF, to display sub menu. If you want to show sub menu, you choose Yes when you however it will be always displayed.
- Column: Set each sub menu item as column. For example: If you choose the number of columns = 2 as our image.
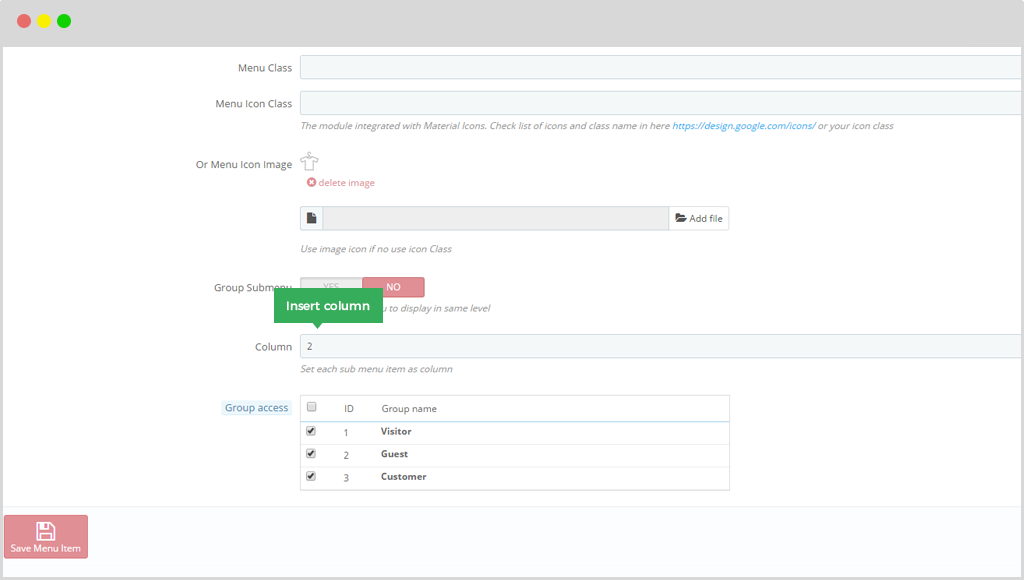
In front ebd will be displayed 2 columns as you want.
- Group Access: Let user know about Visitor, Guest, Customer
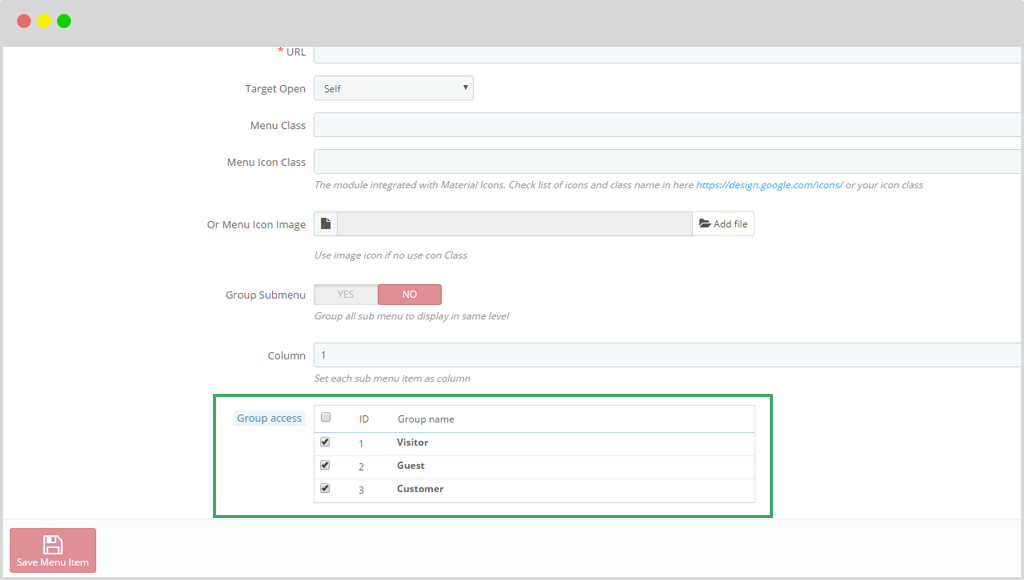
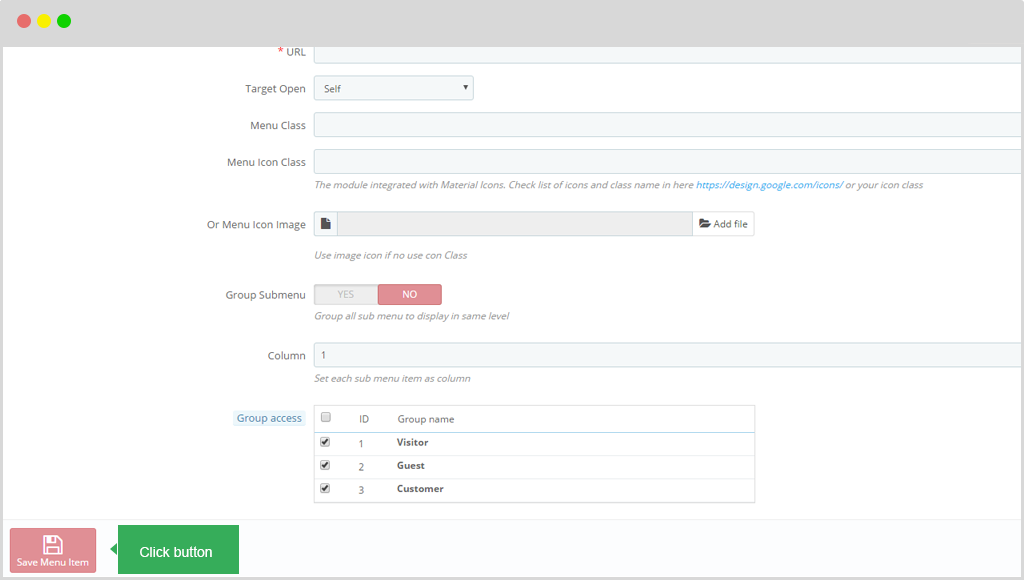
After you complete the information remember click button "Save Menu Item" to save data.
Display in Back Office.
3. Delete, Edit, Duplicate Menu Item
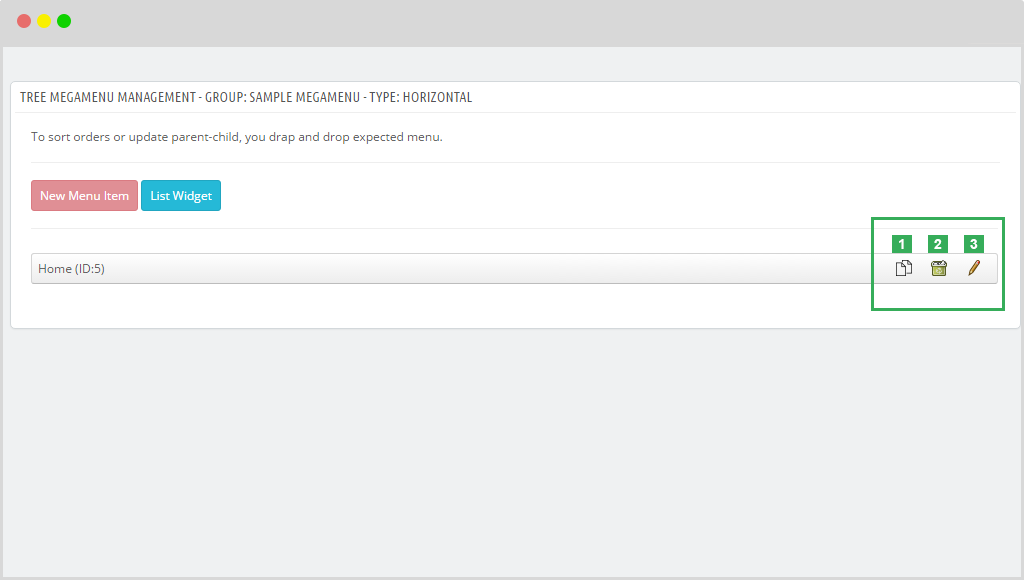
1. Duplicate:
2. Delete:
3. Edit:
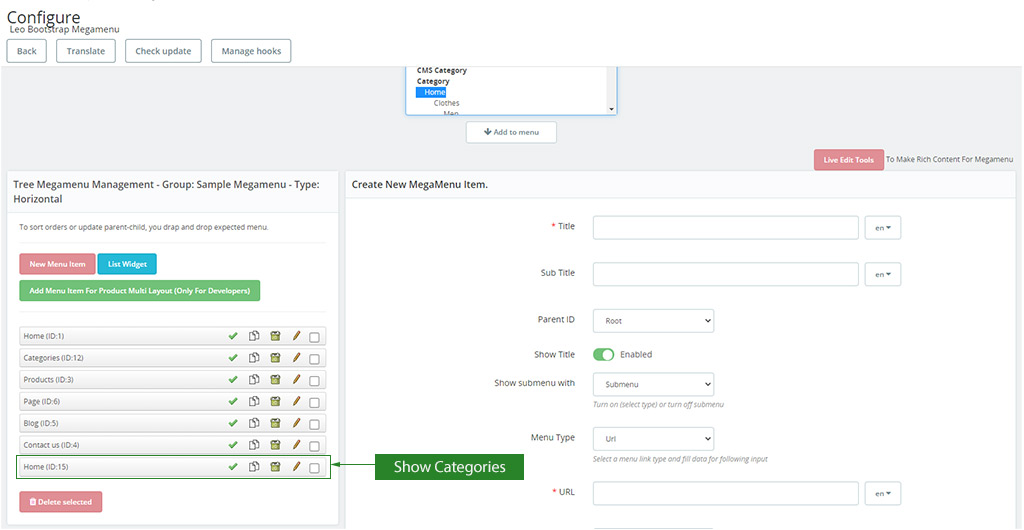
3. Create Show Categories
Please select Categories then click the button "Add to menu"
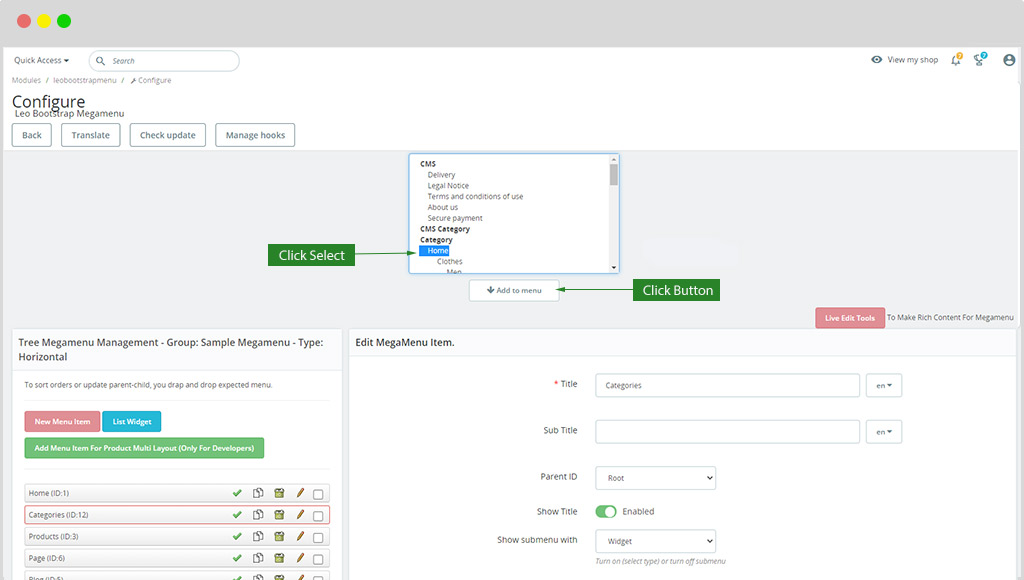
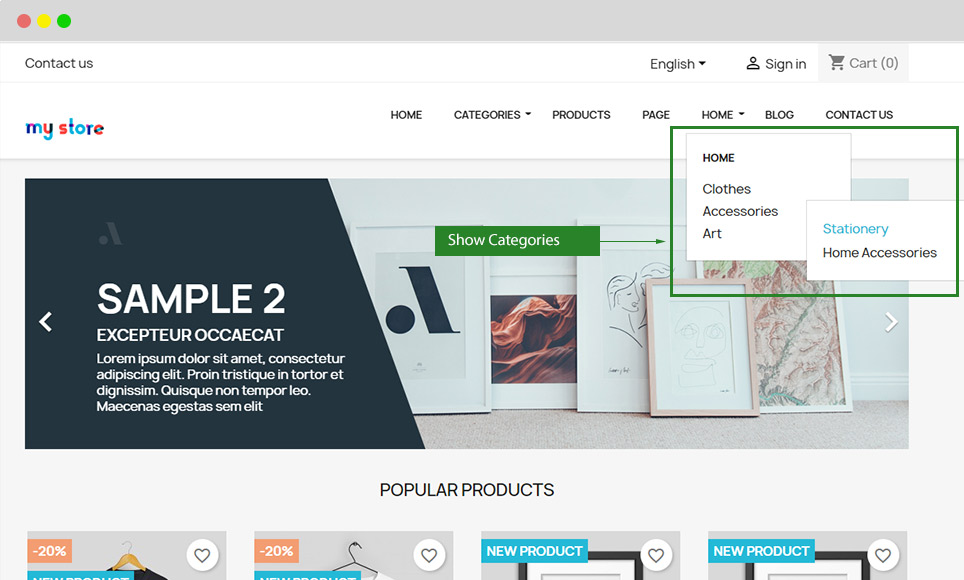
After that, the Categories you choose will be shown here
Display in front end.
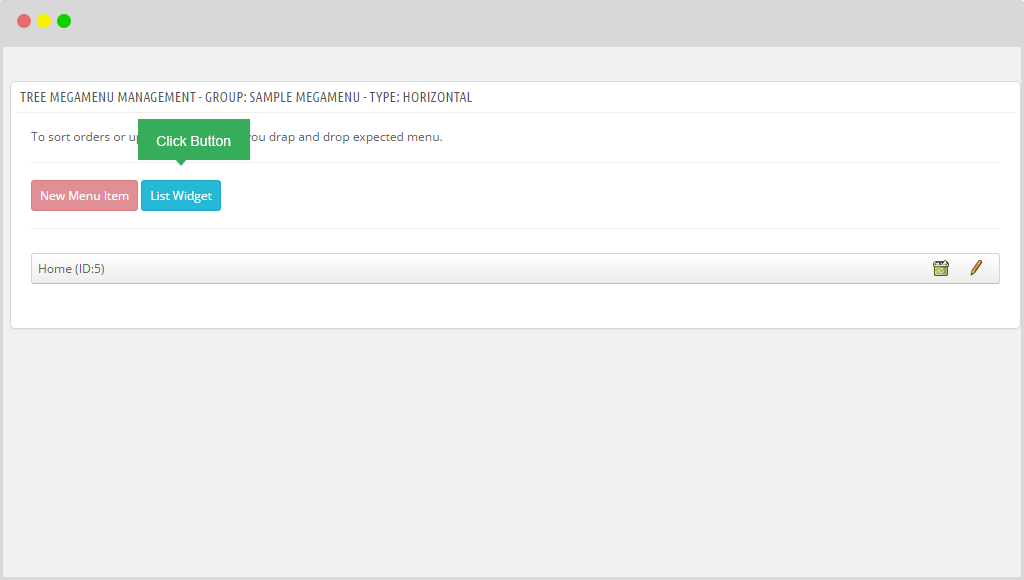
II. Creat List widget
To create widget for your menu, please click button "List Widget".
After that, user choose button "+" to add new widget.
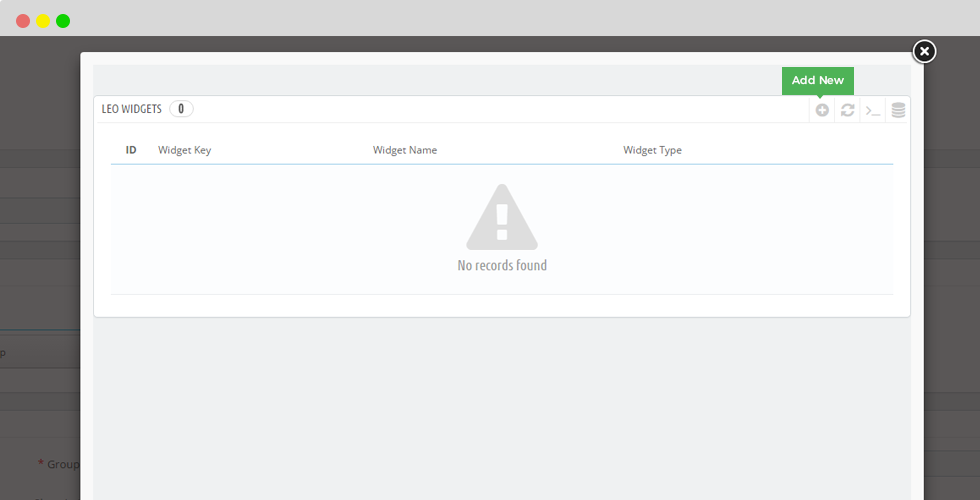
Following up, a table with list of Widget will be shown.

Module Leo Megamenu has widgets below:
- - Alert: Create a Alert Message Box Based on Bootstrap 4 typo
- - Images of categories: Chosing images for categories
- - Facebook: Facebook Like Box
- - HTML: Create HTML With multiple Language
- - Images Gallery Folder: Create Images Mini Gallery From Folder
- - Block Links : Create List Block Links
- - Manufacture Logos: Manufacture Logo
- - Product List: Create Products List
- - Raw HTML: Put Raw HTML Code
- - Sub Categories In Parent: Show List Of Categories Links Of Parent
- - HML Tab: Create HTML Tab
- - Twitter Widget: Get Latest Twitter TimeLife
- - Video Code: Make Video widget via putting Youtube Code, Vimeo Code
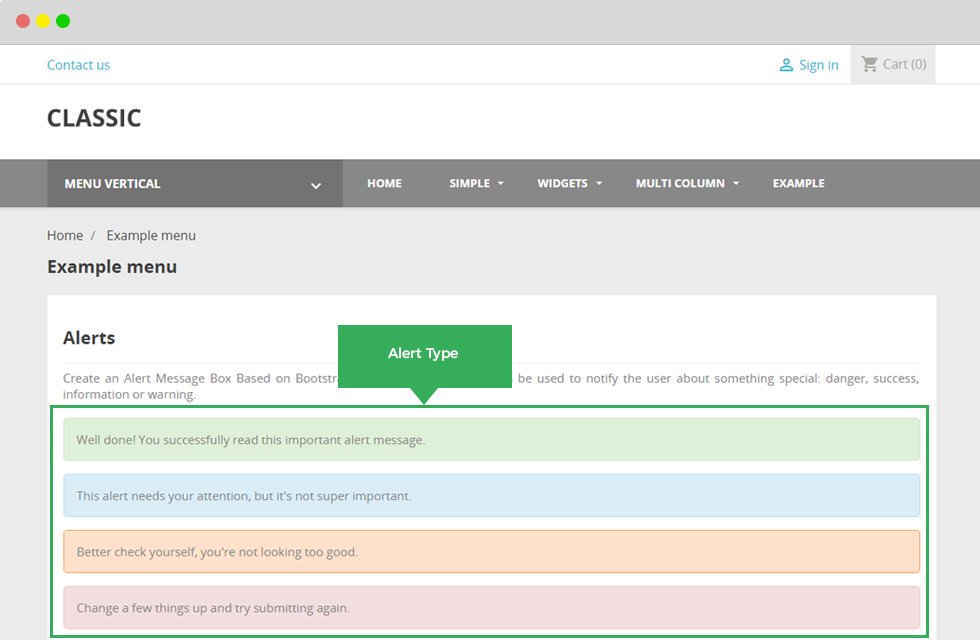
1 .Alert
Create a Alert Message Box Based on Bootstrap 4 typo.
1.1 Widget Info
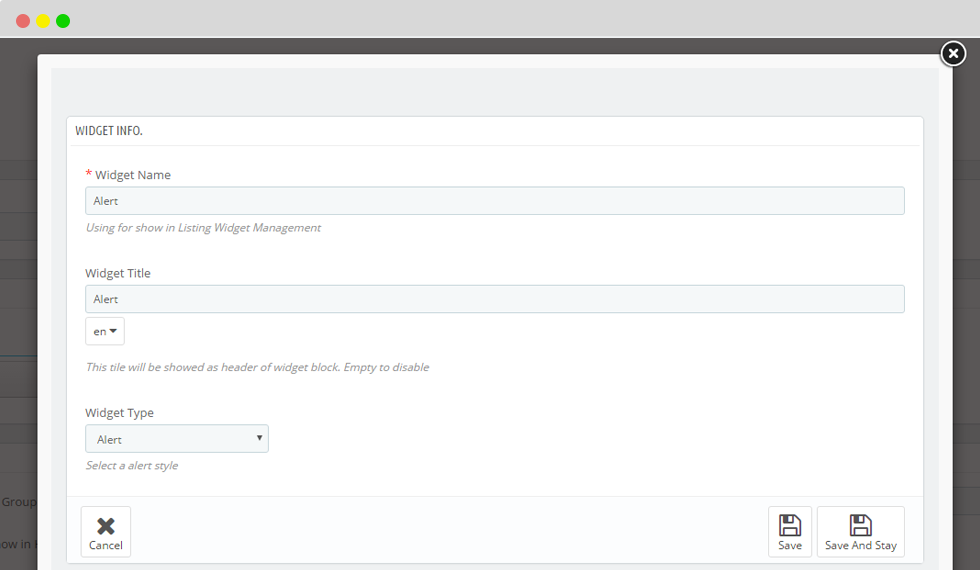
Widget Name: Using for show in Listing Widget Management.(Truong bat buoc dien thong tin)
Widget Title:This tile will be showed as header of widget block. Empty to disable.
Widget Type: Select style of alert.
1.2 Widget form
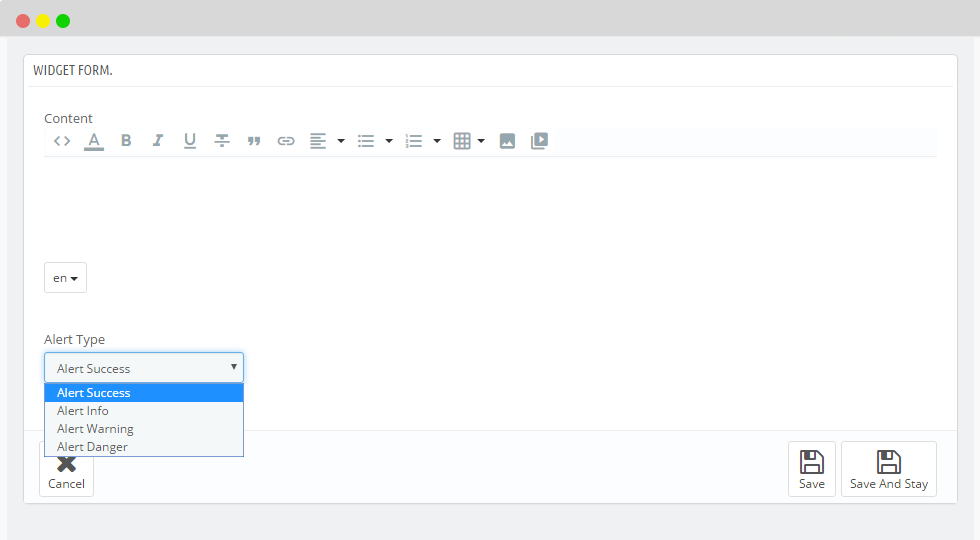
- Alert Type: Select with four styles: alert success, alert info, alert waring, alert danger.
When you finish, please save the data to display in front end.
- Show Front end Alert.
2.Images Of Categories
Chosing images for categories.
2.1 Widget Info:
To complete information for widget.2.2 Widget form
- Categories: Chosing for categories. User should check box into categories which you choose.
To upload Icon for Category, you should create and upload image into folder.
themes/[your_current_themename]/modules/leobootstrapmenu/img/icontab/
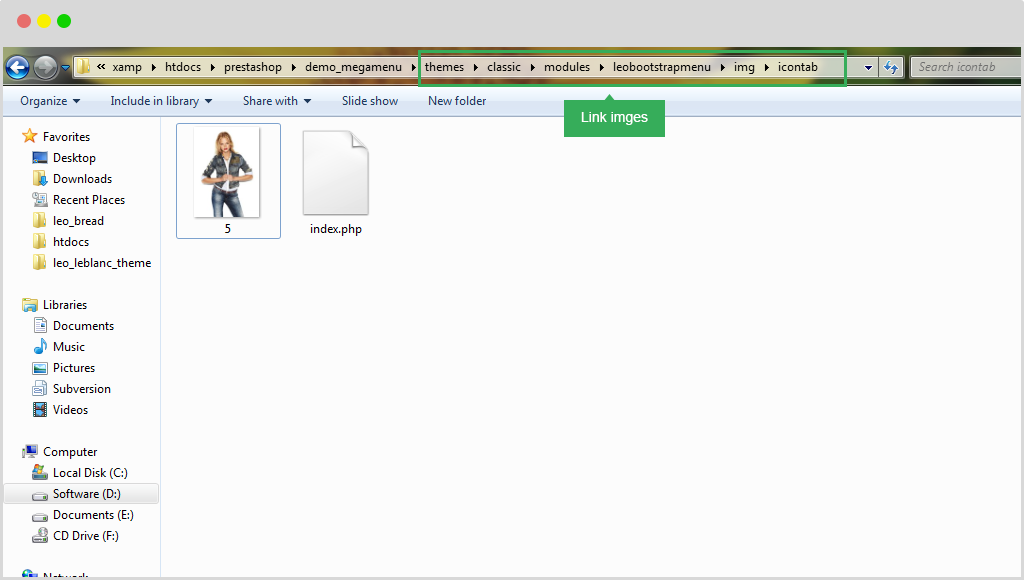
After that you access into backend to choose image which you added in folder.
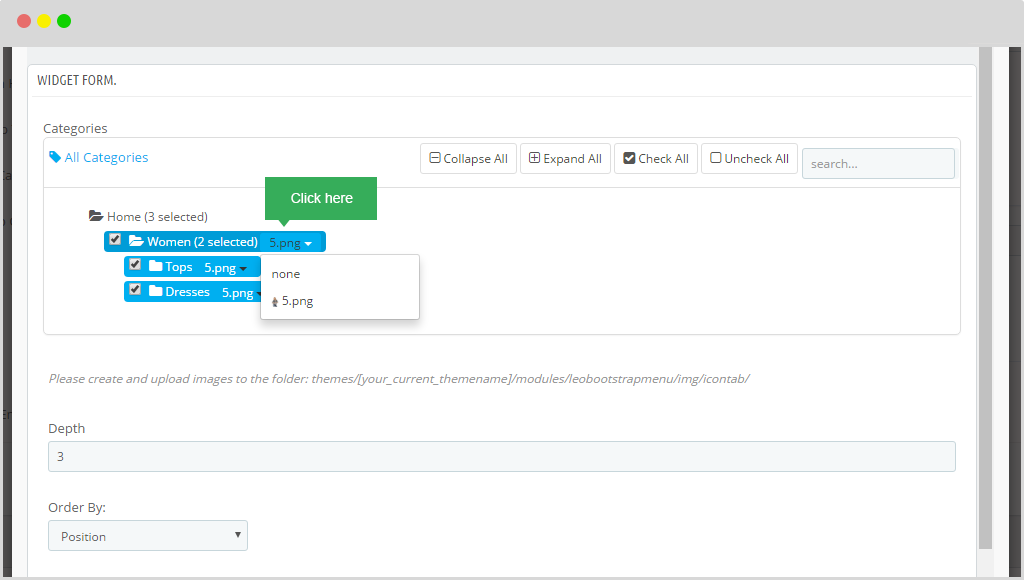
- Depth: The data will be shown by lever.
- Order By The data will be shown based on 3 types: Name, Position and Depth.
- Show icon: To display icon of category.
- Limit: The maximum of Images Category which you want to display.
When you finish edit information, please remember save the data.
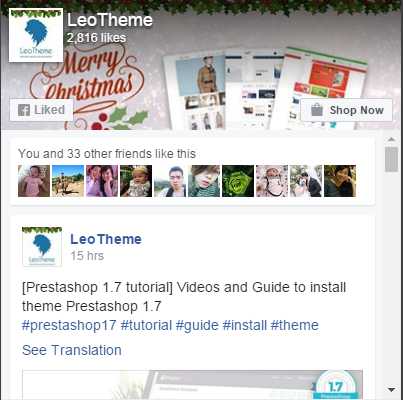
3. Facebook
This widget create Facebook like Box. User can add Facebook as a channel of information on their site. Their customer easily click to update news and posts.
3.1 Widget Info:
To complete information for widget.3.2 Facebook widget form
- Page URL: Put the link of your page.
- Tabs Display: To display border.
+ Timeline: To display color.
+ Event: To display the width of your box.
+ Message: To display the height of your box.
- Height: Height of Facebook box.
- Width: Width of Facebook Box
- Show Faces
- Hide Cover
- Small Header
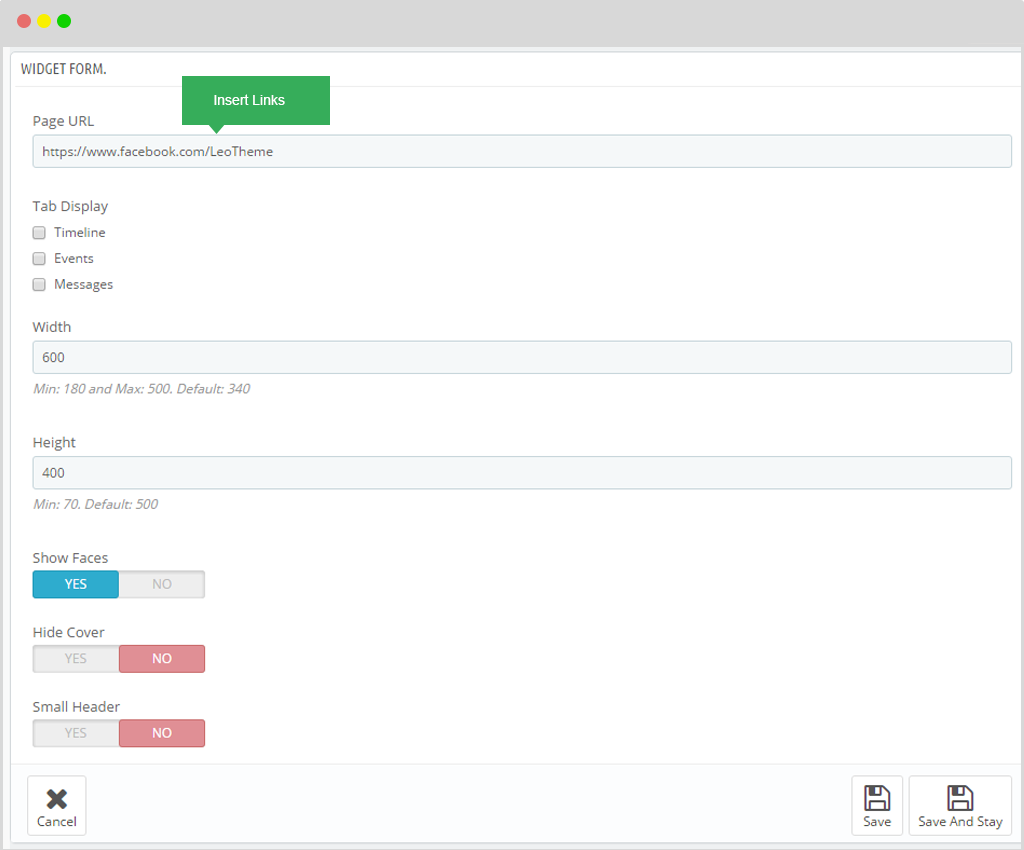
When you finish edit information, please remember save the data.
Show FO
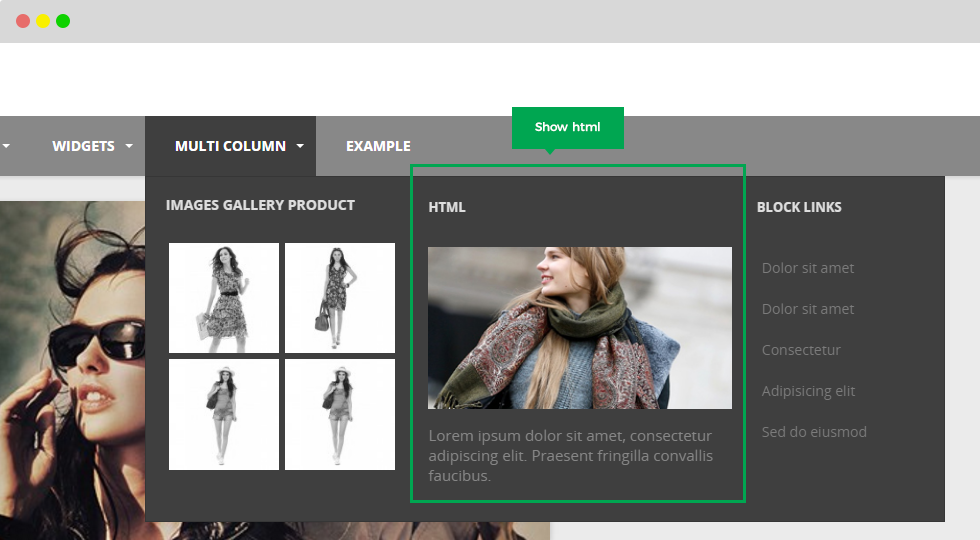
4. Html
4.1 Widget Info:
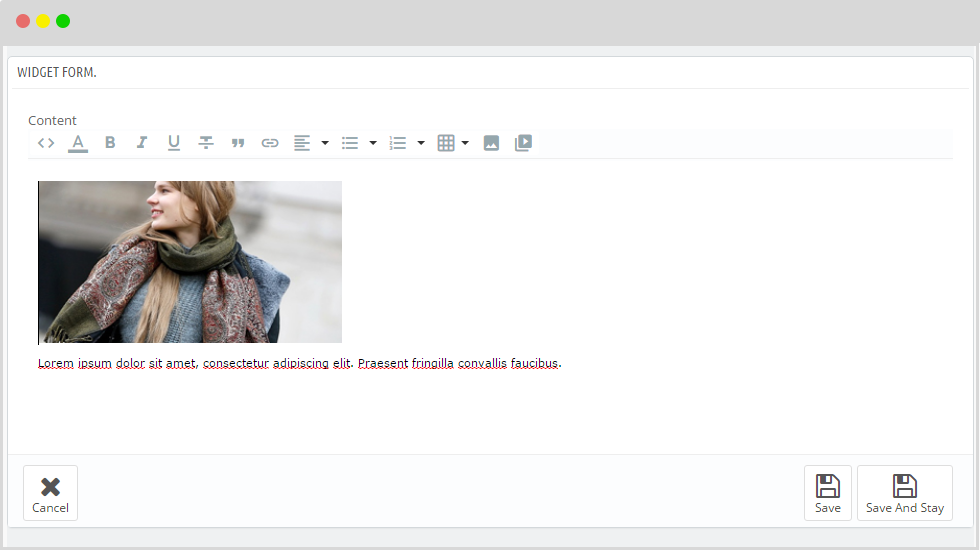
To fill data for widget4.2 Widget form
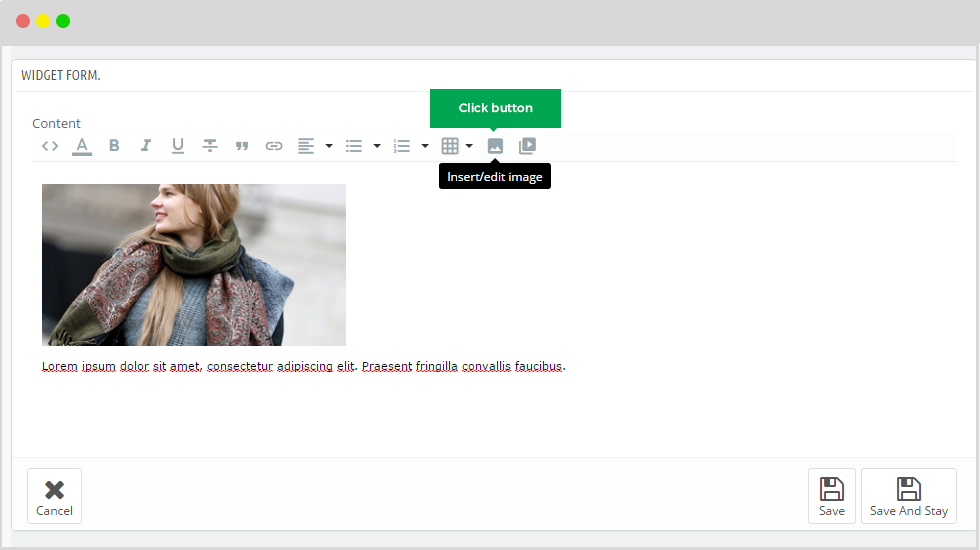
This widget permitted to insert images and descriptions.
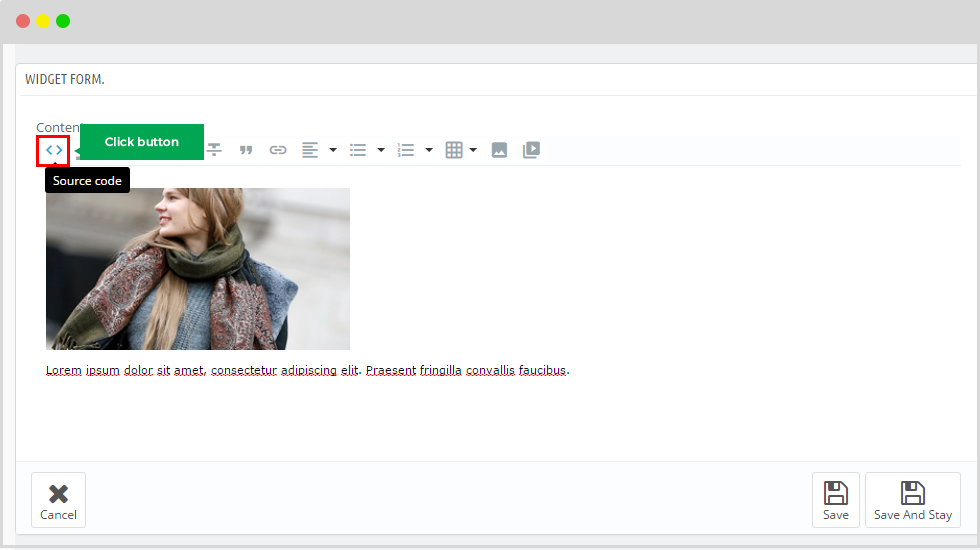
To insert images into widget html, user have 2 ways to configure:
Option 1: Insert source code
- Step 1: You click button "source code".
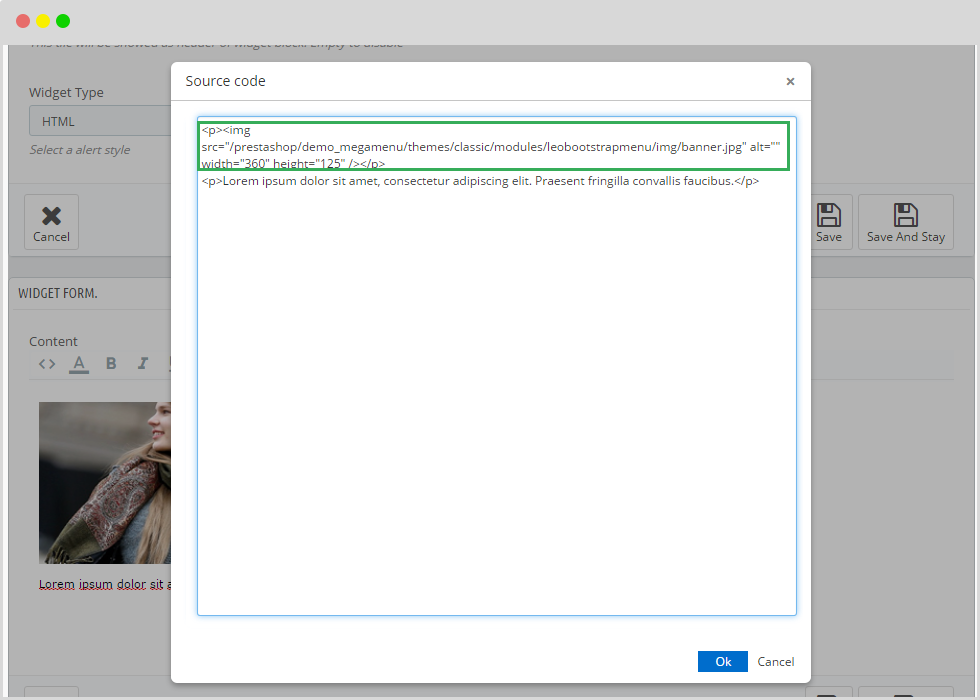
After that, There is a table and you will insert link Path Photo as: theme/yourfoldertheme/moudel/leoboostrapmenu/img/yourimages
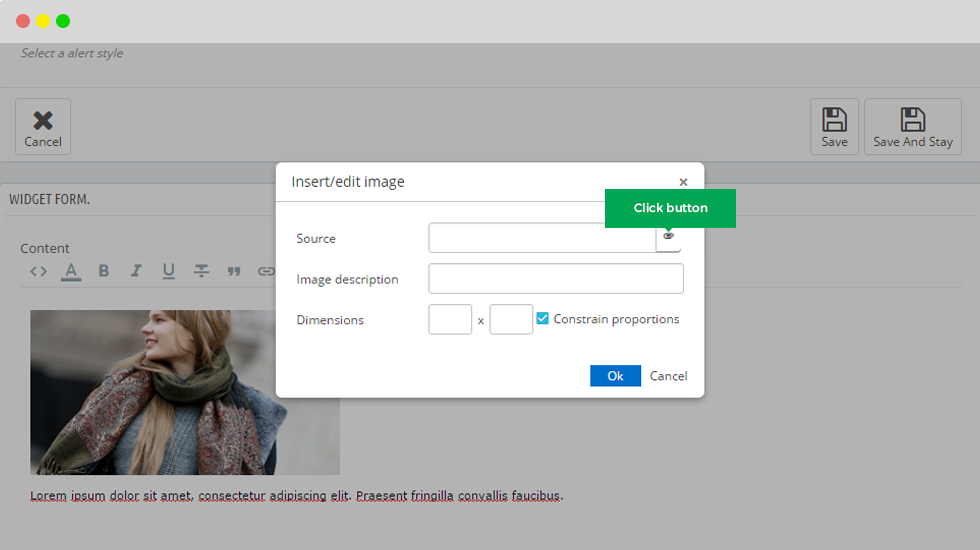
- Step 2: Insert images
You can see the image below. It permitted user to insert any images.
After that you click into button:
Click into button upload to insert images, after that you click into image.
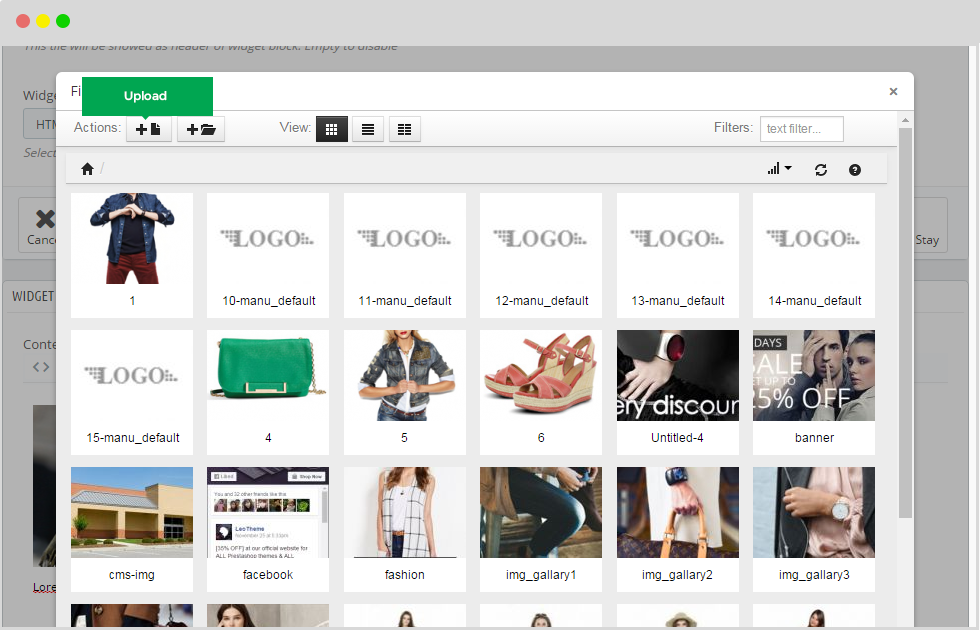
At that time, the screen will display the path table which contained images. You just need to click button "Ok".
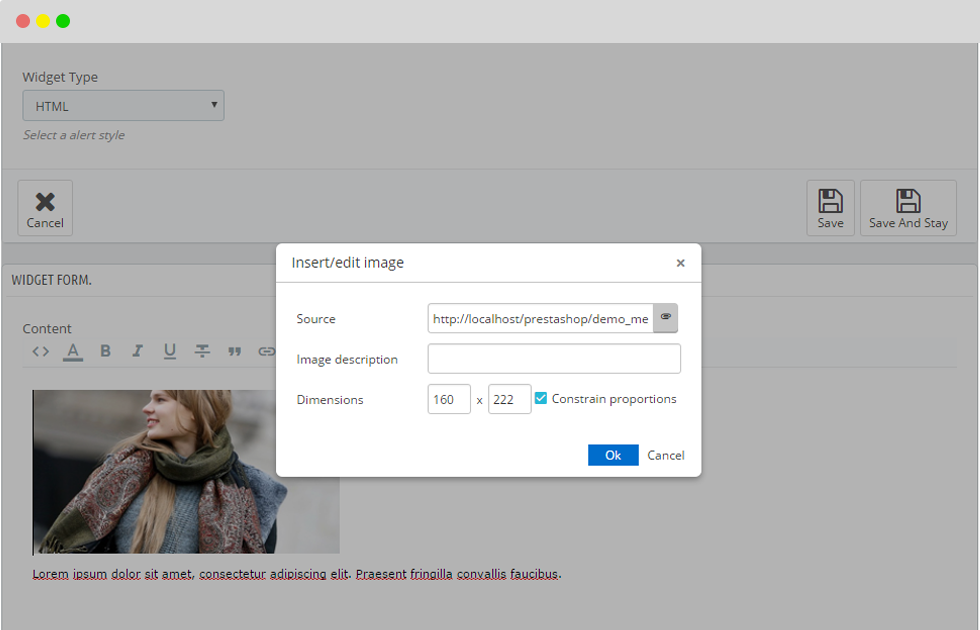
Please remember "Save" button.
Show Front end
5. Images Gallery Folder
Create Images Mini Gallery From Folder
5.1 Widget Info:
To fill information for widget5.2 Widget form
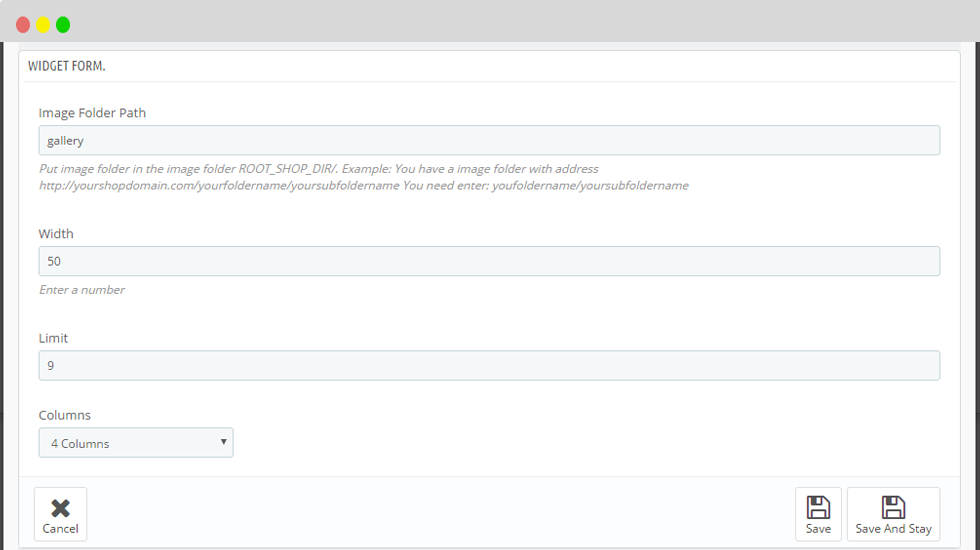
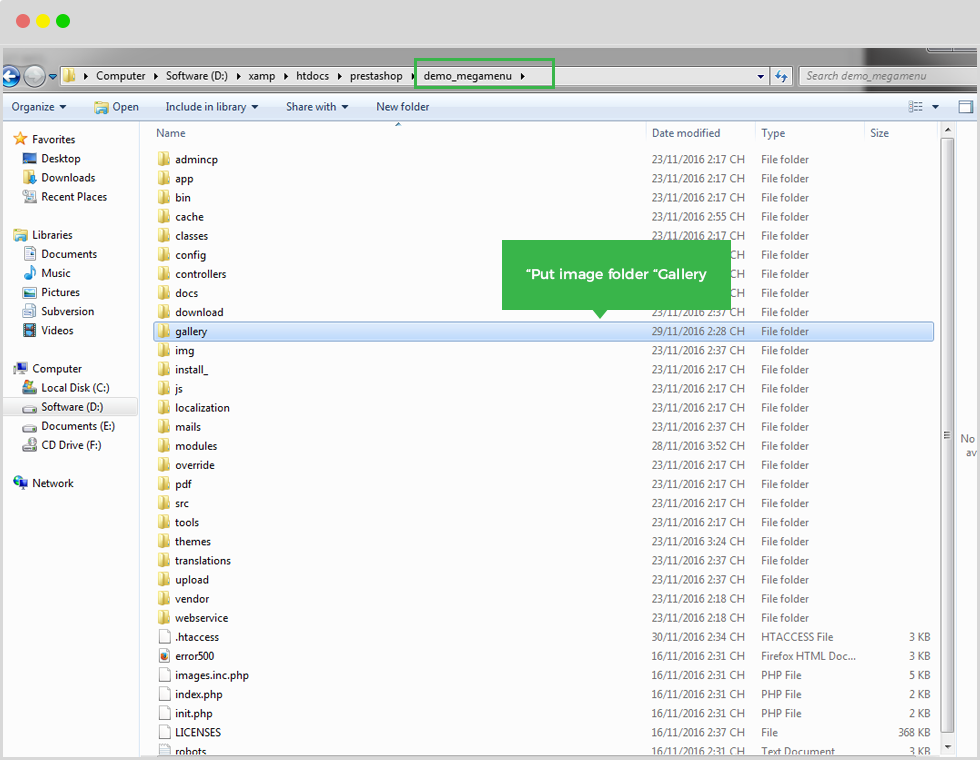
- Image Folder Path: Put image folder in the image folder ROOT_SHOP_DIR/. Example: You have a image folder with address
http://yourshopdomain.com/yourfoldername/yoursubfoldername You need enter: youfoldername/yoursubfoldername
- WidthThe distance for Images Gallery Folder
- Limit Limitations
After that remember "Save" button to keep data.
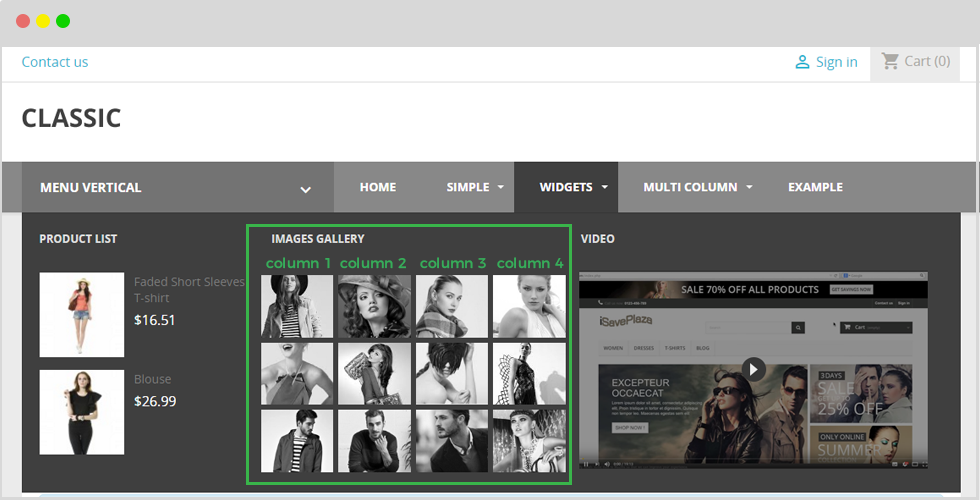
- Column:It will be displayed in fronted follow number of column you configured as image below.
6. Images Gallery Product
Create Images Mini Generalallery From Product
6.1 Widget Info:
To fill information for widget.6.2 Widget form
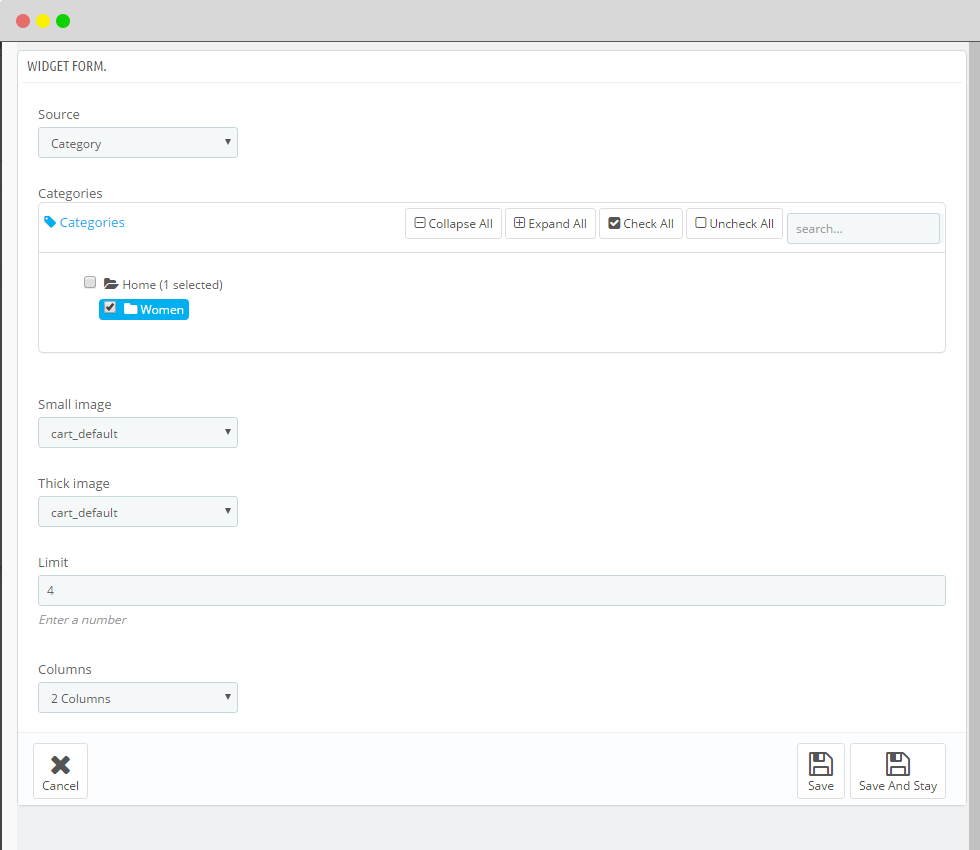
- Small image: Small size of image.
- Thick image: Big size of image.
- Limit: The maximum image.
- Column: The number of column.
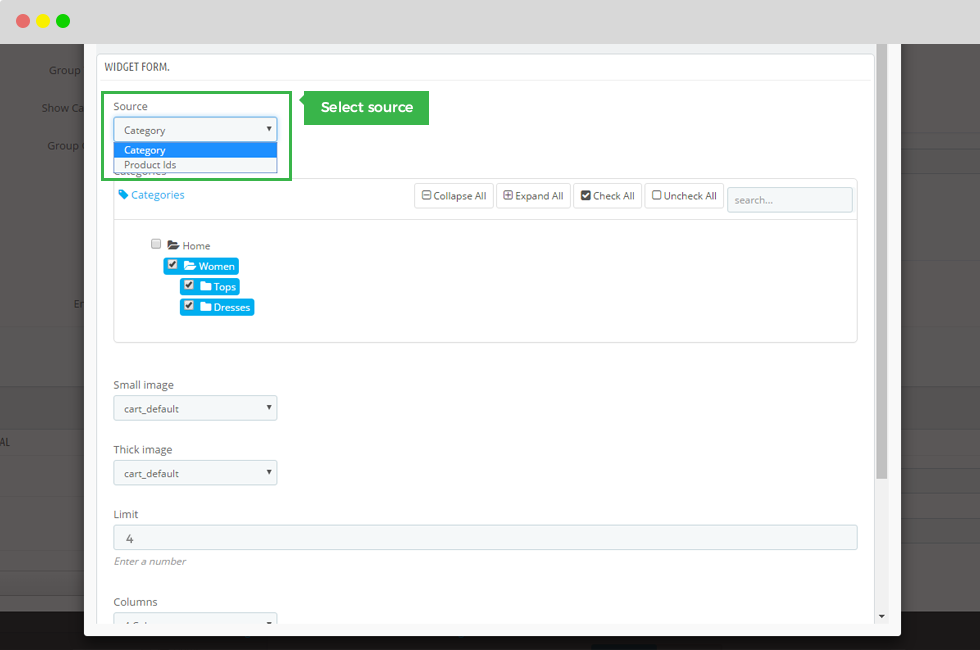
6.2.1 Source: Categories
6.2.2 Source: Product ID
- Product ID: Enter Product Ids with format id1,id2,...
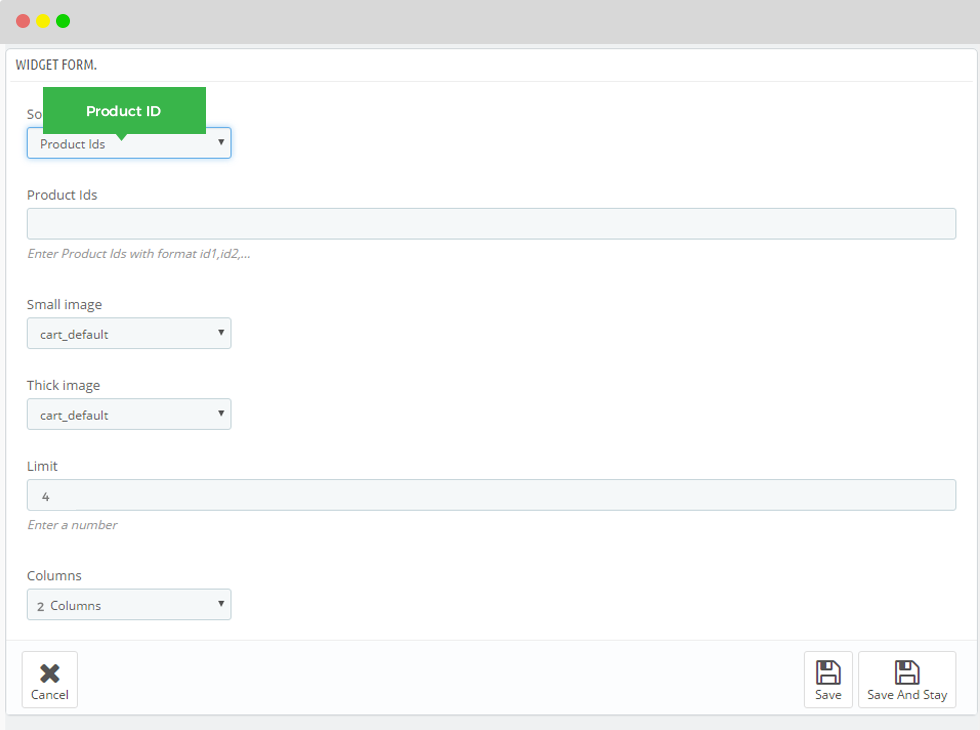
After finishing steps, remember "Save" data.
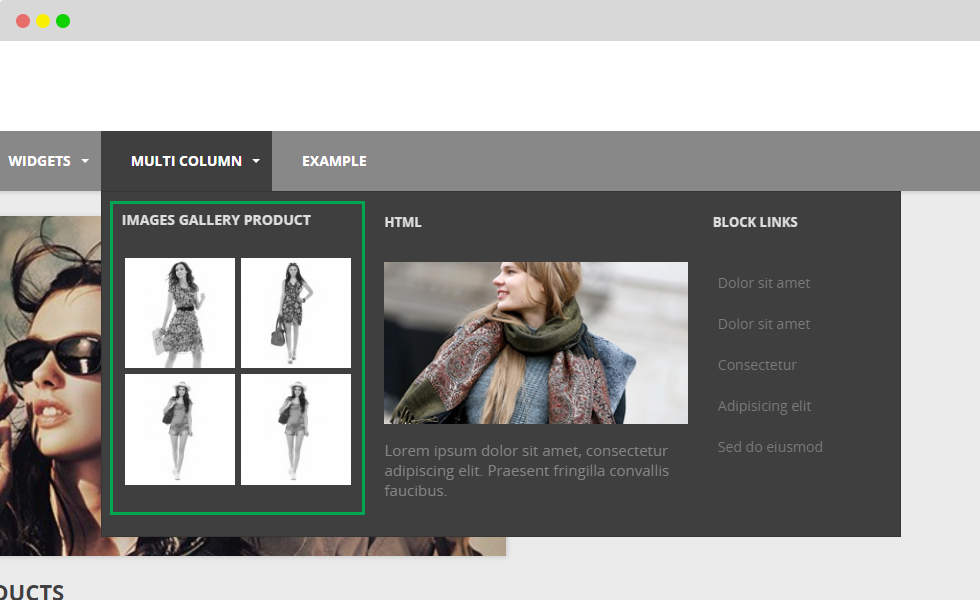
Show FO
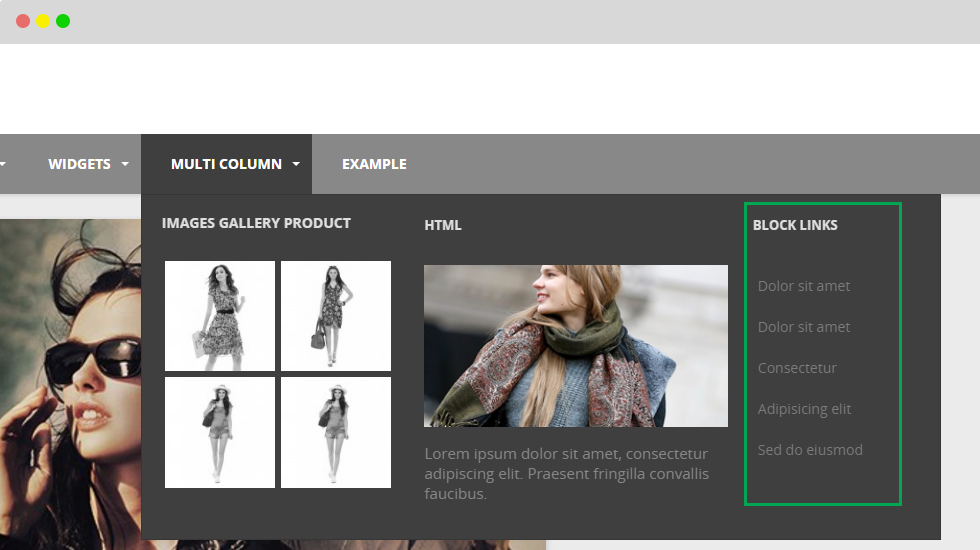
7. Block Links
Create List Block Links
7.1 Widget Info:
To fill information for widget.7.2 Widget form
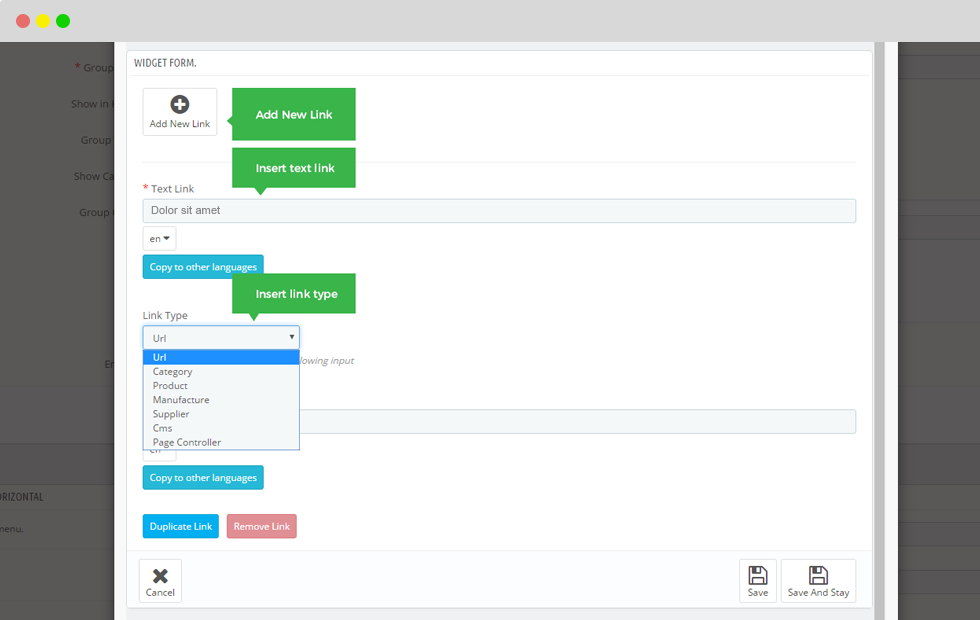
- Text Link: Pathname.
- Copy to other languages: This button is used to copy into other languages.
- Link Type: Choose the path to the different page.
- Duplicate Link: Copy to extra link
Please remember "Save" when you finish.
Show FO
8. Manufacture
This widget lets user add images logo in order to show brand identity.
They are manufacturers of commodities which sold on page or business partner.
8.1 Widget Info:
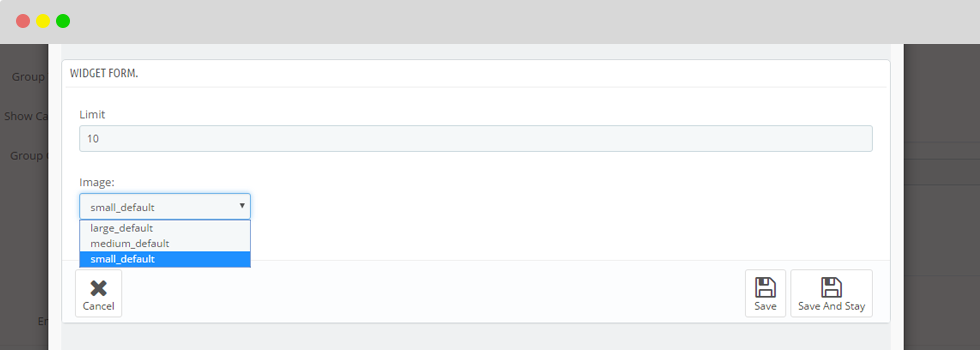
To fill information for widget8.2 Widget form
- Limit: Maximum images manufacture/
- Image: Select type image for manufacture.
Please remember "Save" when you finish.
9. Product list
Create Products List. Product will be shown in the form of list respectively from top to bottom.
9.1 Widget Info:
To fill information for widget.9.2 Widget form
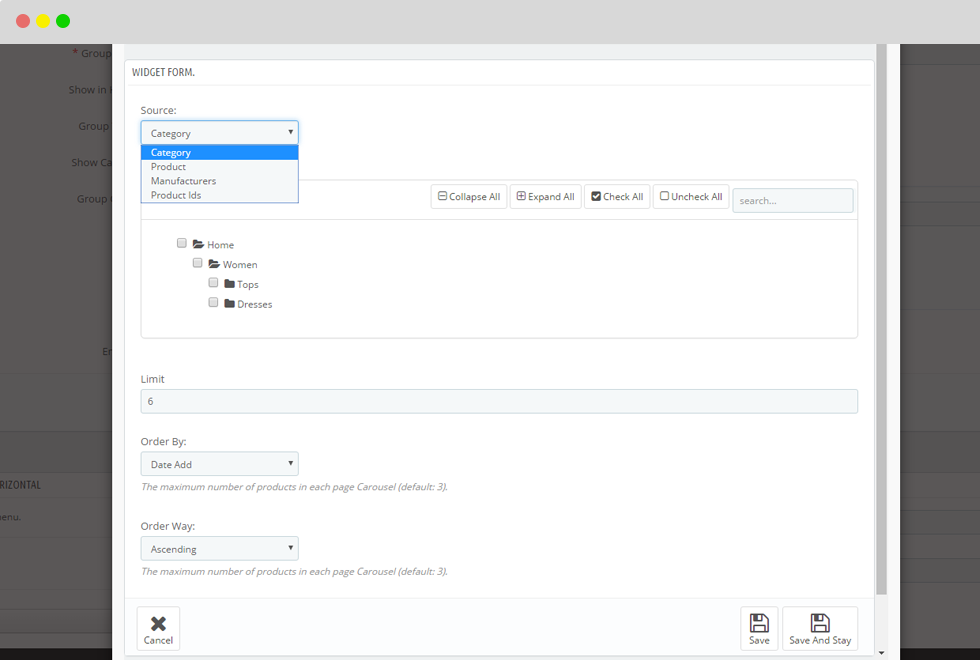
- Source : Categories Get the sources from catalogues.
- Limit: Maximum product.
- Order By: The maximum number of products in each page Carousel (default: 3).
- Order Way: The maximum number of products in each page Carousel (default: 3).
9.2.1 Source: Product
- Products List Type: Select a Product List Type as New Arrivals, Featured Product.
-

9.2.2 Source: Manufacture: Display product for manufacture
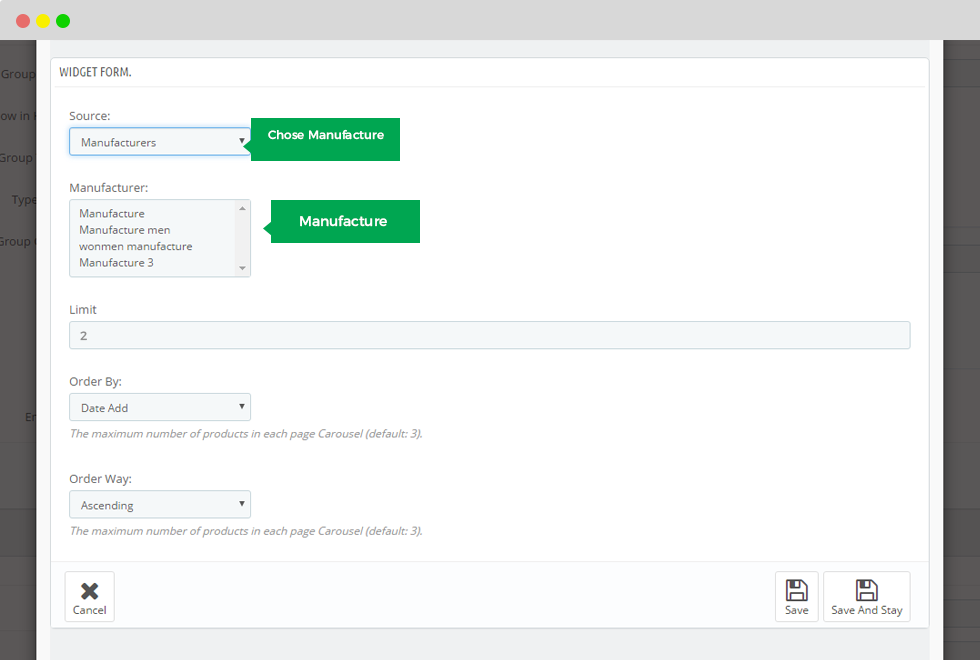
9.2.3 Source: Product id
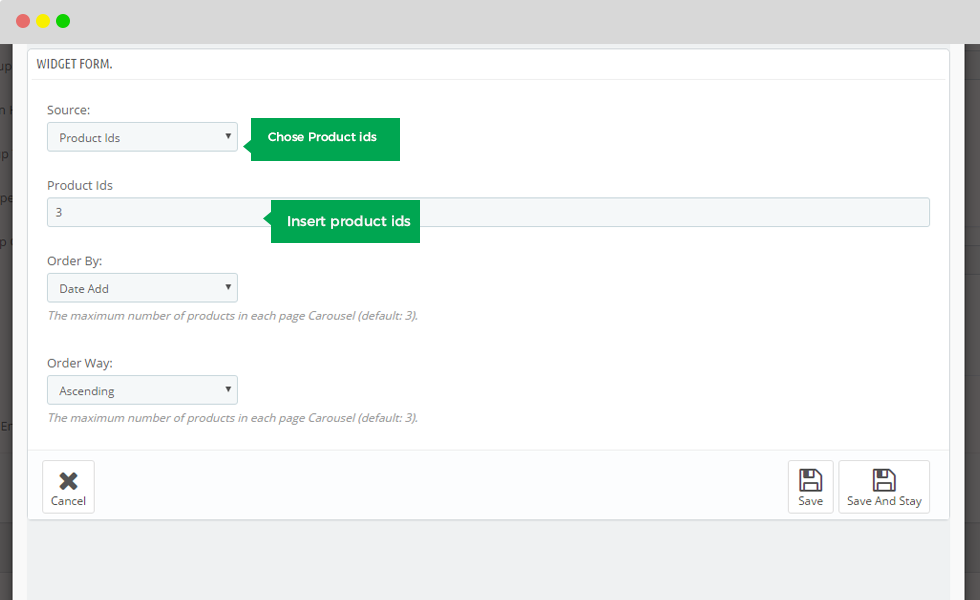
Please remember "Save" when you finish.
Show product list Front end.

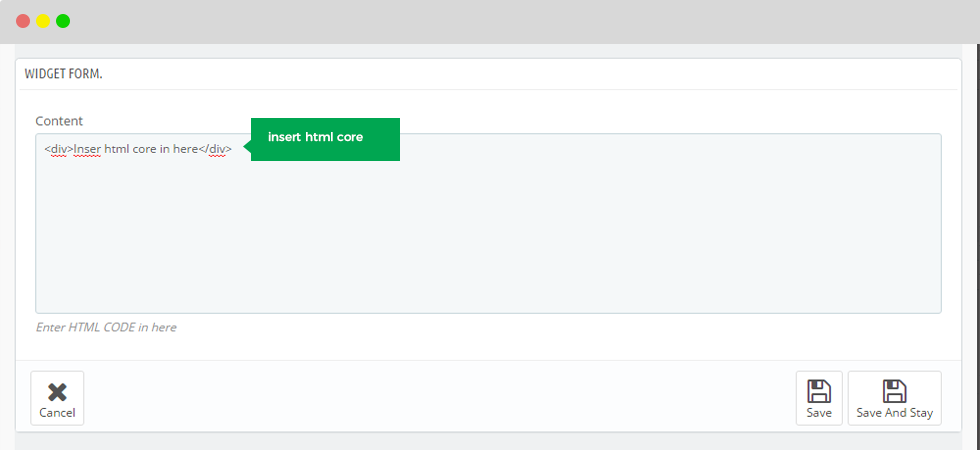
10. Raw Html
10.1 Widget Info:
To fill information for widget.10.2 Widget form
Put Raw HTML Code
Please remember "Save" when you finish.
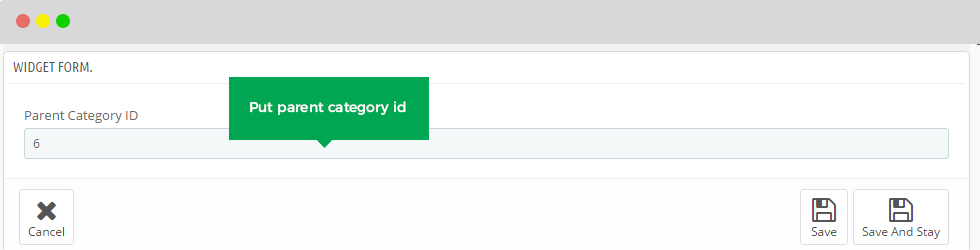
11. Sub categories in Parent
11.1 widget Info:
To fill information for widget.11.2 Widget form
Show List Of Categories Links Of Parent
Please remember "Save" when you finish.
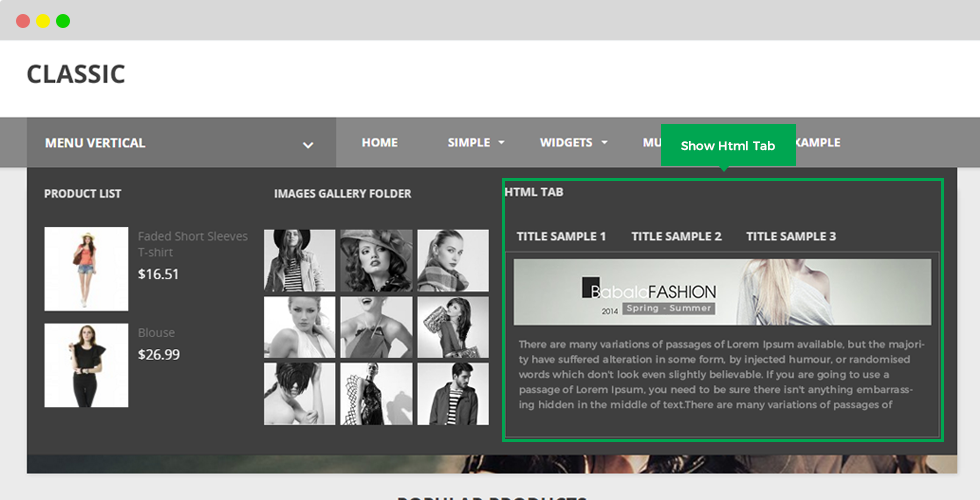
12. html tab
12.1 Widget Info:
To fill information for widget.12.2 Widget form
Create HTML Tab
- Number of html tab: Current quantity of html tabs.
- title tab: Name of tab
- Content tab: Description.
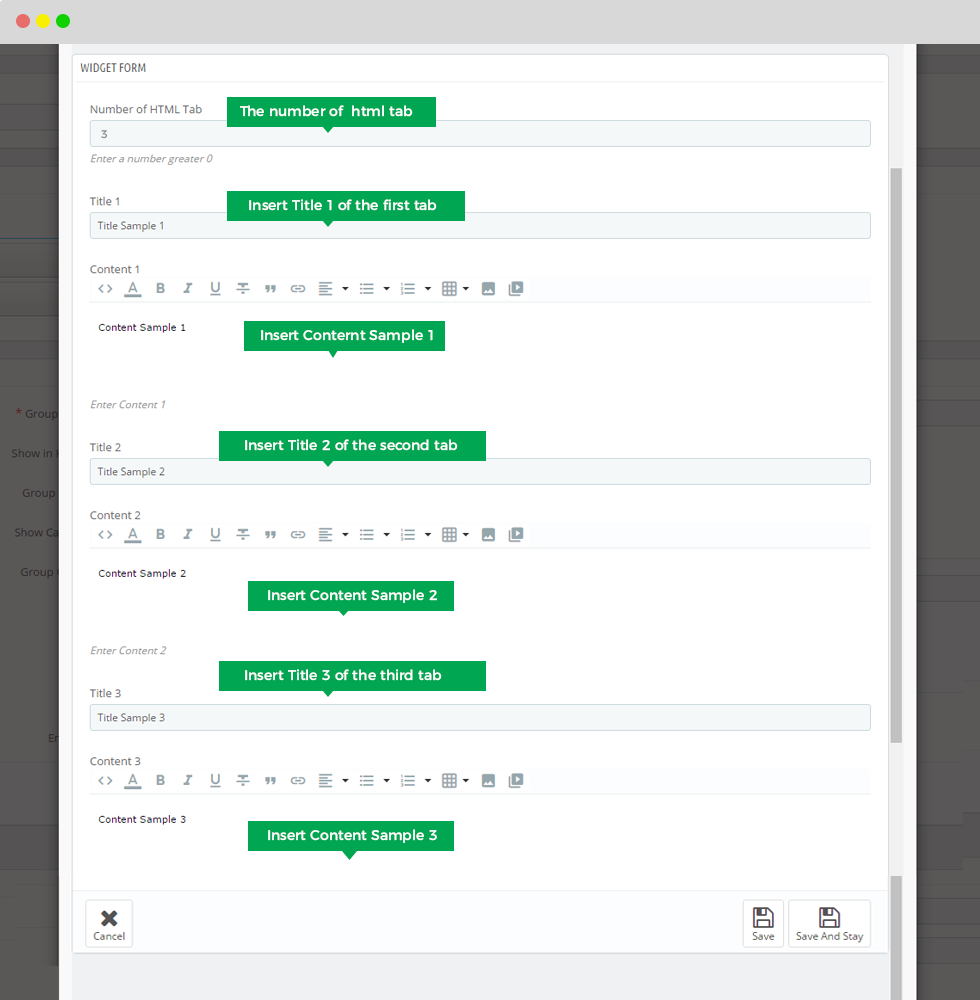
Please remember "Save" when you finish.
Show Front end.
13. Twitter Widget
13.1 Widget Info:
To fill information for widget.13.2 Widget form
Get Latest Twitter TimeLife
Twitter:
Count:
User: Display name of user.
Border Color: Display color of border.
Link Color: Display color of link.
Text Color: Display color of text.
Name Color: Display color of name.
Nick name Color: Display color of nick name
Width: Display Width.
Height: Display Height.
Show background: Display background.
Show Replies: Display Replies.
Show Header: Display Header.
Show Footer: Display Footer.
Show Border: Display Border.
Show Scrollbar: Display Scroll
Please remember "Save" when you finish.

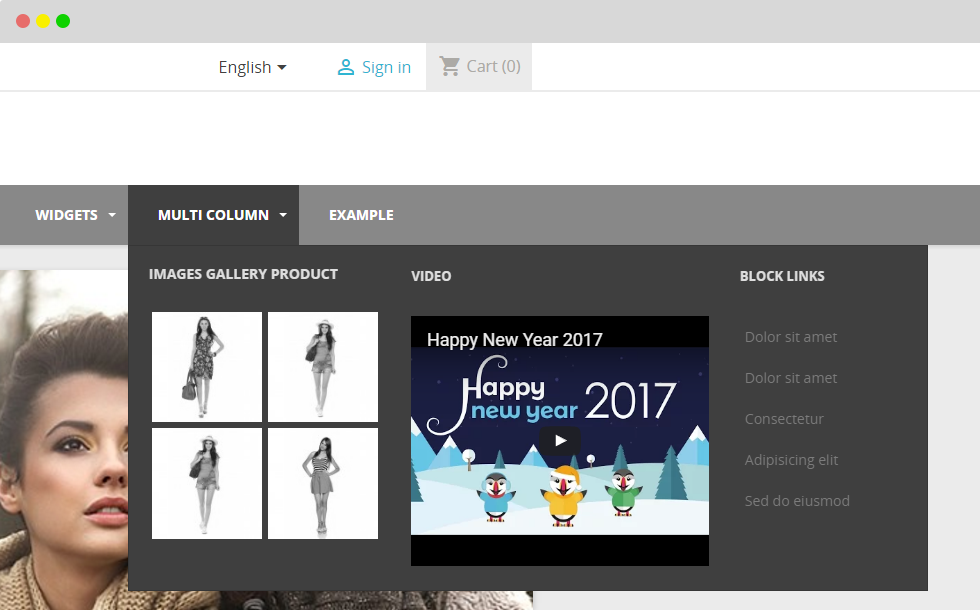
14. Video
14.1 Widget Info:
To fill information for widget.14.2 widget form
Make Video widget via putting Youtube Code, Vimeo Code
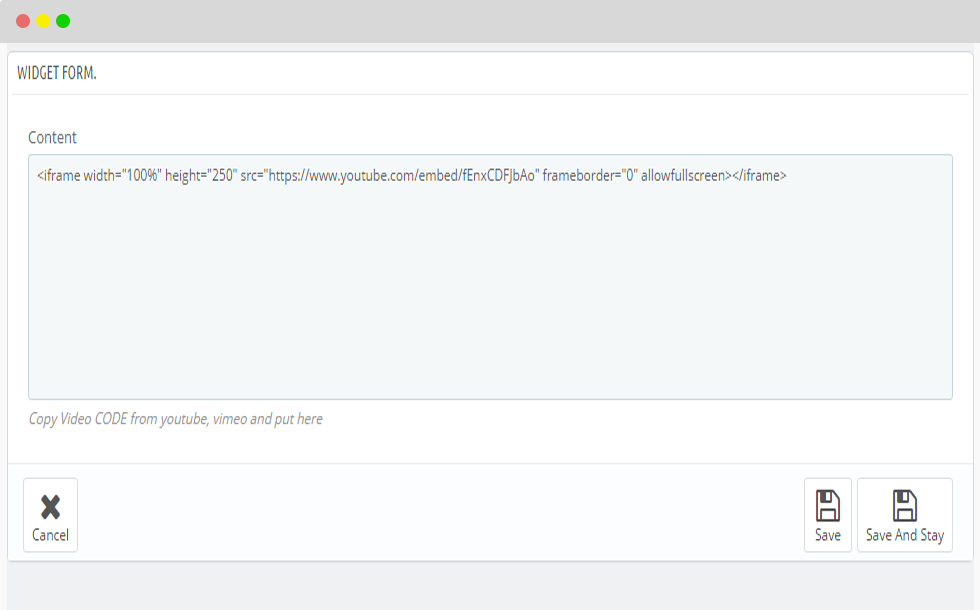
Please remember "Save" when you finish.
Display in front-end.
III. Live edit tools
Firstly, to create sub menu widget user need to configure to display widget in edit megamenu item.
click vào button "live edit tools"
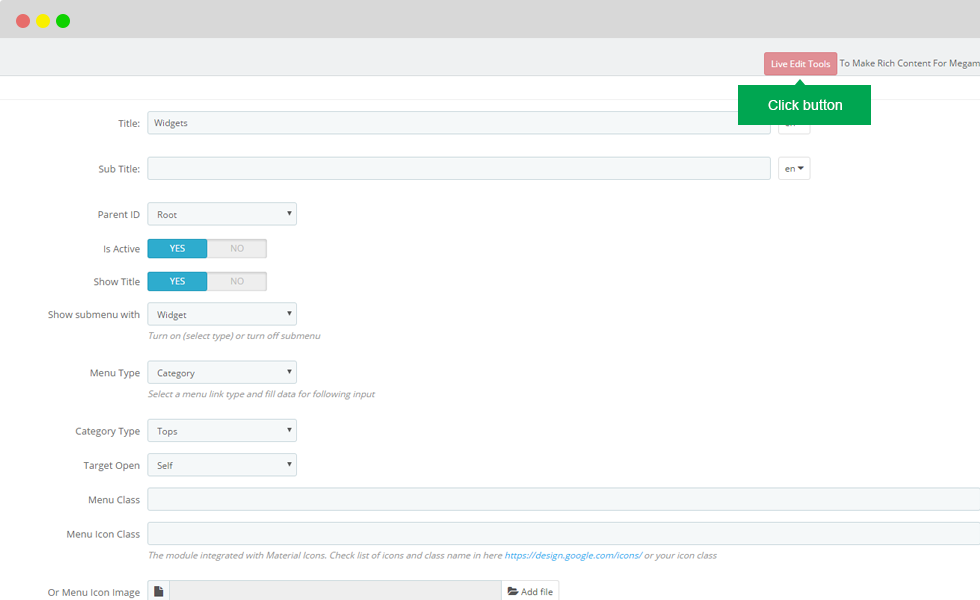
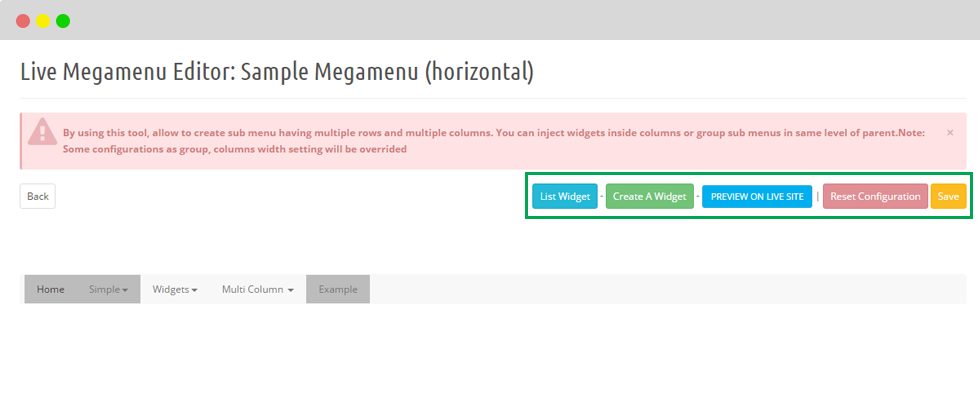
After that, you will see display screen as the image below:
- Button List widget: To display list of created widget.
- Button Creart a Widget: To create widget.
- Button Preview on live site: Show display in front end
- Button Reset Configure:
- Button Save: To keep data.
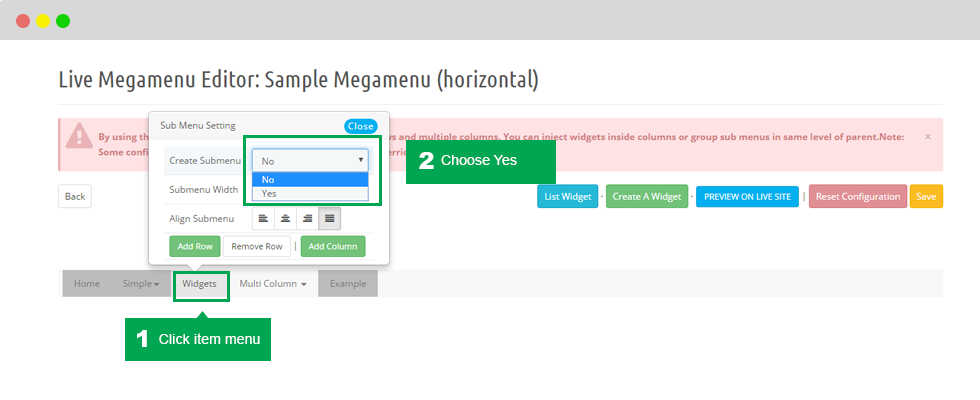
1. Add row
Step 1: Click item menu.
Step 2: Create Submenu: Choose Yes.
- Submenu width: Show width of submenu.
Step 3: click button "add row"
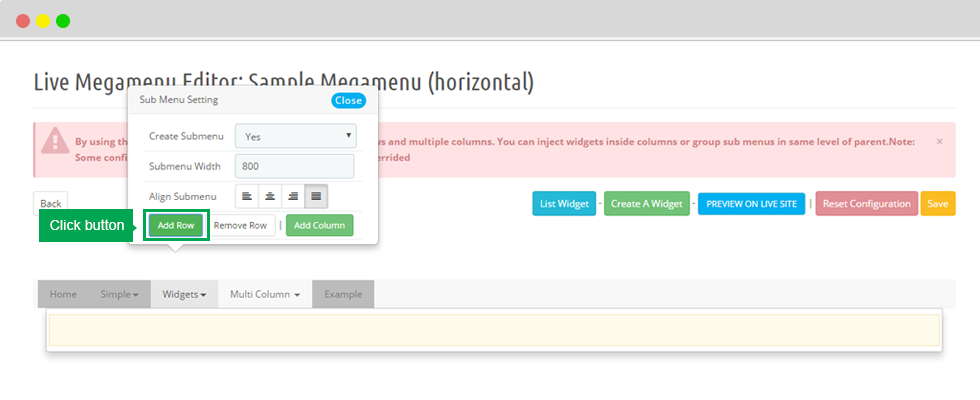
To remove row . You just need to click button "Remove row" next to "Add row" button.
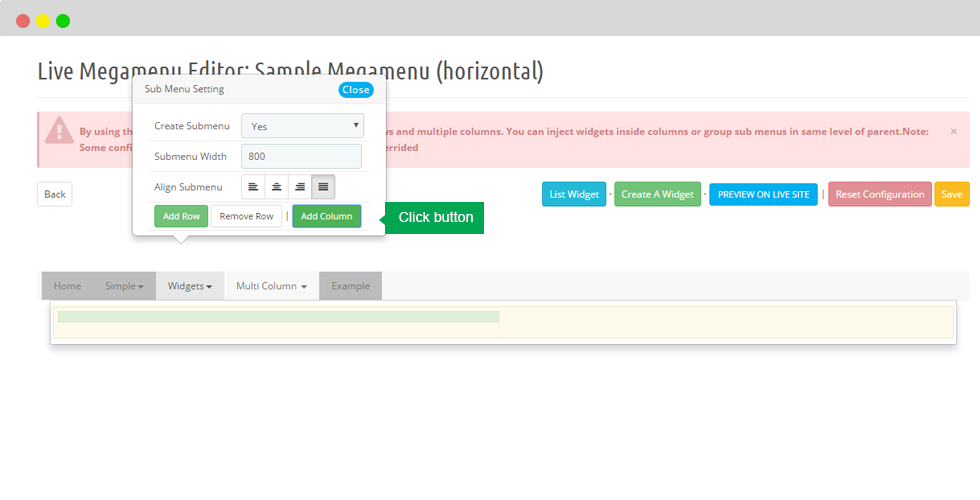
2. Add column
Please click button "add colunm"
- Then click on the column at the bottom, there is a table which contained all configuration of column displayed.
- We also add some necessary information column.
Addition Class: Add class for column.
Column width: The width of the column as a percentage of boostrap.
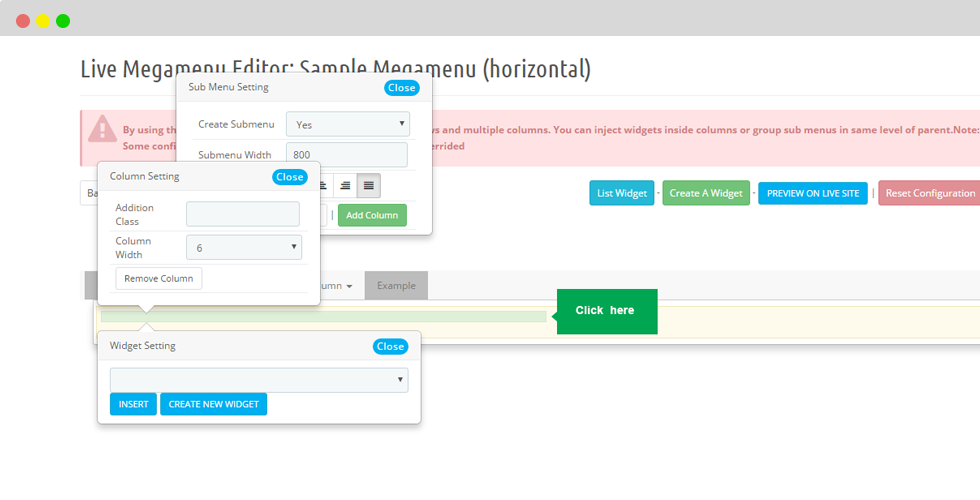
- Select frame of widget setting, then user choose widget which you want to create.
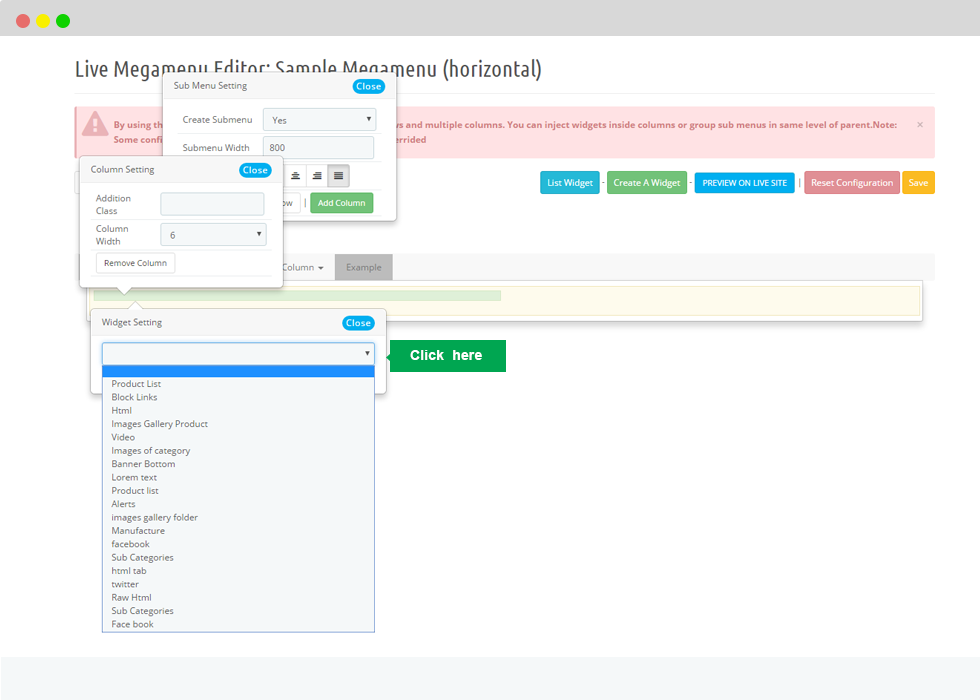
Then you click button "Insert" to insert column.
Then add row and add colunm, please remember "save" button.
IV. Export & Import
1. Export
Allow users to "Export" Menu data.
- Export Groups With Widgets: Use to export data included Menu Widget data.
- Export Groups Without Widgets: Use to export data excluded Menu Widget data.

When "Export", output file is ".txt"
2. Import
Allow users to "Import" Menu data.
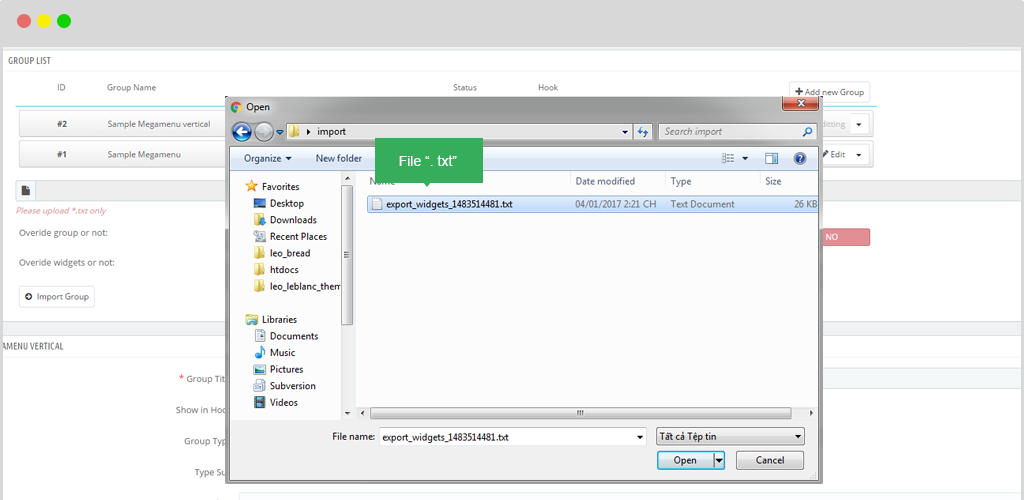
To "Import" data, you just need to click button "Choose a file".
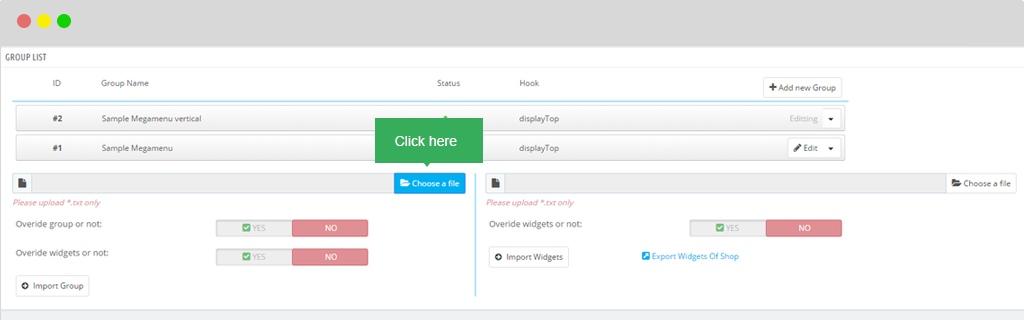
After that, the path will be displayed, you only need to find file ".txt"
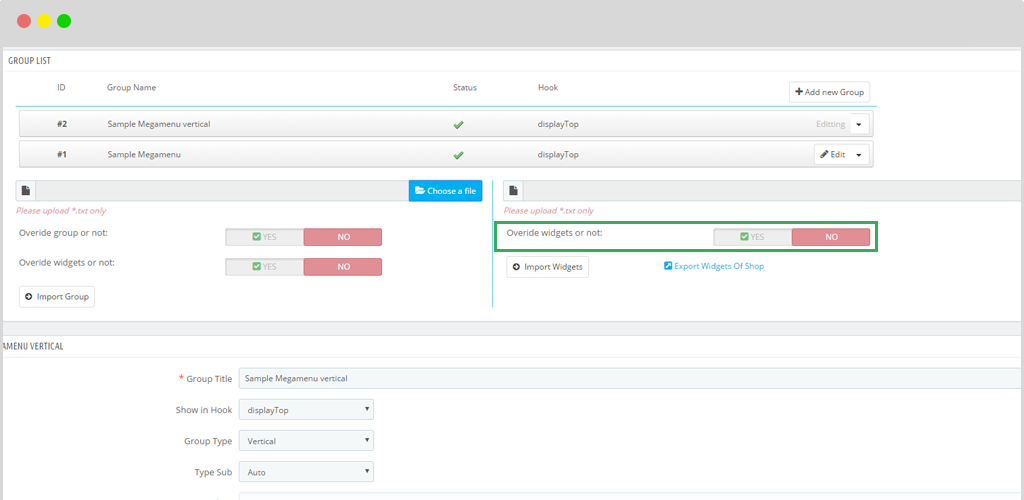
After "import" file you also can Overide group.
- Overide group or not
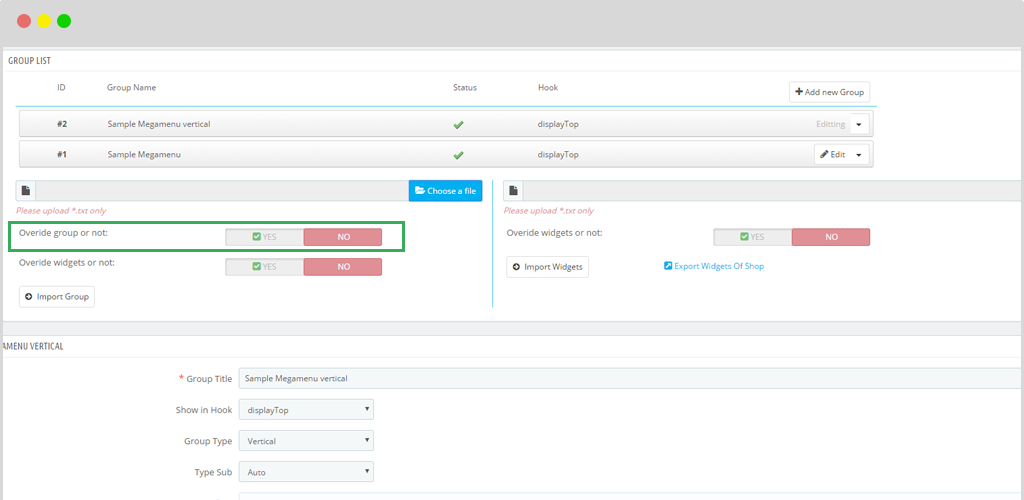
+ Enable: If id of group exist => Clear all current menus of group then update data of group and data menu of group from import file.
+ Disable: Add new group and new menu of group.
- Overide widgets or not
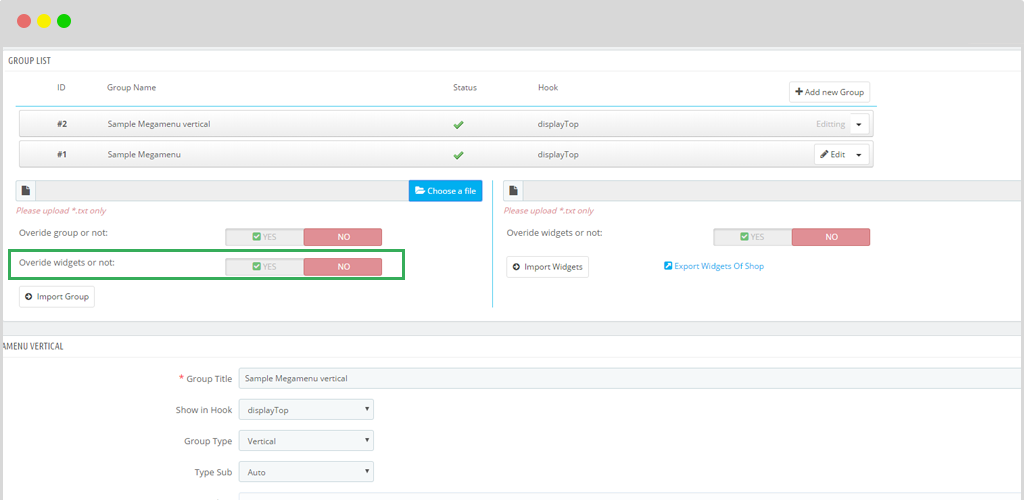
+ Enable: if key widget, exists => update data from import file
+ Disable: Add new widget if key widget not exists
Then click button "Import Group"
+ Enable: if key widget exists => update data from import file .
+ Disable: add new widgets if key widgets not exists.
Mutishop Menu
User only need to create a new shop, after that you choose this shop in megamenu.
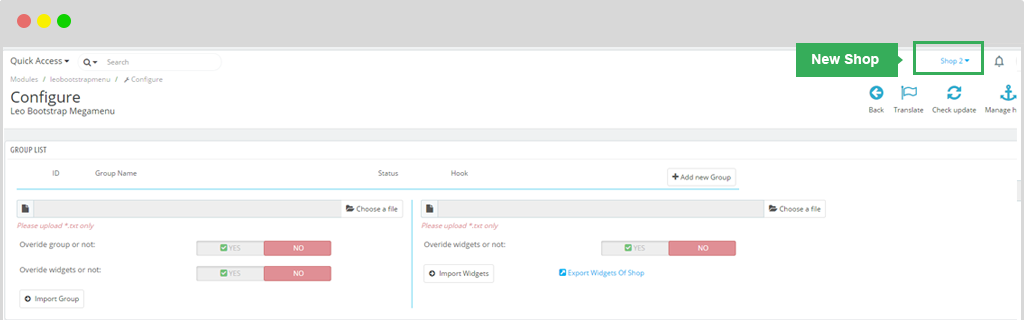
User have two options to create Megamenu:
Option 1: Create menu by Add new group
Option 2: Create menu by Import Group
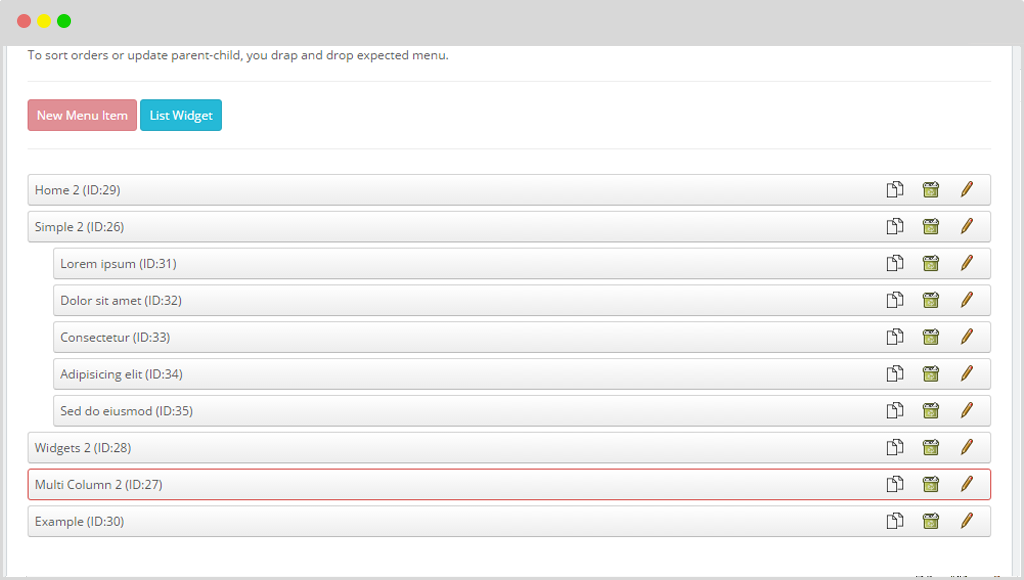
Display in Backend
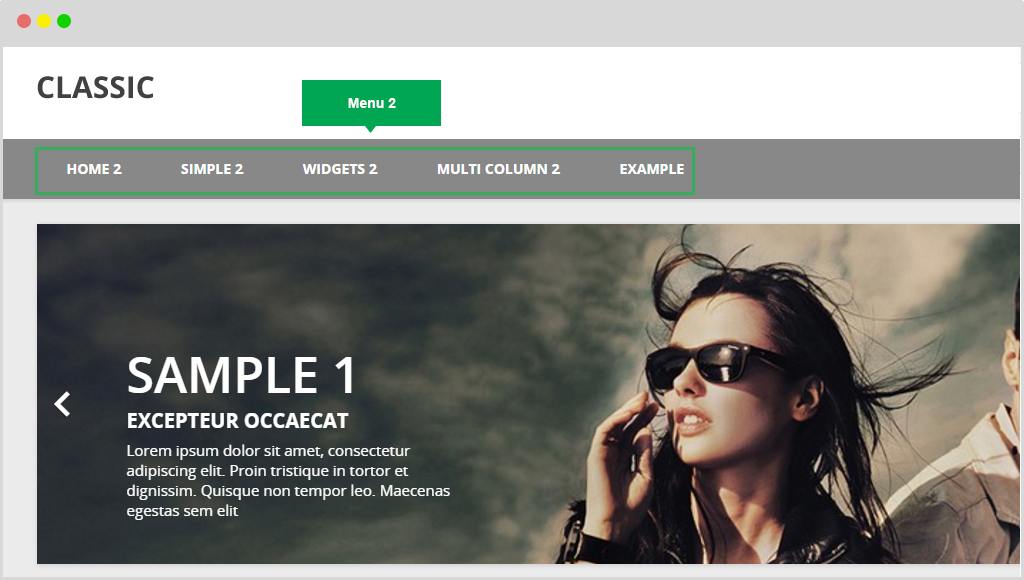
Display in Frontend
Translate Language
User access into edit manager widget then click button "en" (we chose English as default) and choose language you need to translate.
Your next step is to copy the title to be translated into other languages.
Conclusion
Getting Support
If you are unable to find your answer here in our documentation, please go to our forum and post up a new topic with all the details we need. Please be sure to include your site URL as well or send us an email.
Our support scope
Our support covers configuration, building site as demo, trouble using any features, and bug fixes. We don't provide support for customizations or 3rd party extension.
Our support time
We try our best to monitor the email around the clock, however, this is not always possible due to different time zones. We will try to reply you as fast as we can.
Our working time is 8.00 AM - 5.30 PM, Monday to Friday (UTC+7). So if ask for help in the weekend, you may have to wait a little bit for support and please be patient.