Leo Dulcan
Leo Dulcan guide for prestashop 1.6
- Created : 18/04/2016
- Latest update: 18/04/2016
- By : Leotheme
- Email: leotheme@gmail.com
THANK YOU FOR PURCHASING OUR THEME!
Here are some basics on installing, configuring and customizing the Leotheme.
BEFORE WE GOThe theme and the sample data is provided "as is". Customizing code and other design related issues can be done as freelance work on a $50-100 hourly rate only with Paypal and/or Skrill, if our team is available. If you are new to Prestashop, please understand I cannot fix your site for free. Leotheme would love to help everyone but We are really busy. I suggest reading documentation available online regarding using Prestashop, server requirements, etc.
If you like this theme please rate it.
Have a rest of your day
LeothemeTeam
Prestashop Guide
If you are new with prestashop. Please read prestashop guide first:
http://doc.prestashop.com/display/PS16/Getting+Started
Install Quickstart Package
For each package you download from Leotheme, you will have: quickstart package, theme package, PSD. If you buil your shop from scrap, you can download quickstart file.
Steps of how to install QuickStart
- Download quickstart file
- Extract it in your host
- Install it is like prestashop default file
Note : all the steps are described in the video already.
Install Theme
If you have avail shop and install follow guide
Steps of how to install Prestashop theme
- Go to back-office and login, navigate to: Preferences > Themes > Add new theme
- In this step, you can install template follow 2 ways:
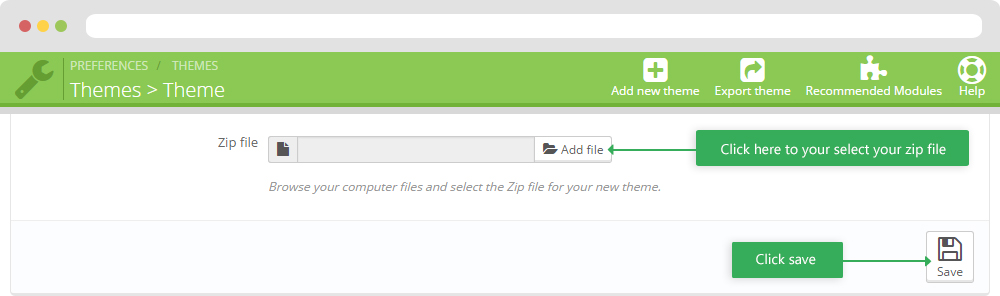
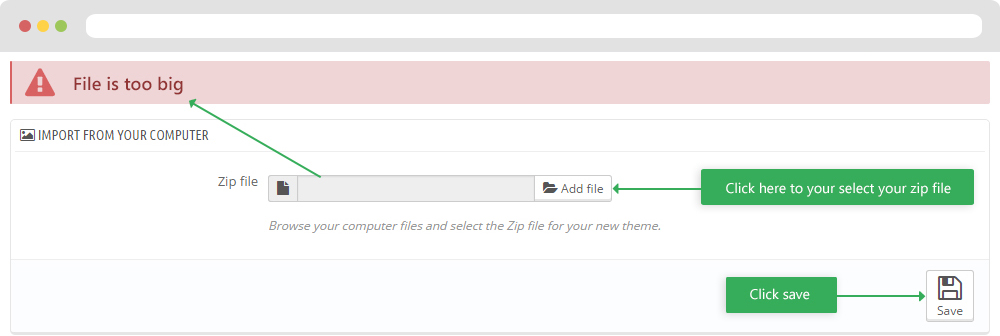
- Upload, file from your computer: Please find box: Import from your computer > Choose File > Click Next , If you see error when use this way, please use option 2
-
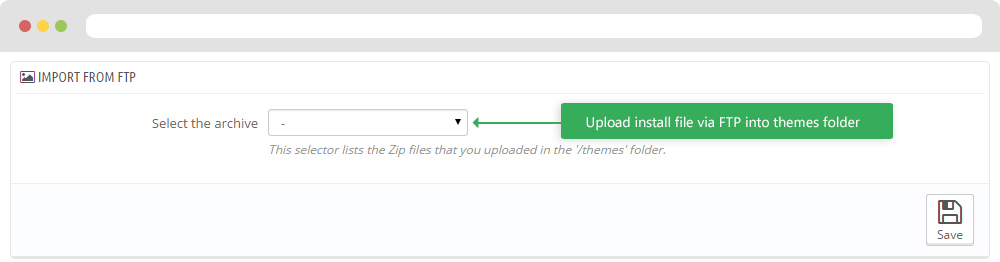
Upload file to your folder in your live site via FTP client. Please upload the zip file of template to folder: ROOT/themes/theme.zip, refresh your browser,
you will see zip file in dropdown list of box Import from FTP, Select template file and click next
- Next until Finish
Note: Please note that all the steps are described in the video already.
1. Install follow video guide
2. Install follow demo images
- Backend > Preferences > Themes > Add new theme

- You can import themes from your computer
+ If you see this error when the file is too big, you can follow my guide
- Also, you can put themes on the folder themes form FTP
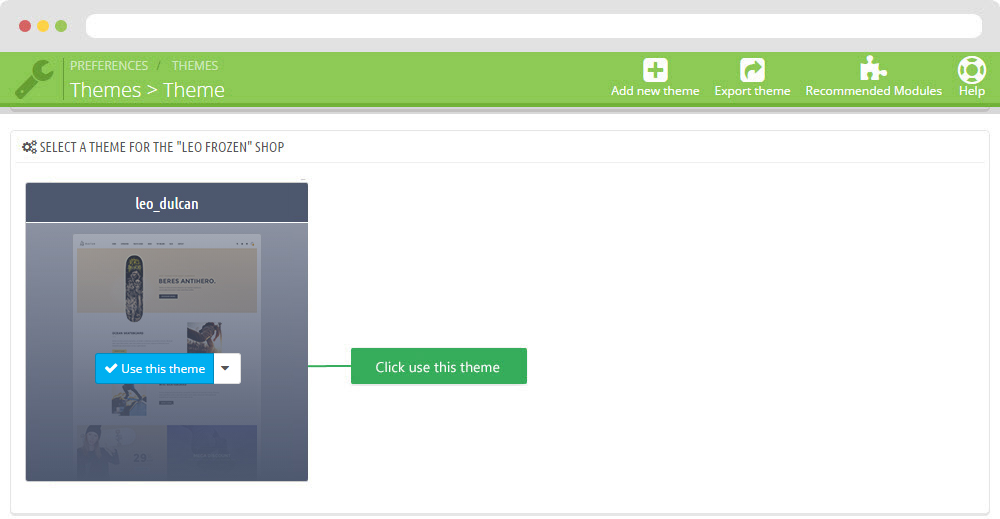
- You can select a theme for the shop
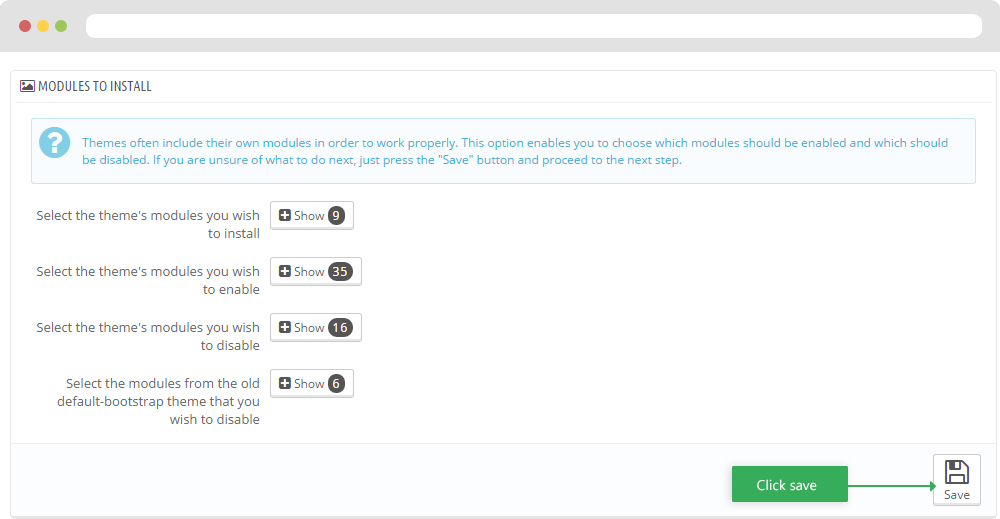
-
Select template as default and config show left or right column in each page
- Create or edit image size and regenerate thumbnails in step 5
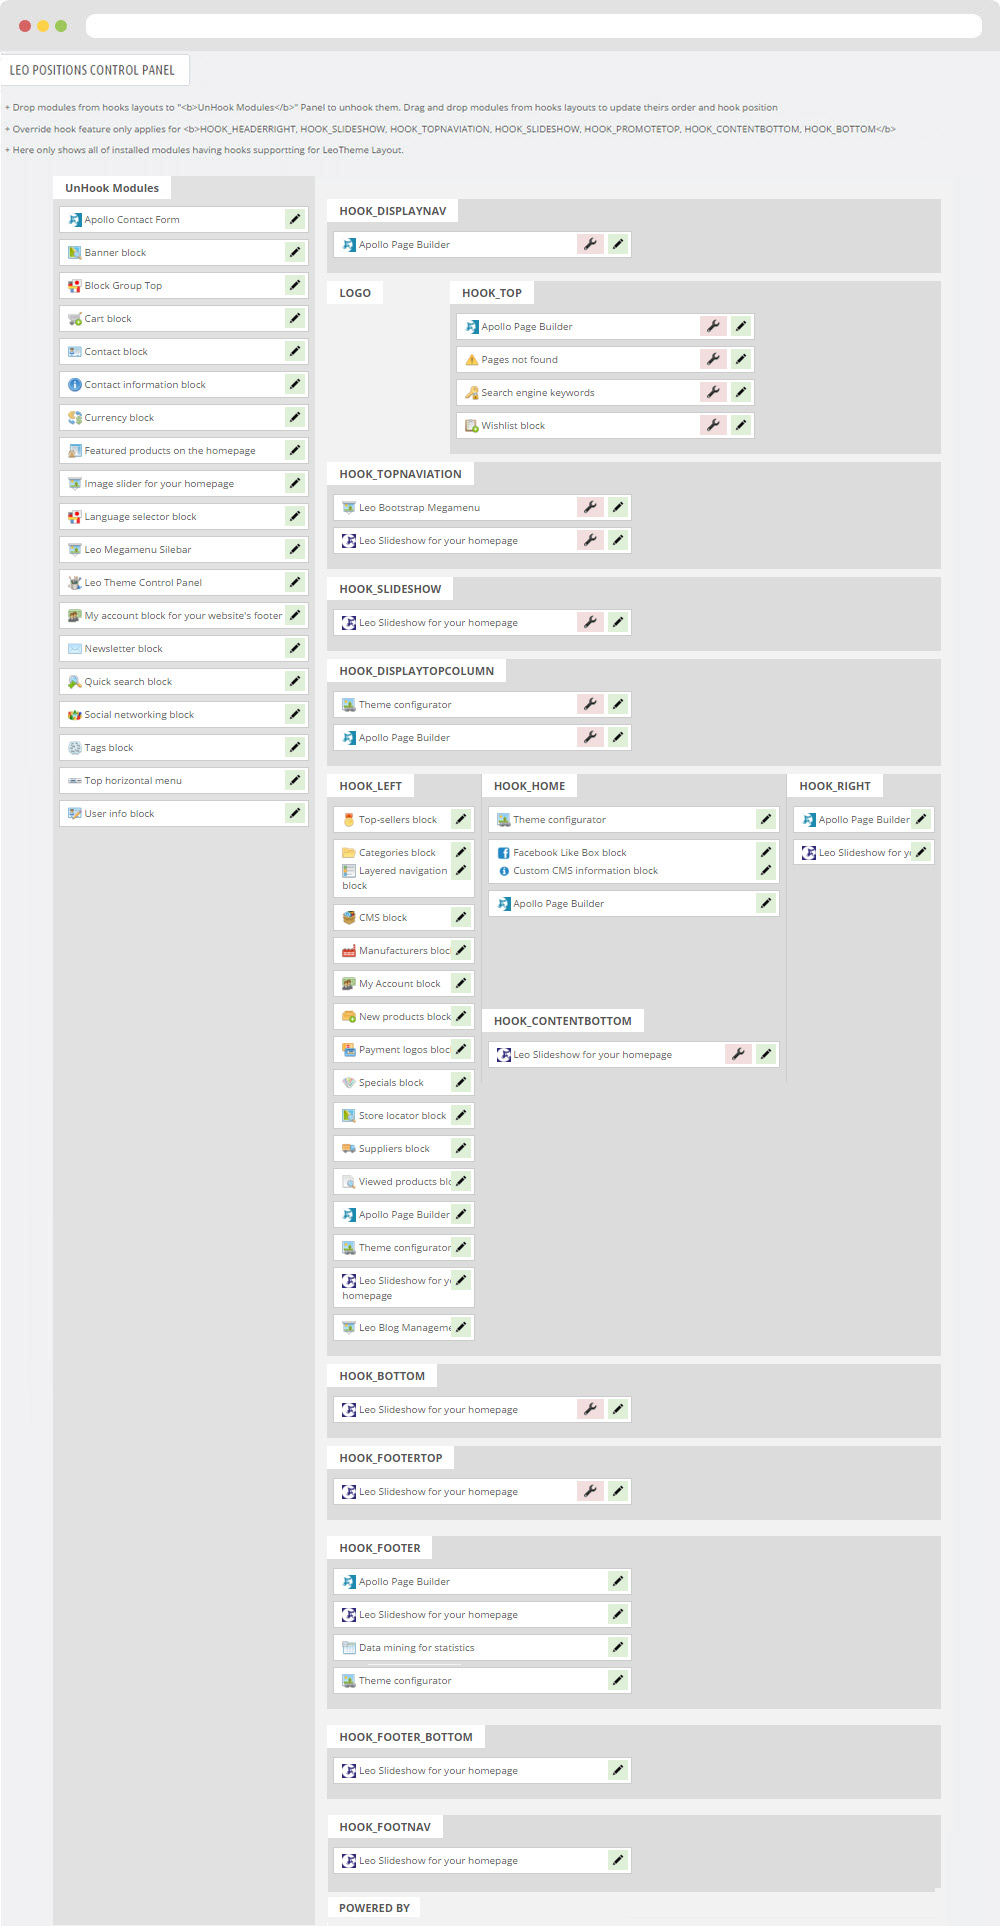
- Check module position in Modules > Leo Positions Control Panel
5. Create or edit size image and Regenerate thumbnails
Backend > Preferences > Images
+ Create or edit size image
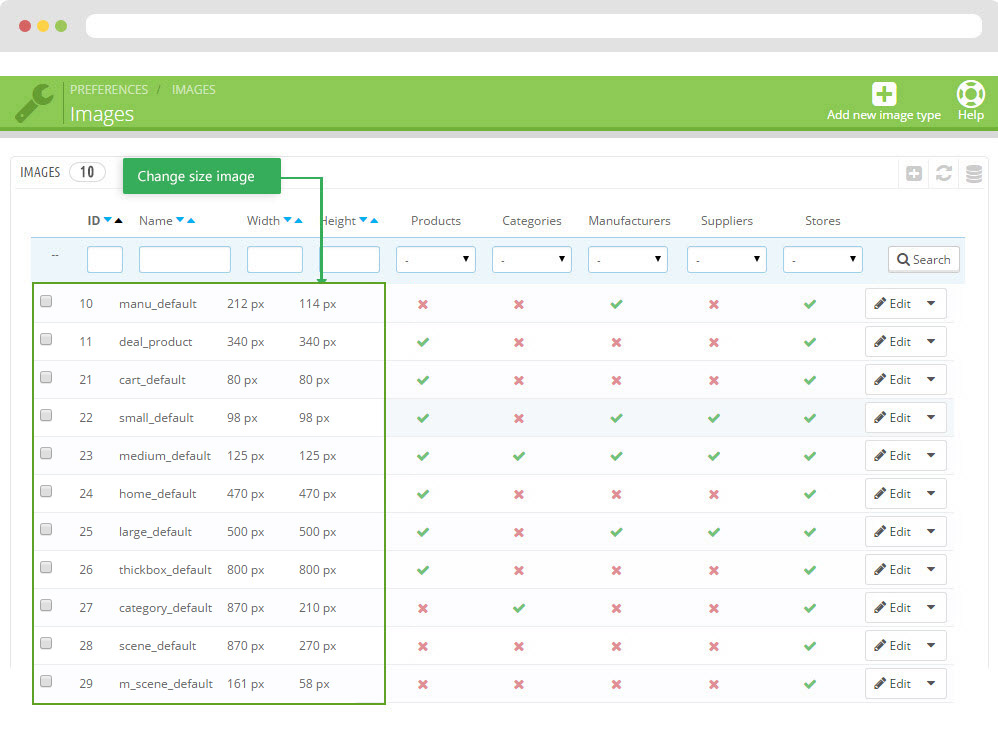
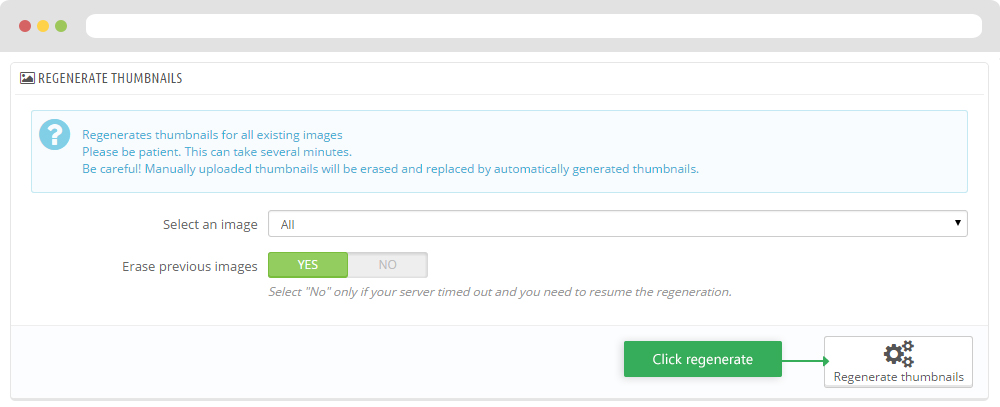
+ Regenerate thumbnails
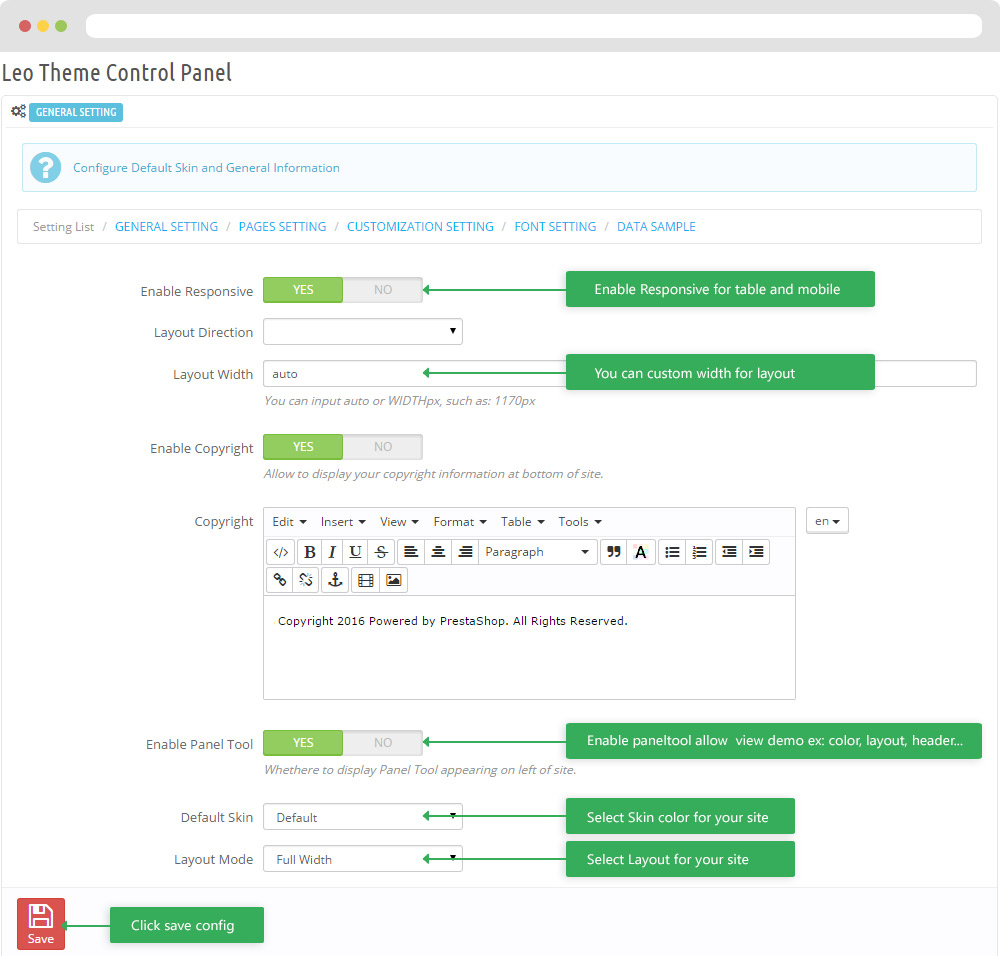
Leo Theme Control Panel
You can read guide in link (Blog Guide)

I. Backend > Modules > Leo Theme Configuration
-
General setting
-
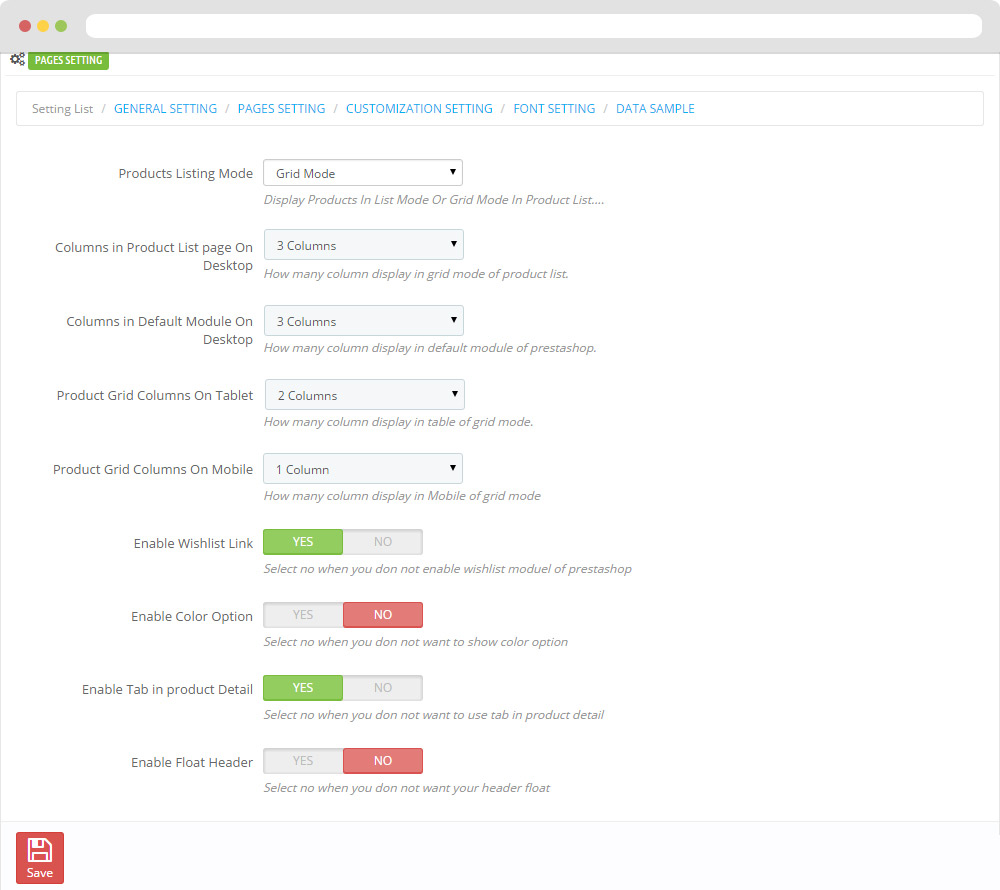
Pages setting
-
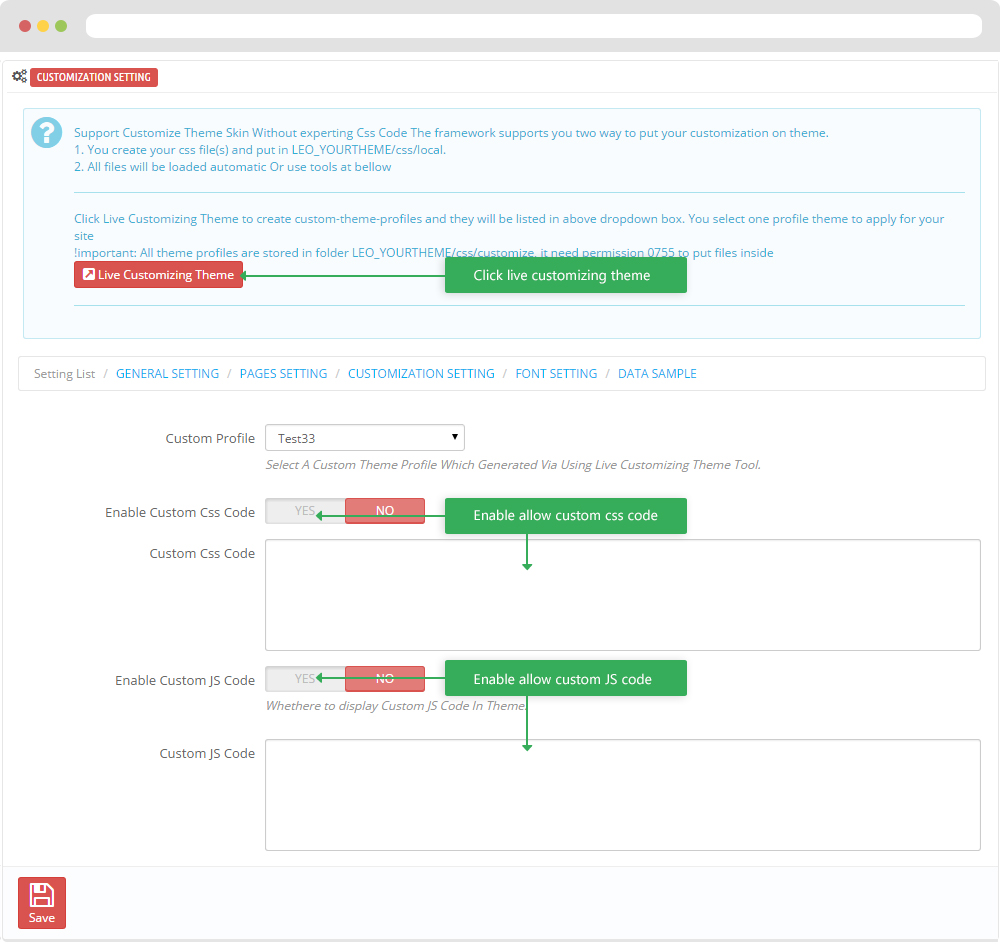
Customize setting
-
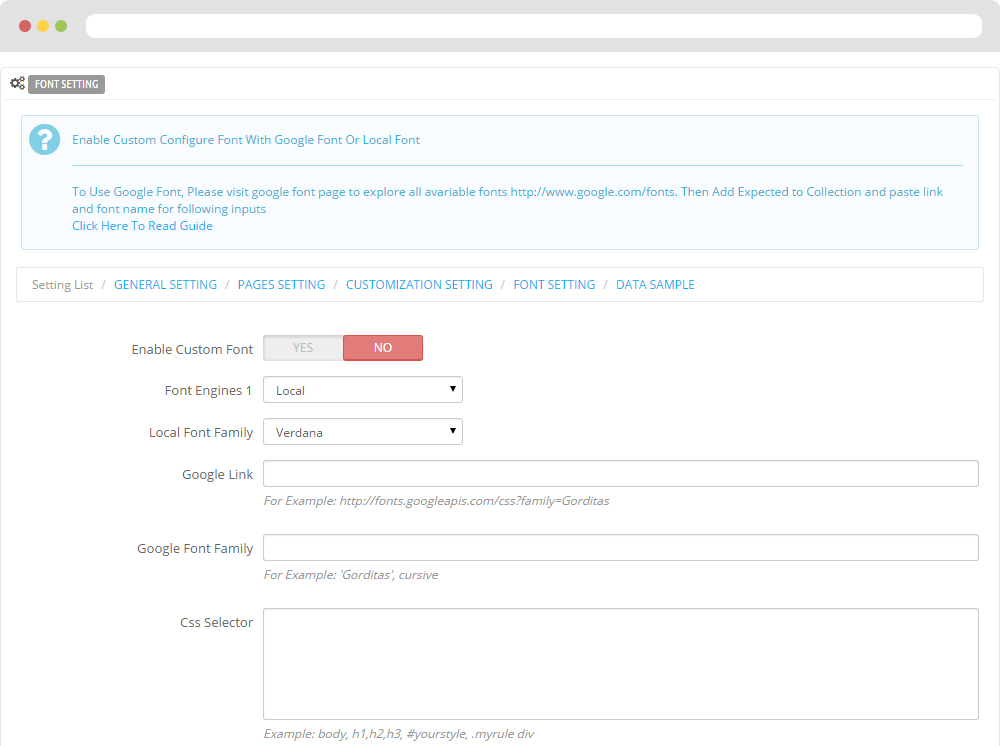
Font setting
-
Data sample
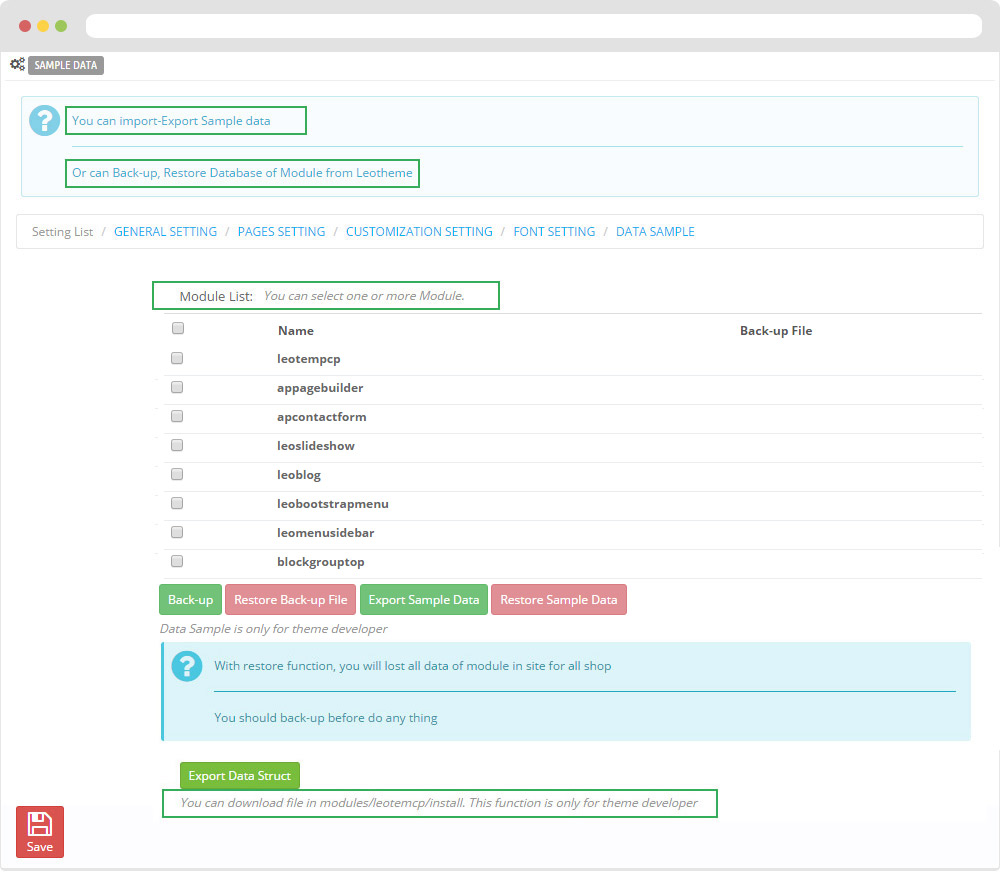
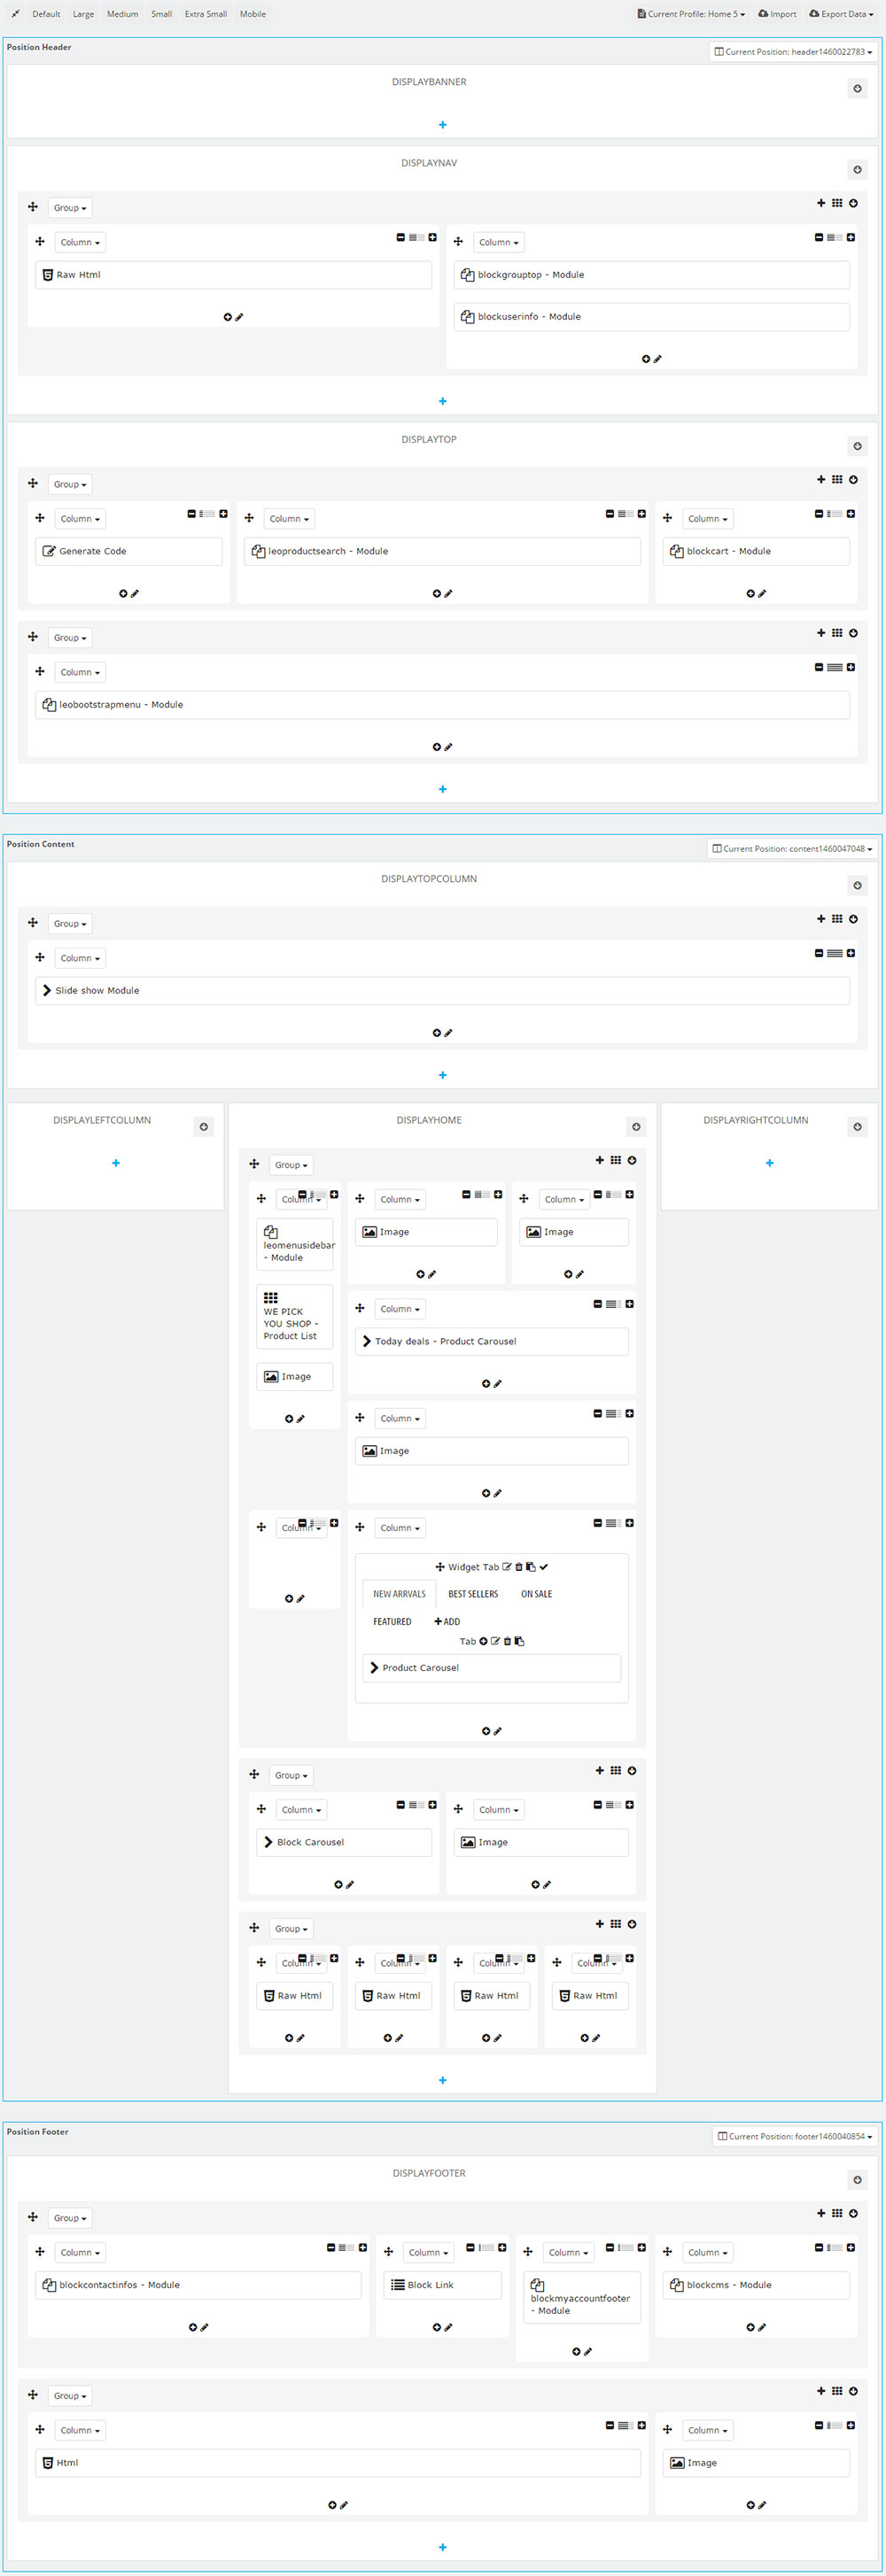
II. Backend > Modules > Leo Position Control Panel
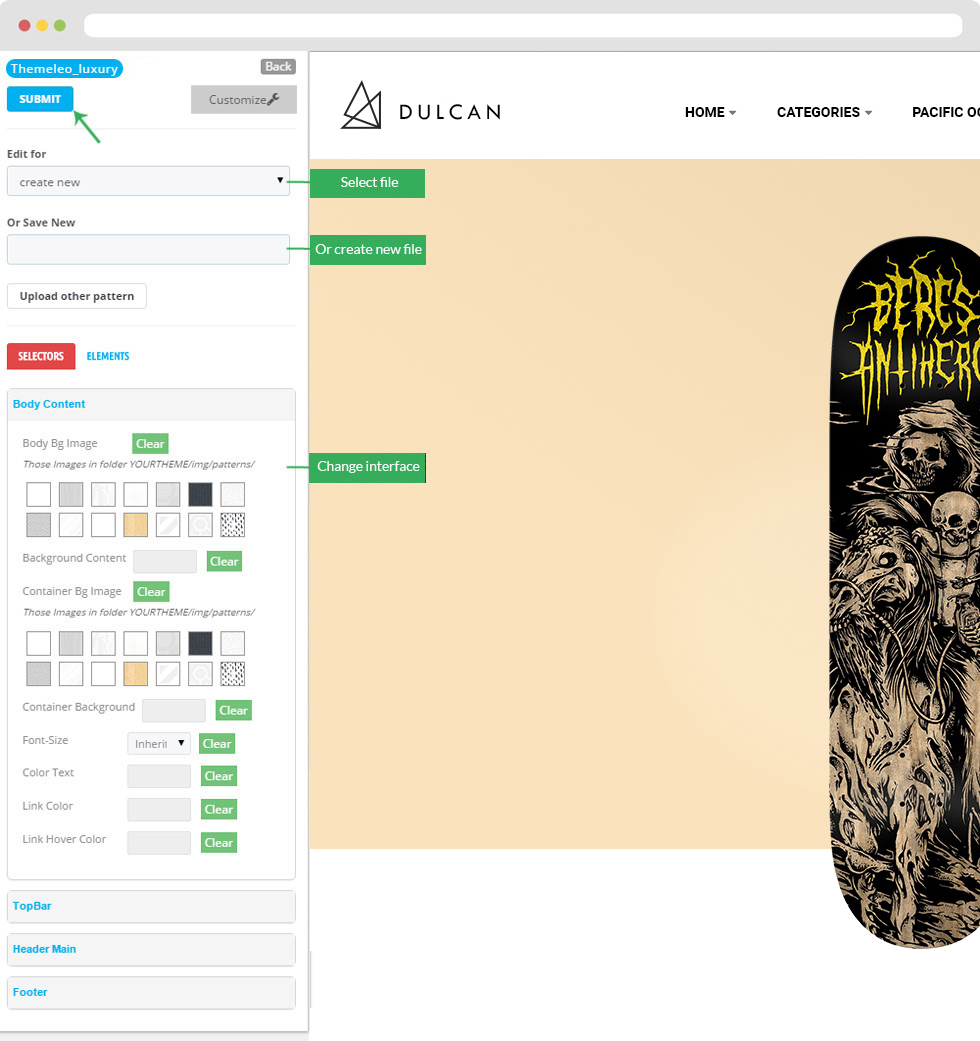
III. Backend > Modules > Leo Live Theme Editor
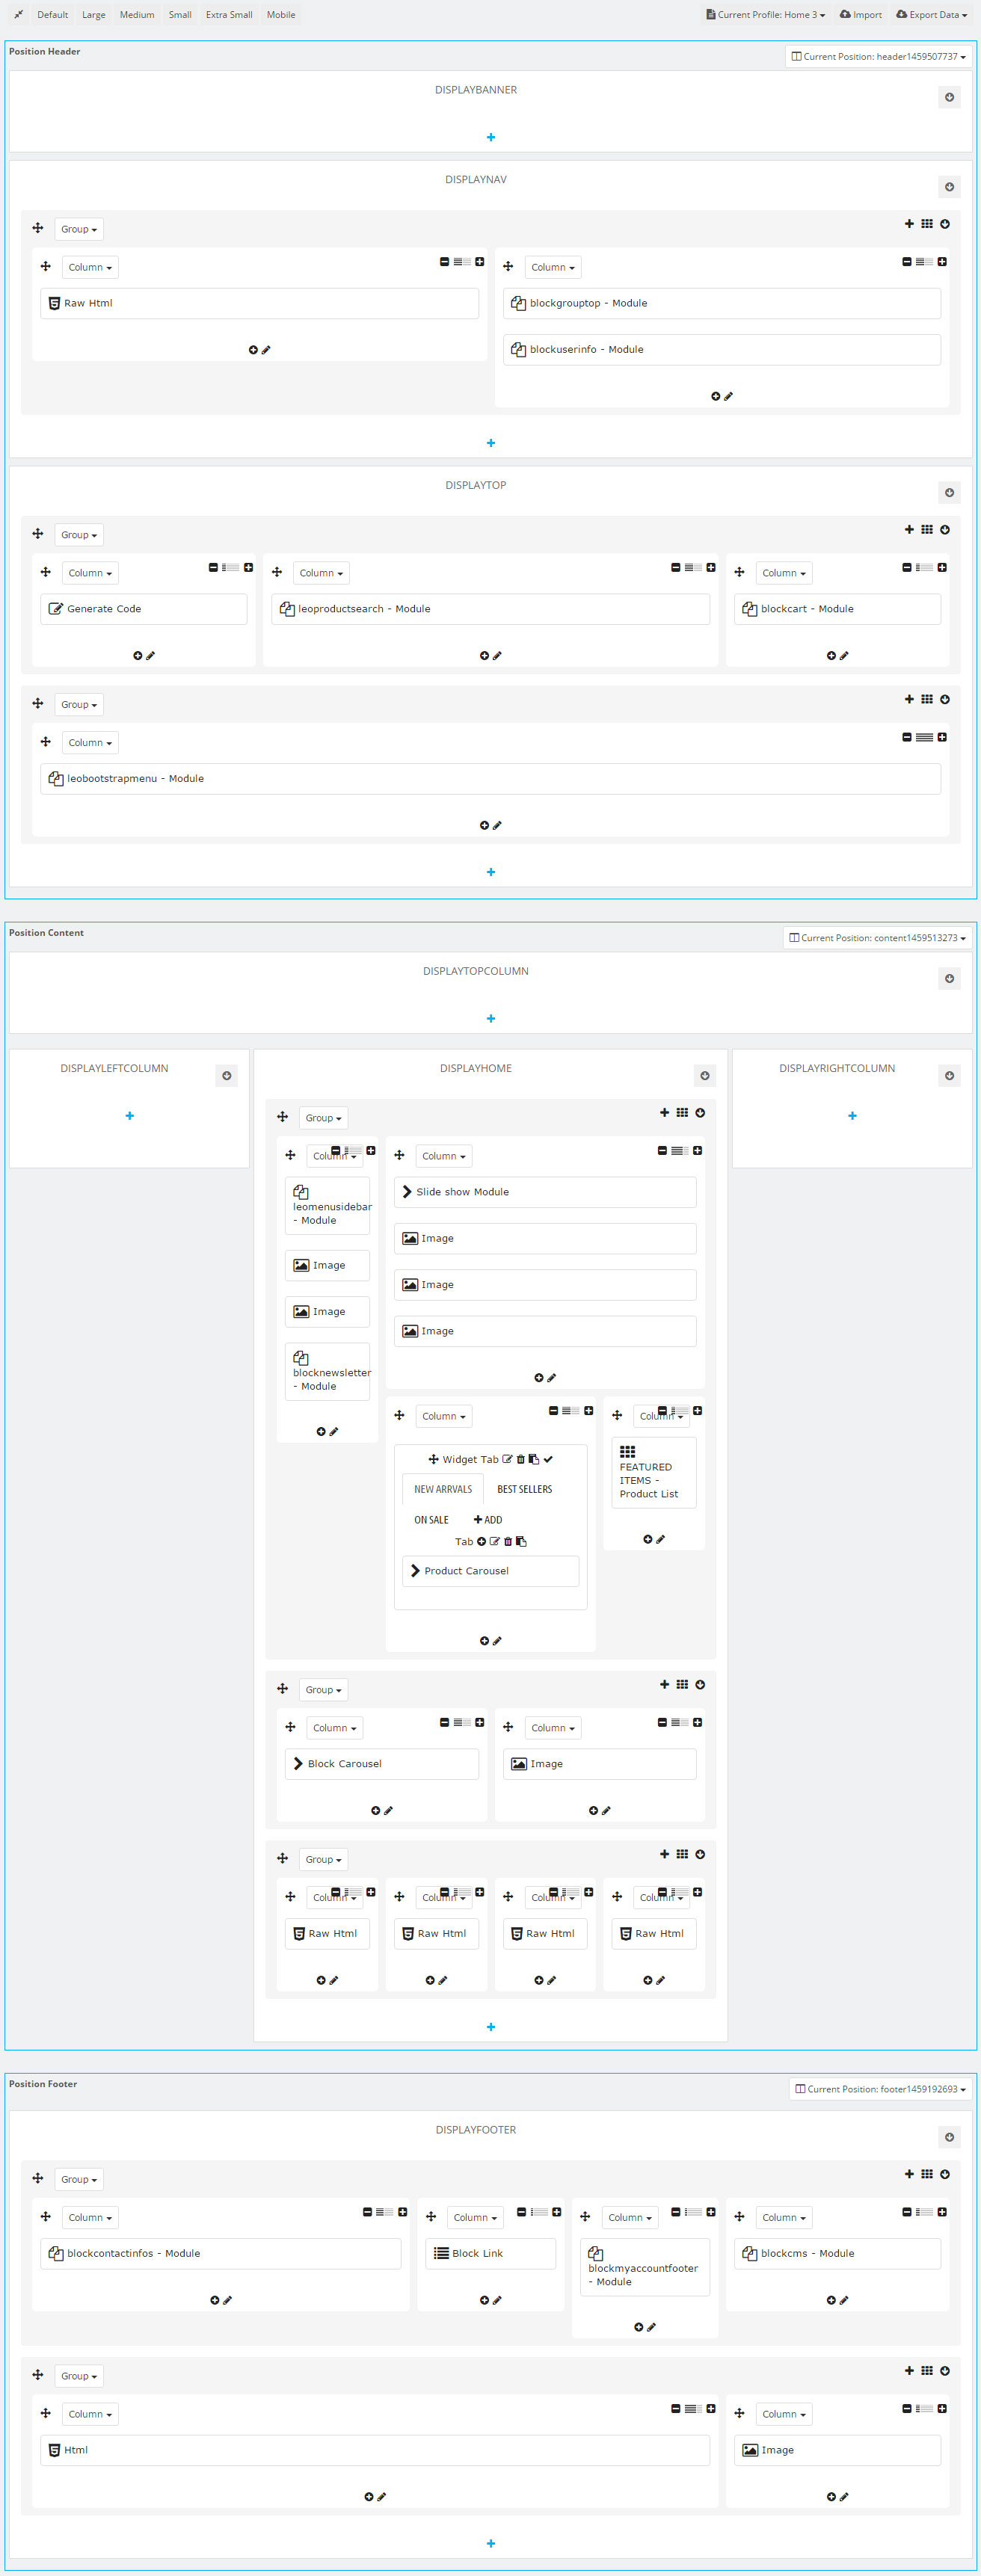
Back end
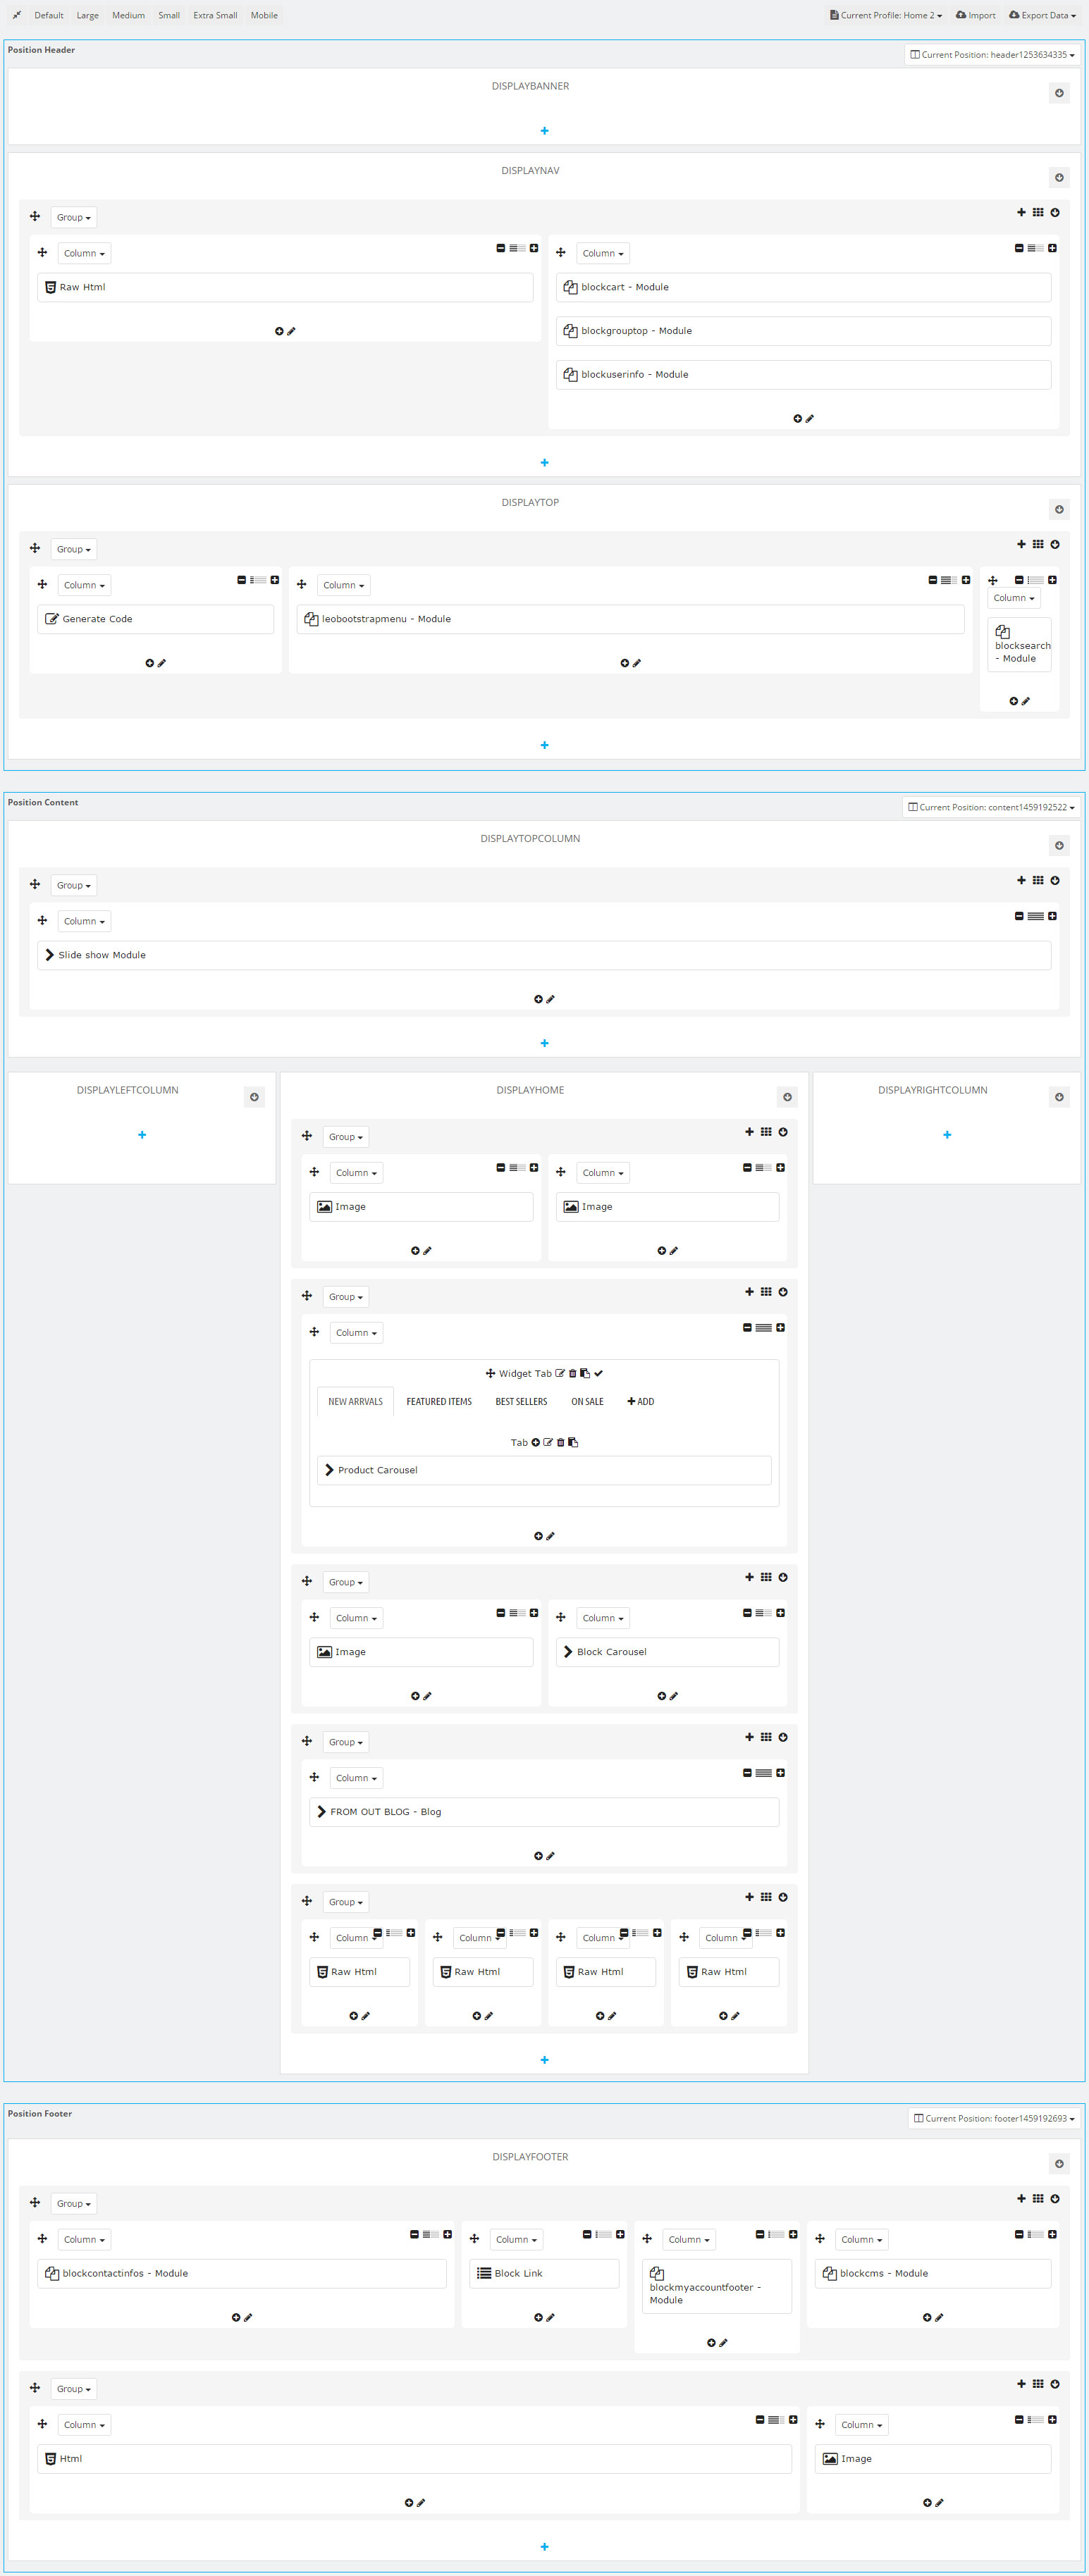
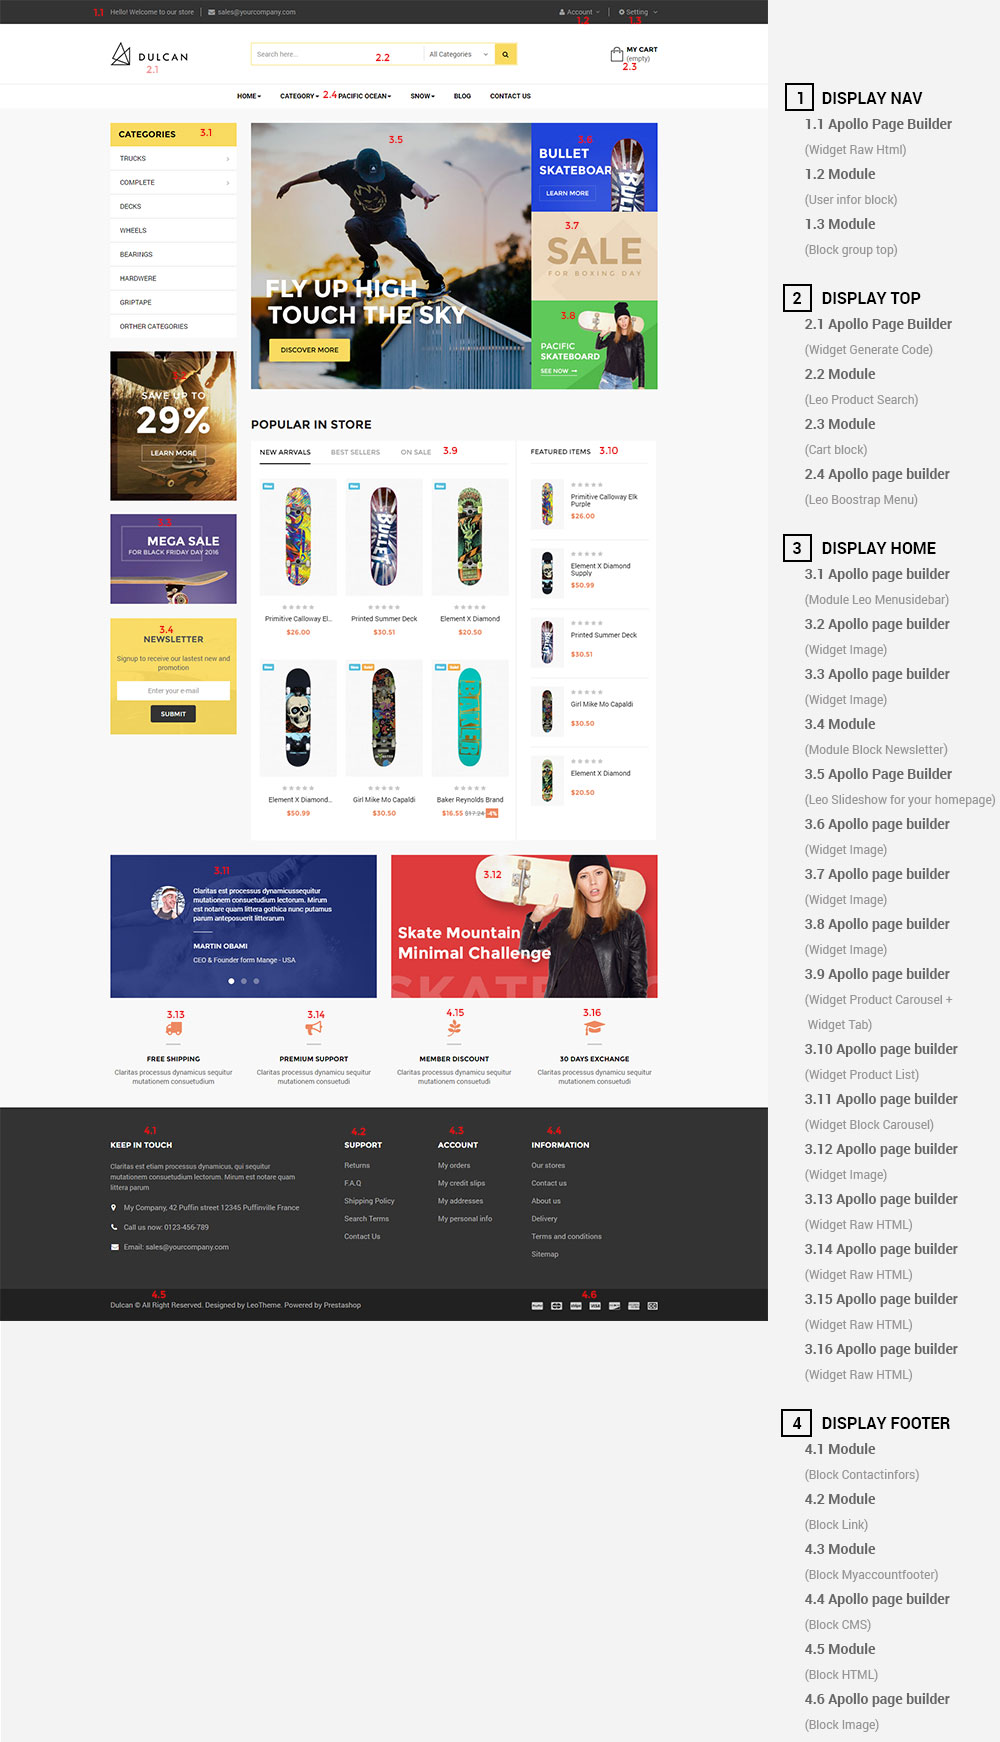
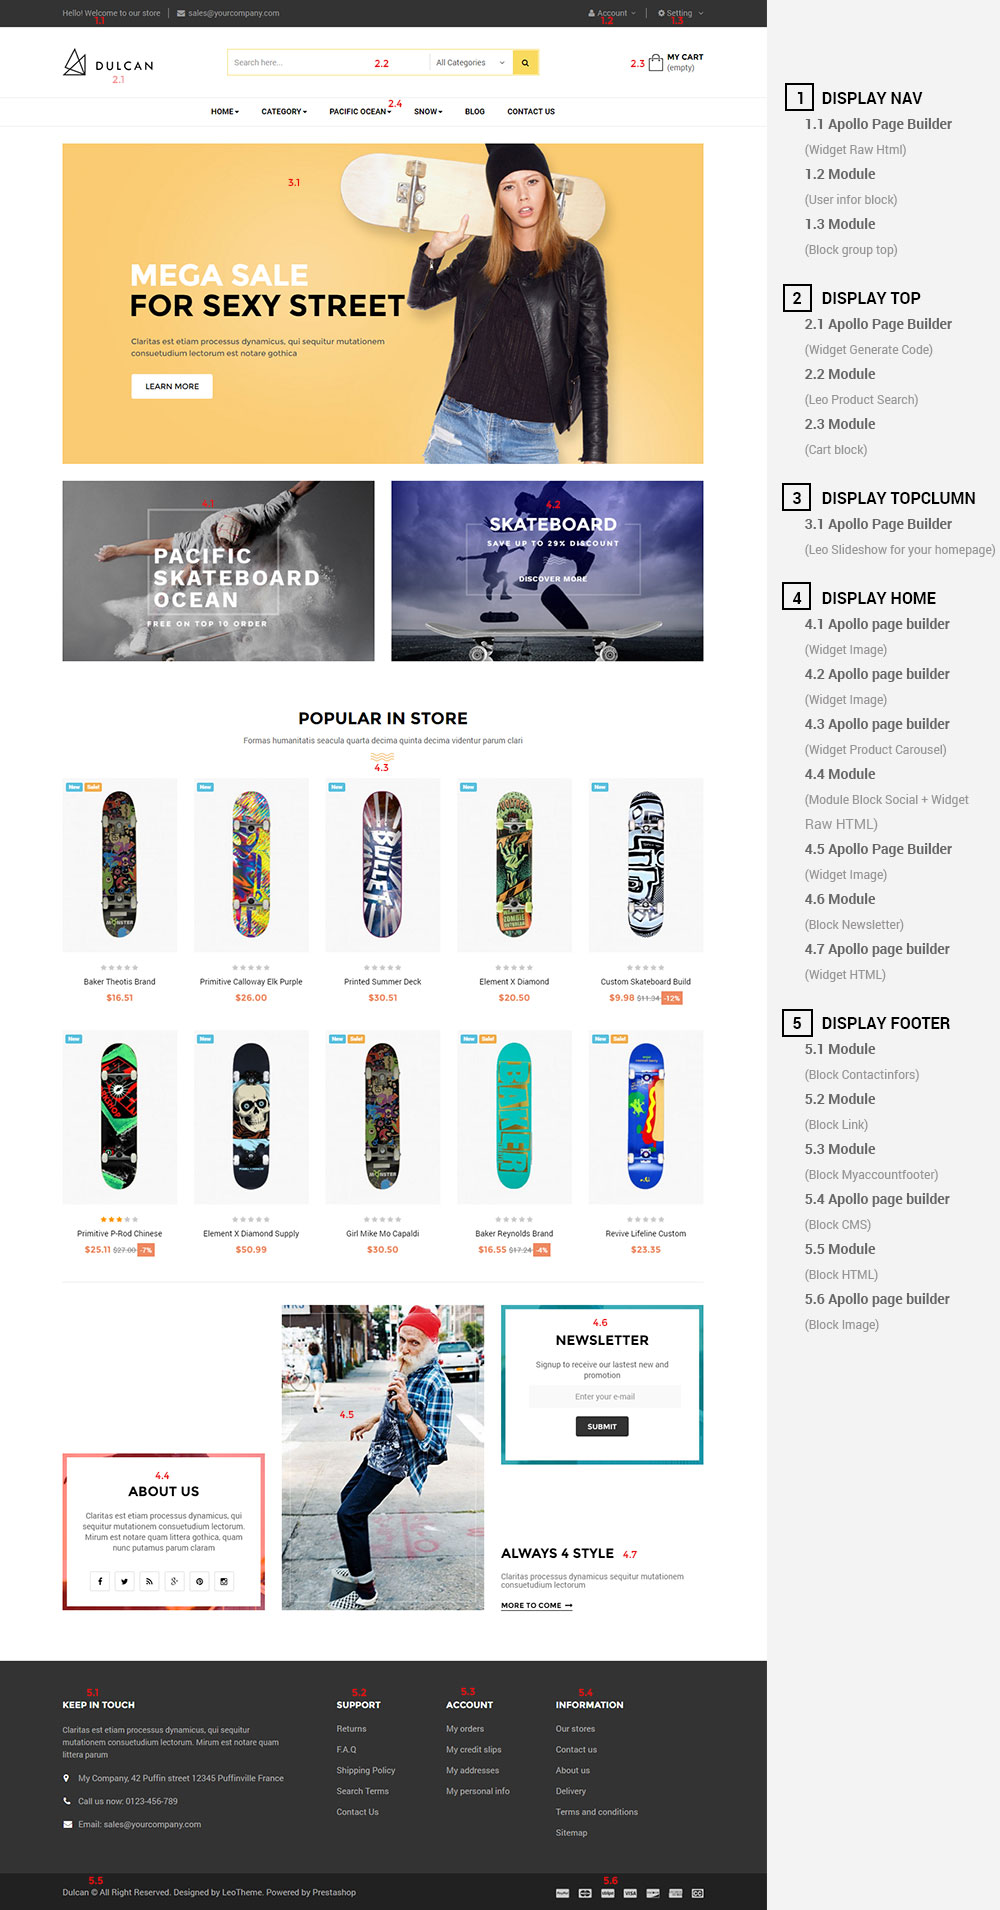
Layout Structure
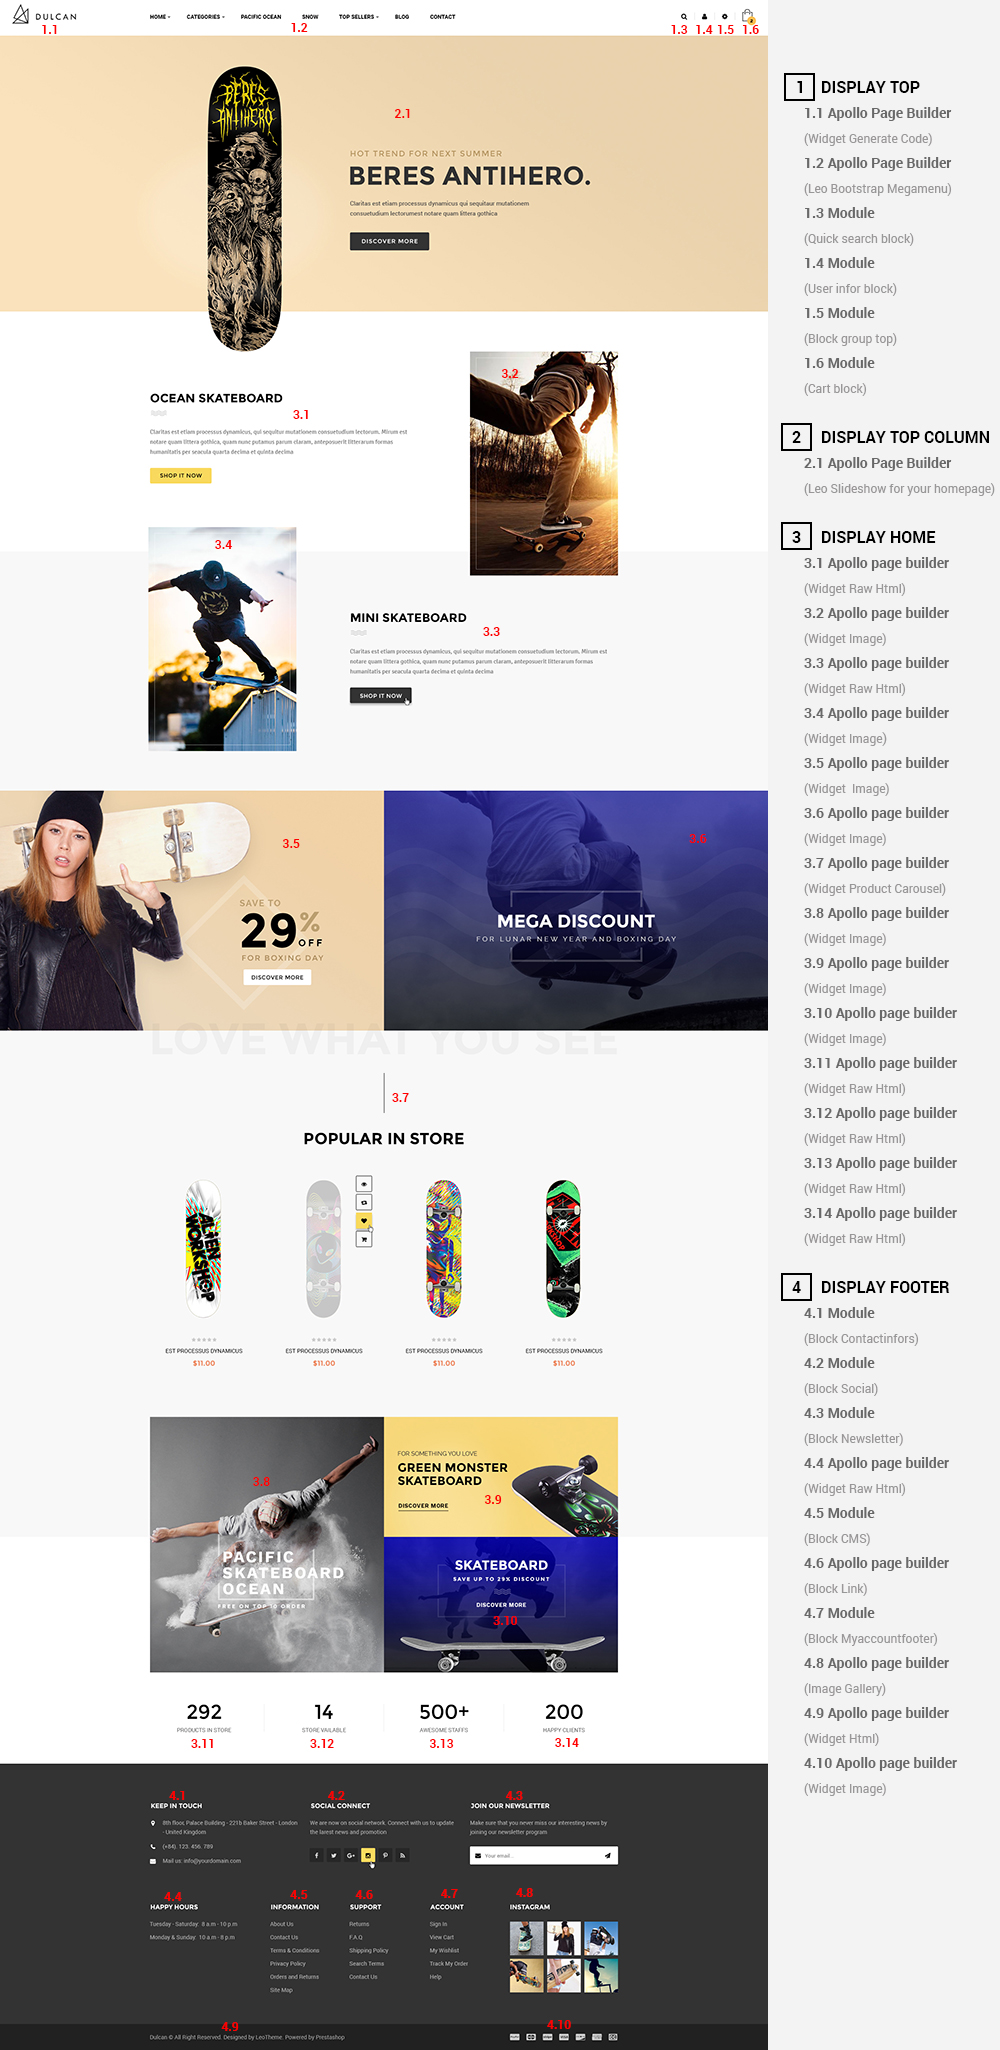
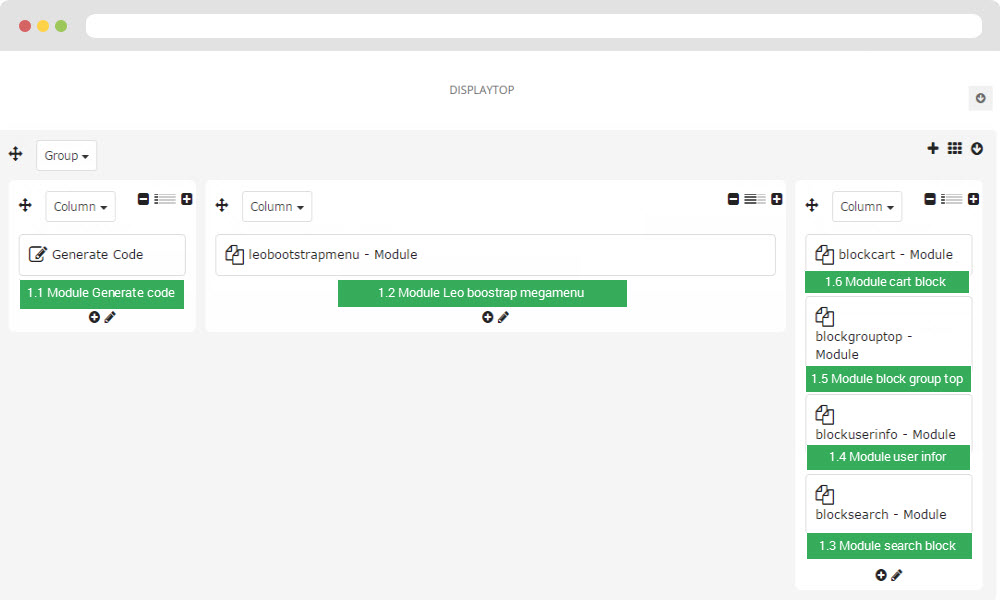
1. Display Top
- Front End
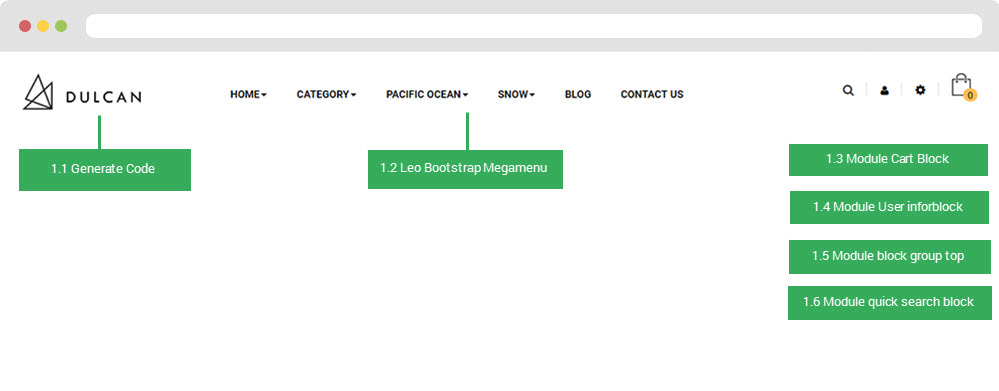
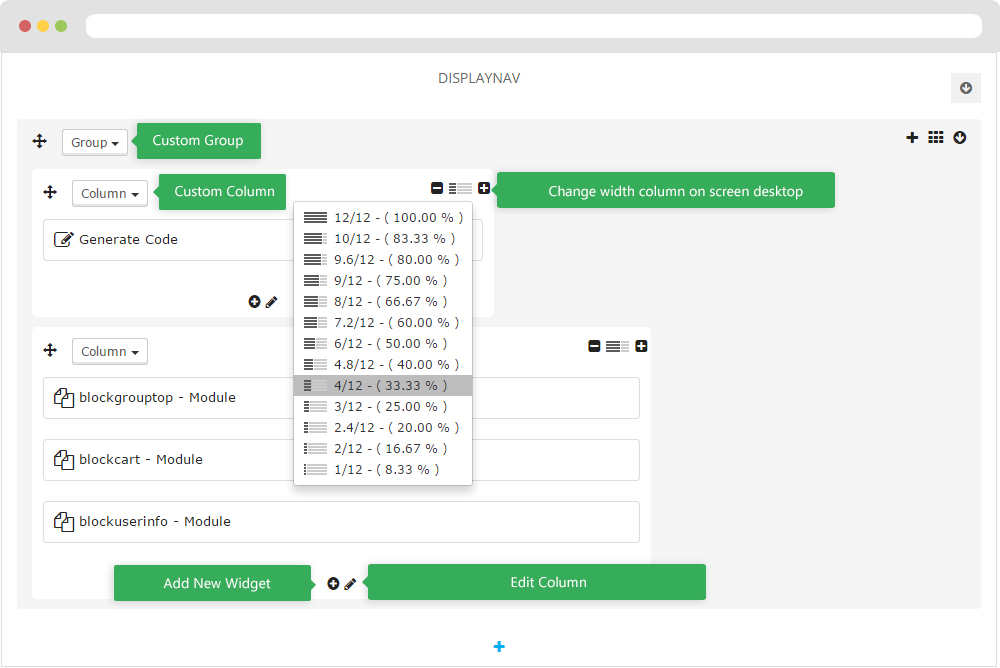
- Configure Apollo Page Builder ( Backend > Ap PageBuilder > Ap Profiles Manage --> Select Shop 1 --> View)
1.1 Logo generate code
![]()
1.1.1 Edit widget Generate code
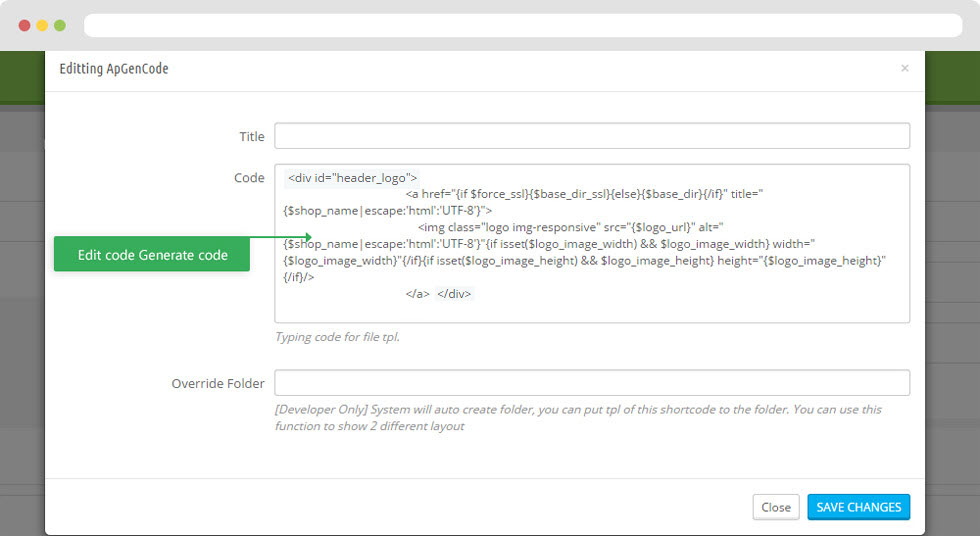
1.1.2 HTML Generate code
<div id="header_logo"> <a href="{if $force_ssl}{$base_dir_ssl}{else}{$base_dir}{/if}" title="{$shop_name|escape:'html':'UTF-8'}">
<img class="logo img-responsive" src="{$logo_url}" alt="{$shop_name|escape:'html':'UTF-8'}"
{if isset($logo_image_width) && $logo_image_width} width="{$logo_image_width}"
{/if}{if isset($logo_image_height) && $logo_image_height} height="{$logo_image_height}"{/if}/> </a></div>
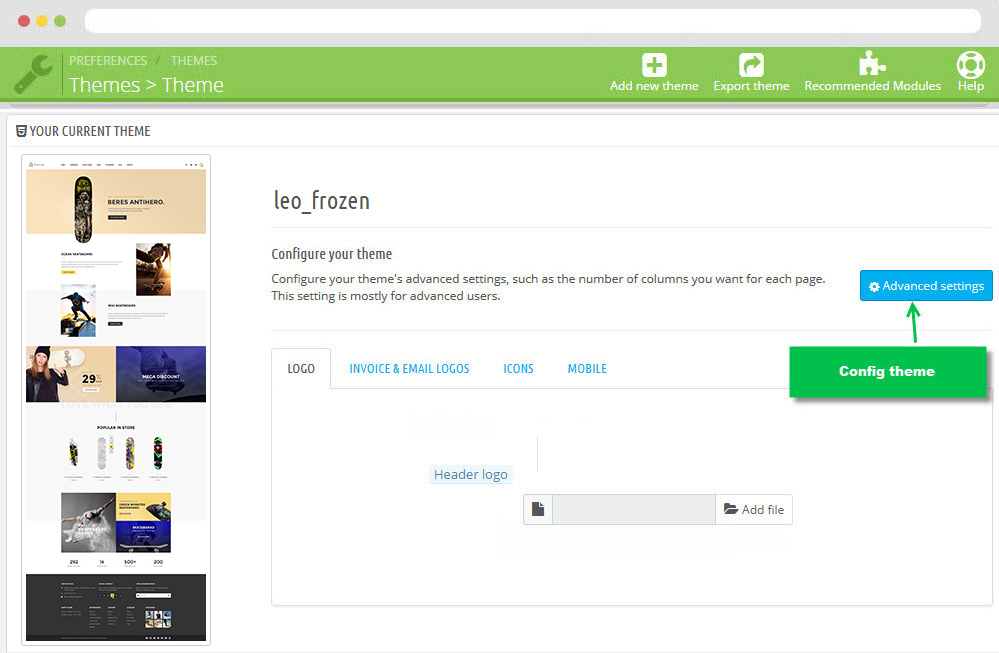
1.1.3 Change Logo
Backend > Preferences > Themes
![]()
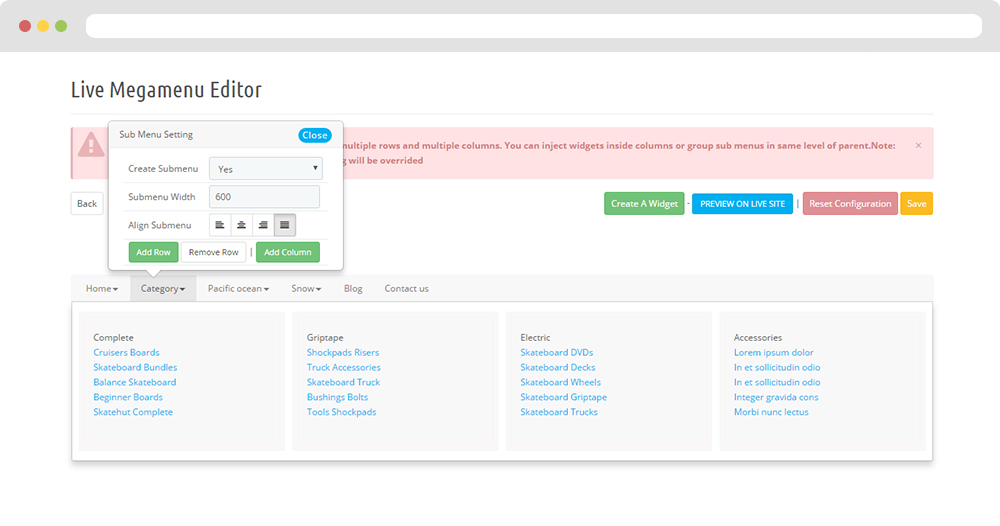
1.2 Leo Bootstrap Megamenu(Backend > Modules > Block Leo Bootstrap Megamenu)
- You can read guide in link (Blog Guide)
- Front end
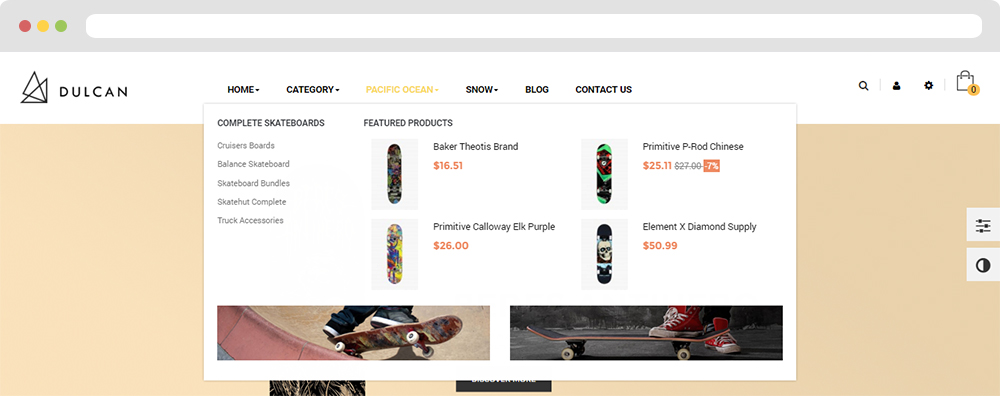
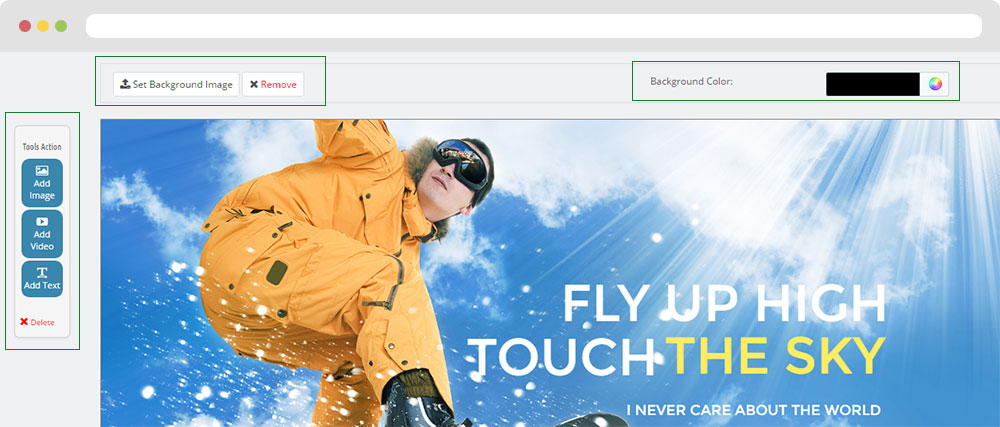
- Configure Block Leo Bootstrap Megamenu(Backend > Modules > Block Leo Bootstrap Megamenu)
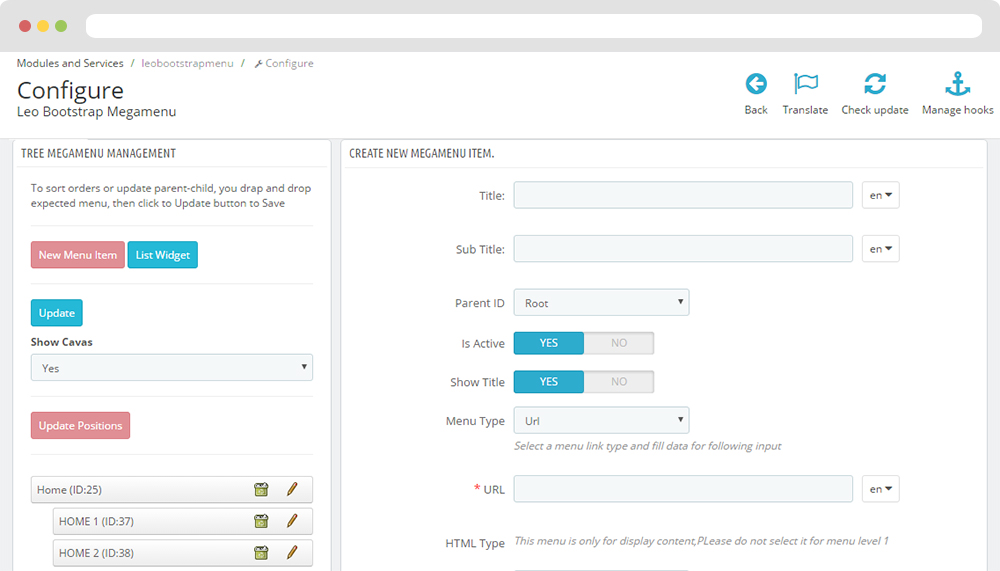
+ You can using "Live Edit Tools" To Make Rich Content For Megamenu
1.3 Module search block
Configure User info block( Backend > Modules > Search block )
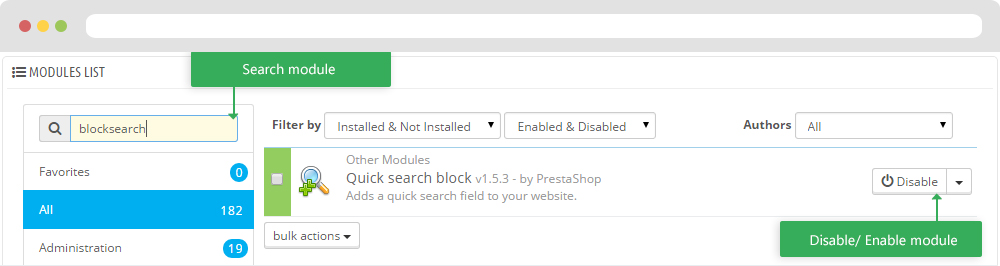
+ You can edit "nav.tpl" at: \themes\PROJECT_NAME\modules\blocksearch\blocksearch-top.tpl
1.4 Module blockuserinfo
Configure User info block( Backend > Modules > User info block )
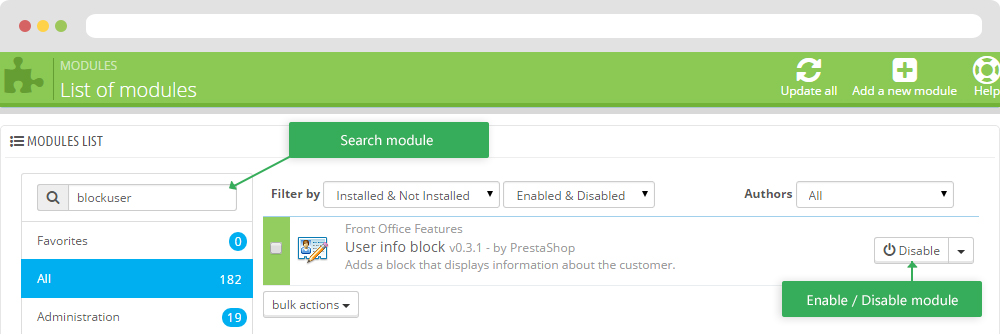
+ You can edit "nav.tpl" at: \themes\PROJECT_NAME\modules\blockuserinfo\nav.tpl
1.5 Module Block group top
Configure User info block( Backend > Modules > Block group top )
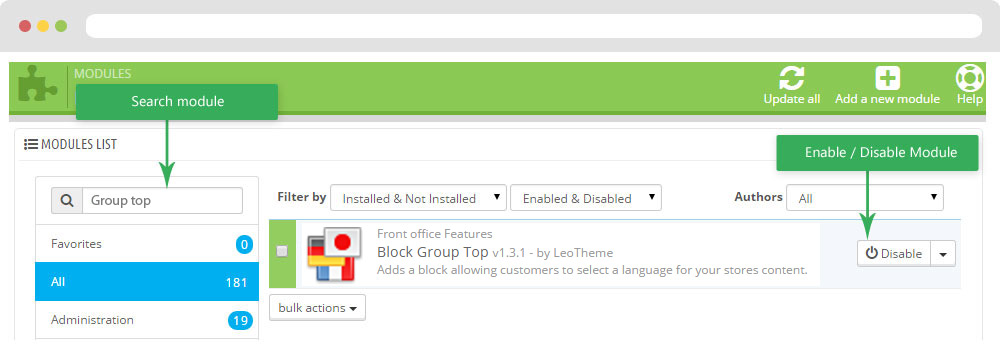
+ You can edit "nav.tpl" at: \themes\PROJECT_NAME\modules\blockgrouptop\blockgrouptop.tpl
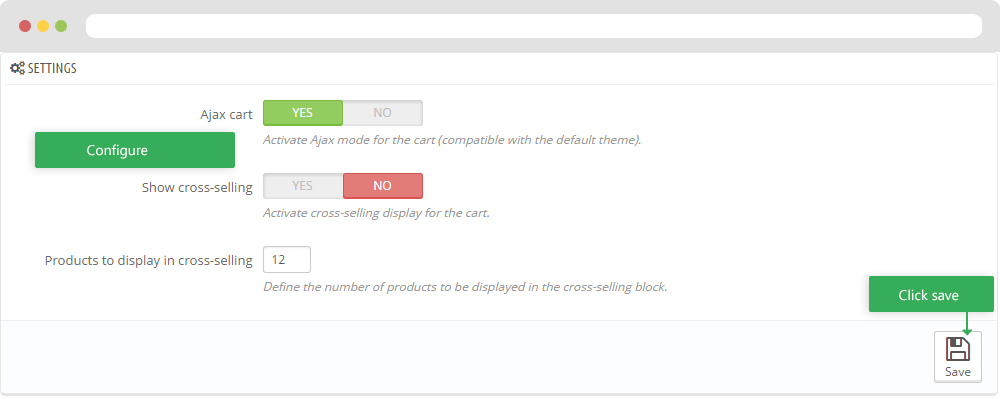
1.6 Module blockcart
Configure Cart block( Backend > Modules > Cart block )
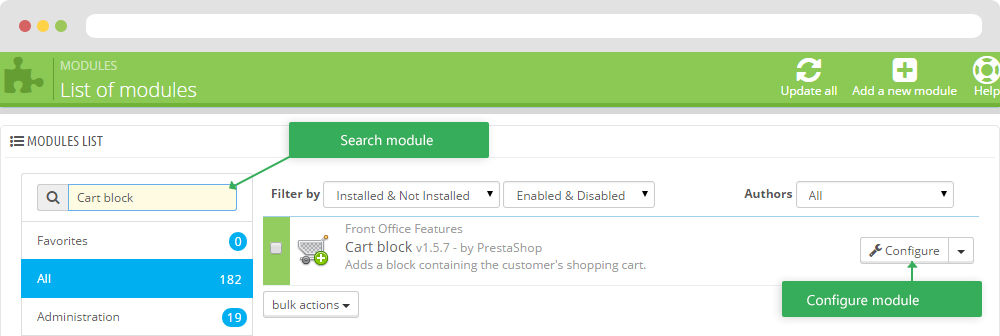
+ You can edit "blockcart.tpl" at: \themes\THEME_NAME\modules\blockcart\blockcart.tpl
2. DISPLAY TOPCOLUMN
- Front End

- Configure Apollo Page Builder ( Backend > Ap PageBuilder > Ap Profiles Manage > Select Shop 1 > View )
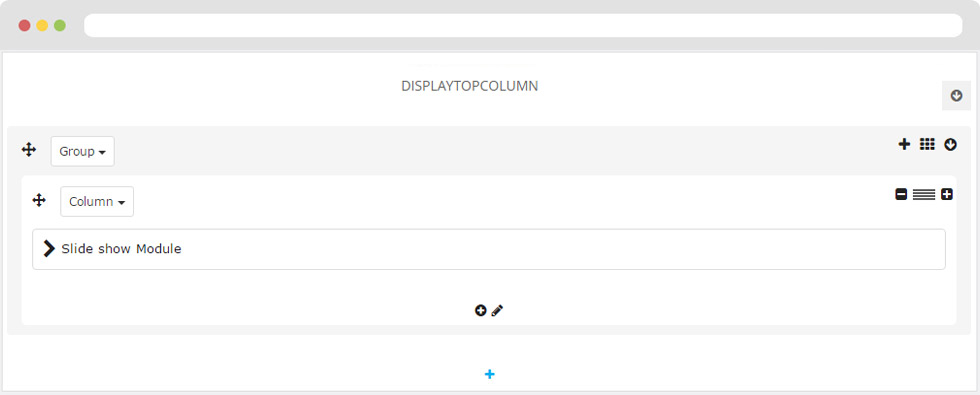
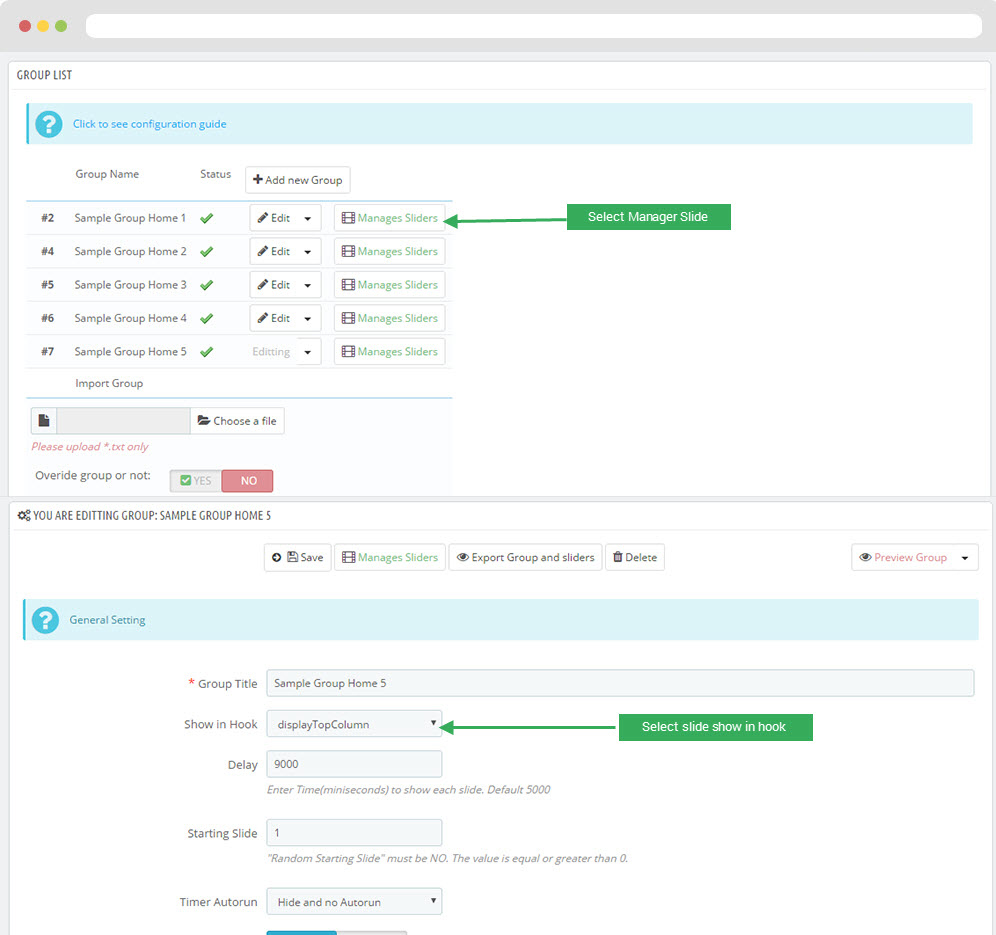
2.1 Configure Leo SlideShow
- Configure Leo Slideshow for your homepage ( Backend > Module > Leo Slideshow )

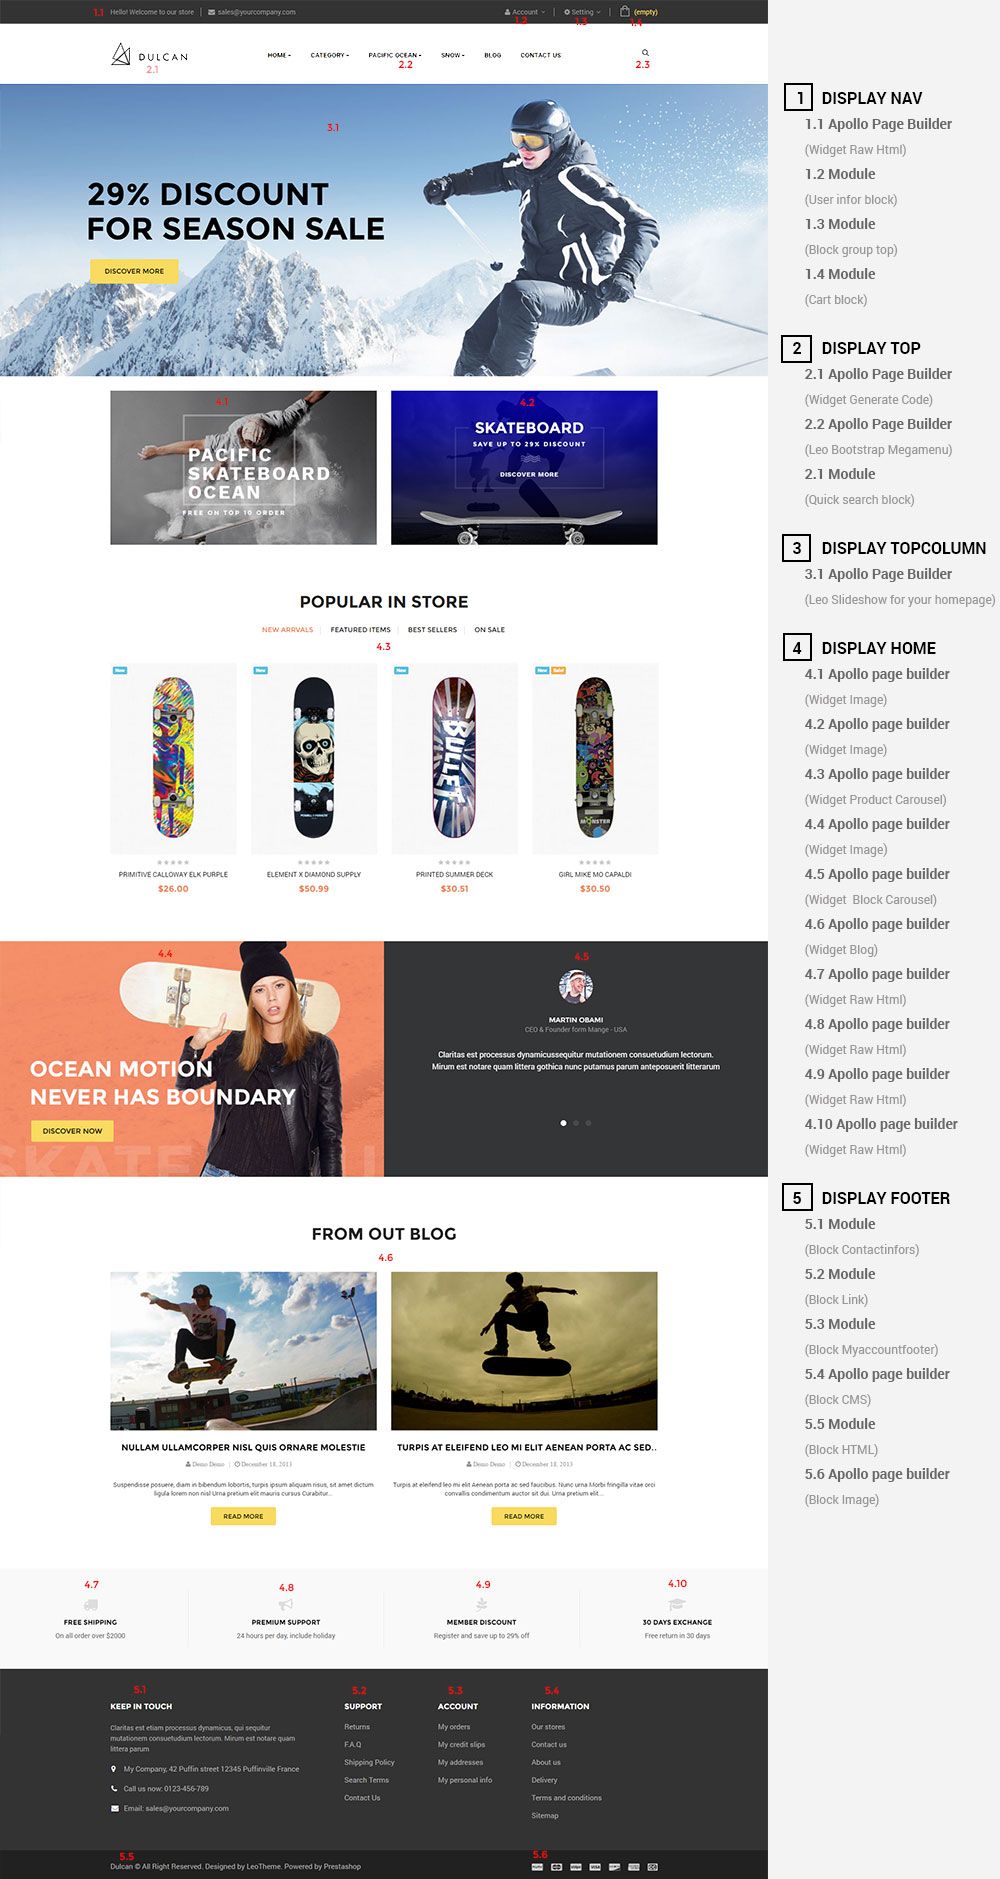
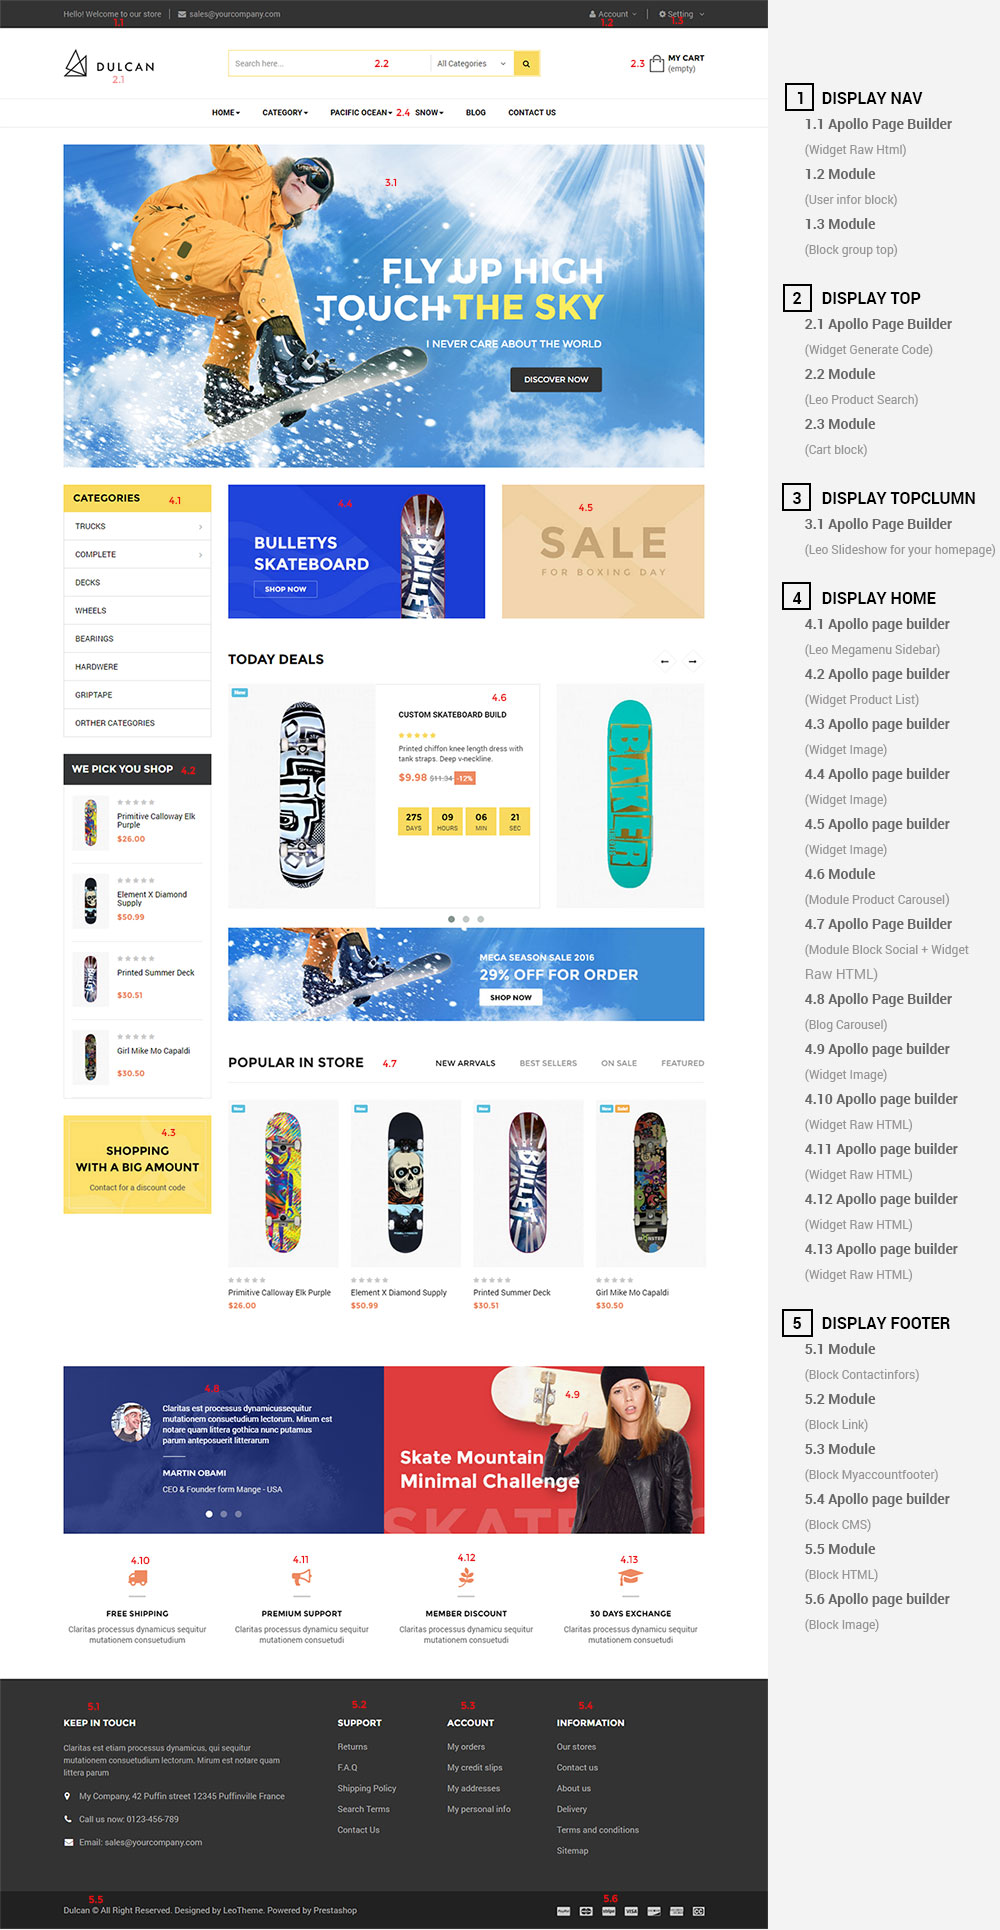
4. DISPLAY HOME
Front End

- Configure Apollo Page Builder ( Backend > Ap PageBuilder > Ap Profiles Manage > Select Shop 3 > View )
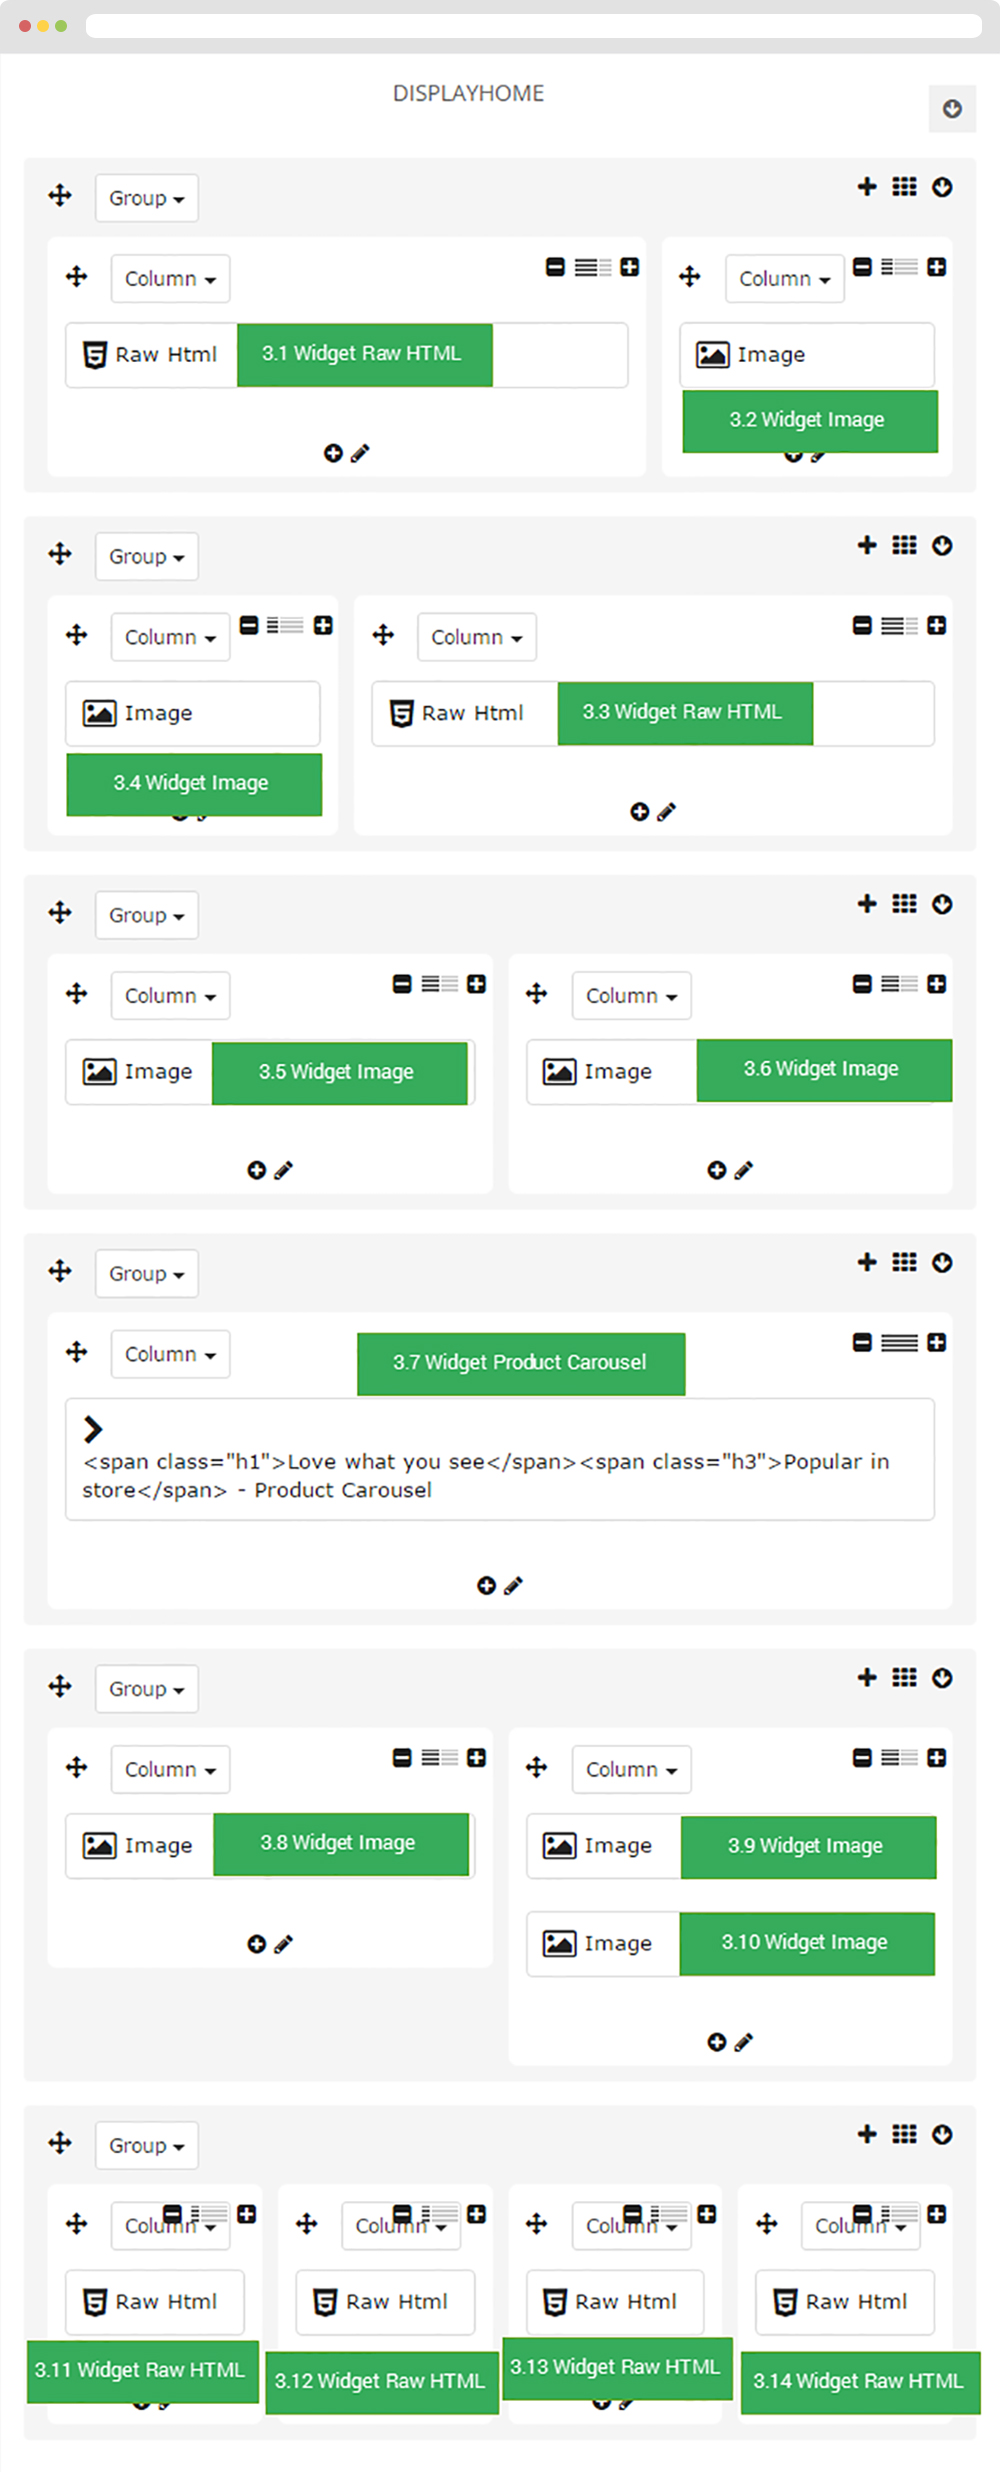
3.1 Widget Raw HTML
- Edit Raw HTML
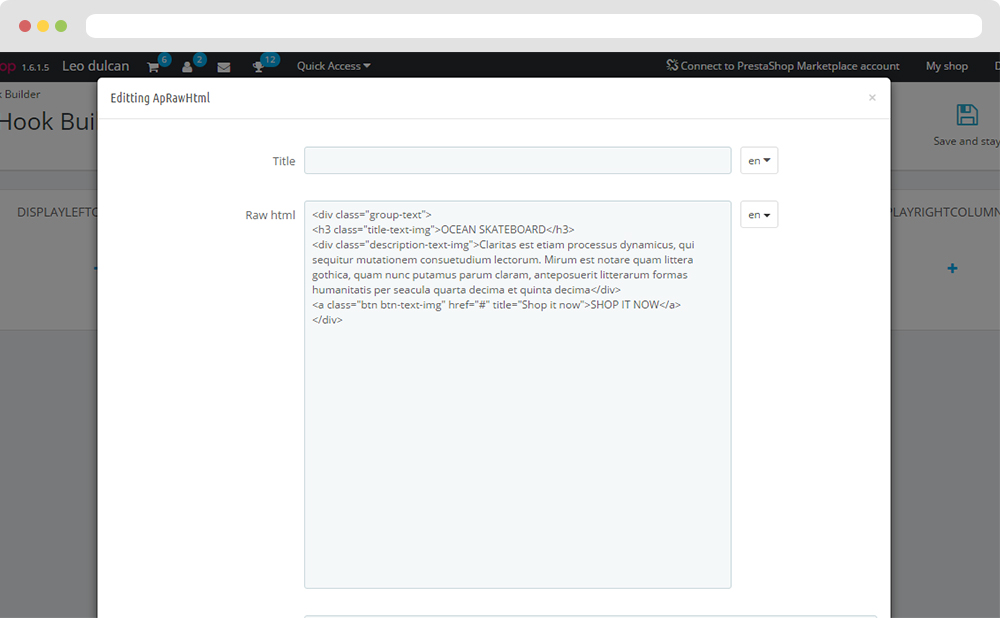
<div class="group-text">
	<h3 class="title-text-img">OCEAN SKATEBOARD</h3>
	<div class="description-text-img">Claritas est etiam processus dynamicus, qui sequitur mutationem
	consuetudium lectorum. Mirum est notare quam littera gothica, quam nunc putamus parum claram, anteposuerit
	litterarum formas humanitatis per seacula quarta decima et quinta decima</div>
	<a class="btn btn-text-img" href="#" title="Shop it now">SHOP IT NOW</a>
</div>
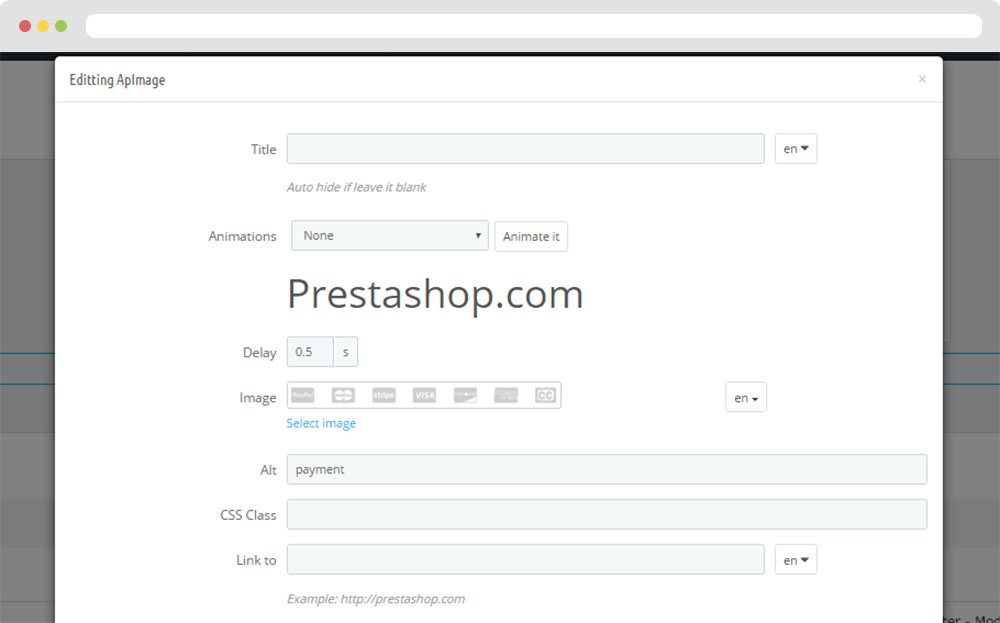
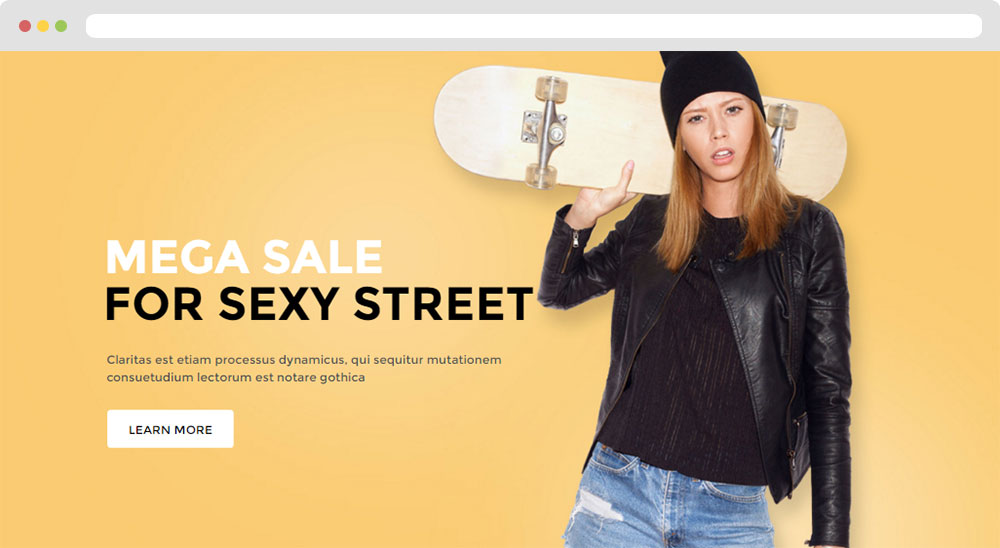
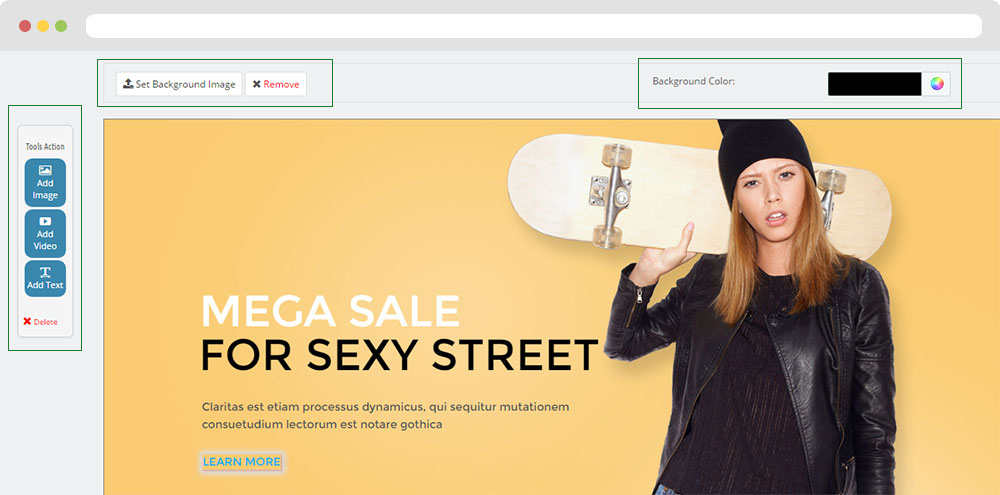
3.2 Widget Image
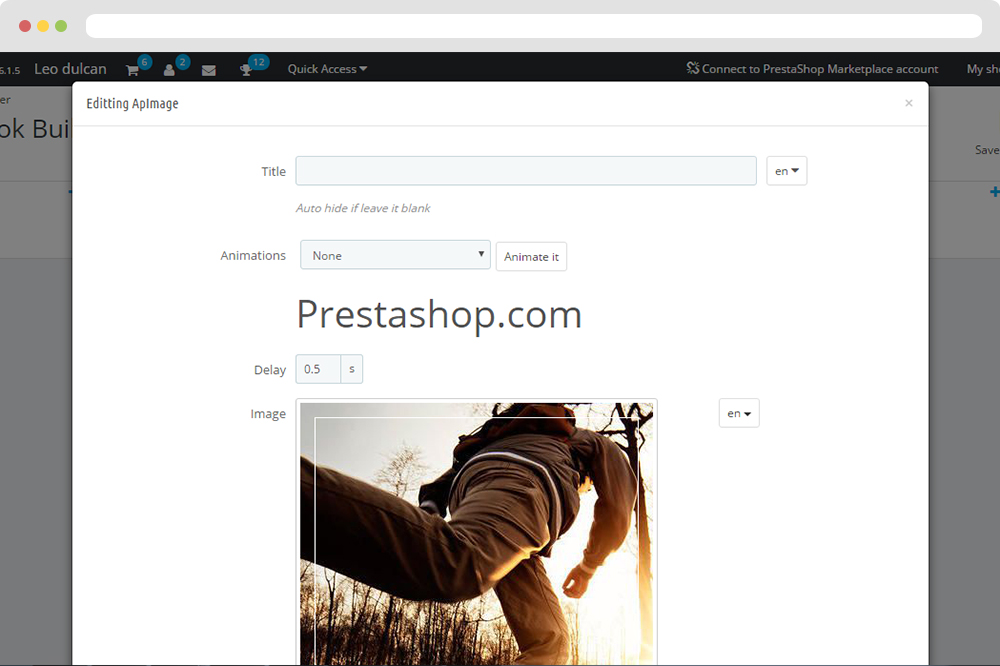
3.3 Widget Raw HTML ( Configure Widget Image follow link )
3.4 Widget Image ( Configure Widget Image follow link )
3.5 Widget Image ( Configure Widget Image follow link )
3.6 Widget Image ( Configure Widget Image follow link )
3.7 Widget Product Carousel
- Edit Widget Product Carousel
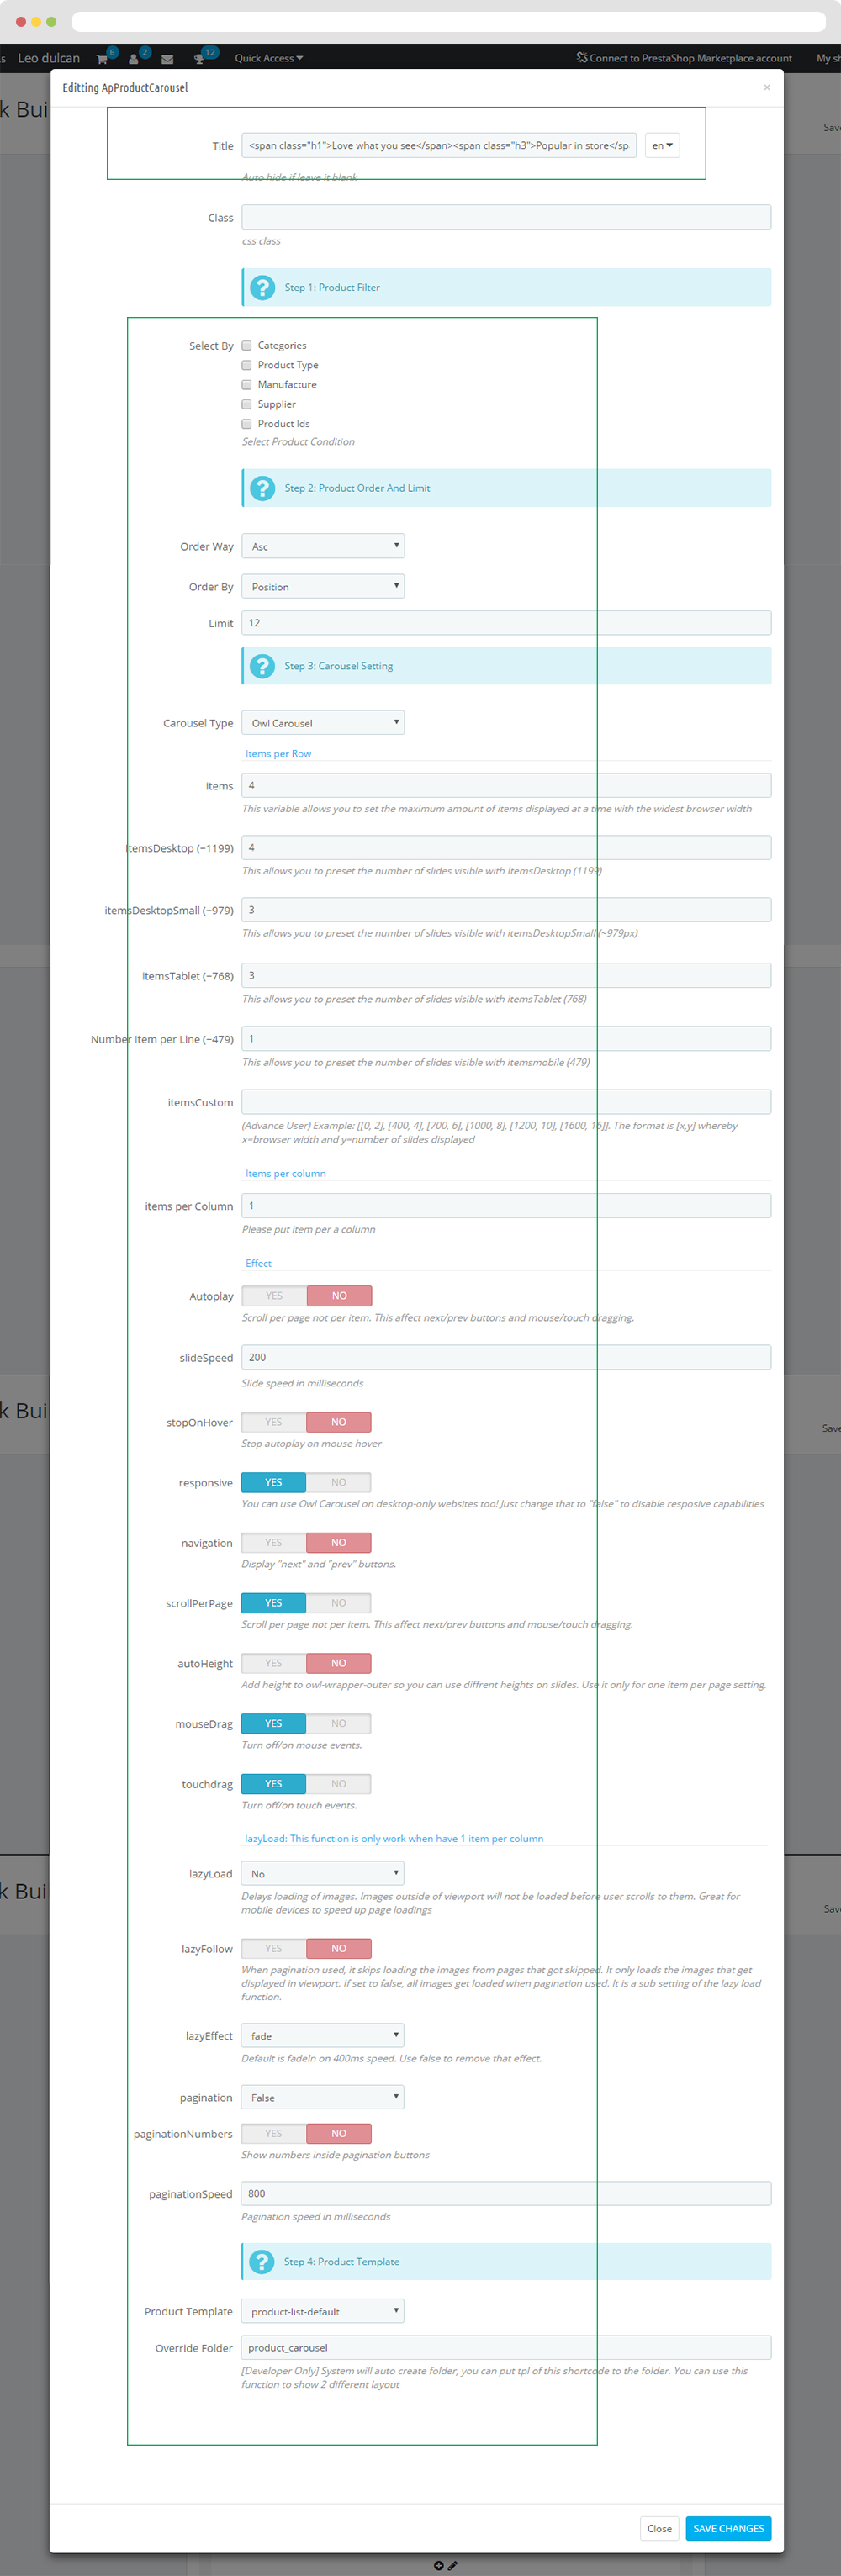
- Title Product Carousel
<span class="h1">Love what you see</span><span class="h3">Popular in store</span>
3.8 Widget Image
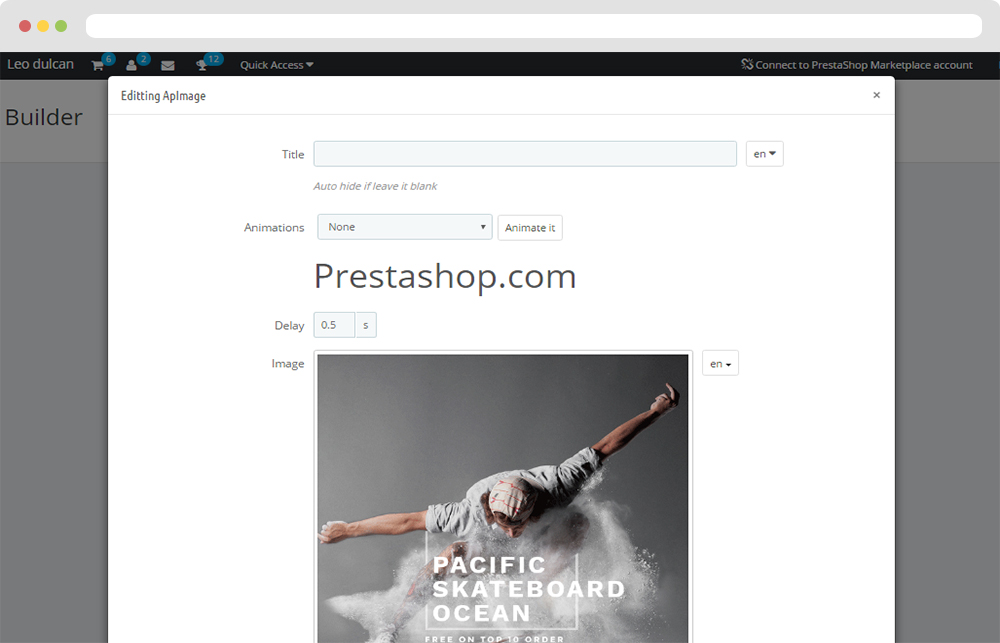
3.9 Widget Image( Configure Widget Image follow link )
3.10 Widget Image( Configure Widget Image follow link )
3.11 Widget Raw HTML
- Edit Raw HTML

<h1>292</h1>
<p>products in store</p>
3.12 Widget Raw HTML
- Edit Raw HTML
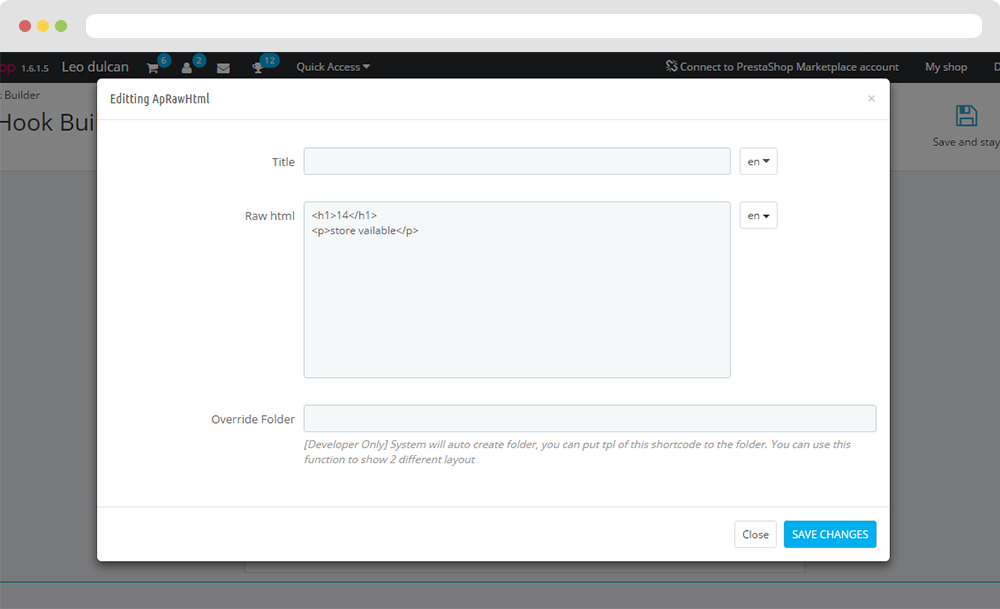
<h1>14</h1>
<p>store vailable</p>
3.13 Widget Raw HTML
- Edit Raw HTML
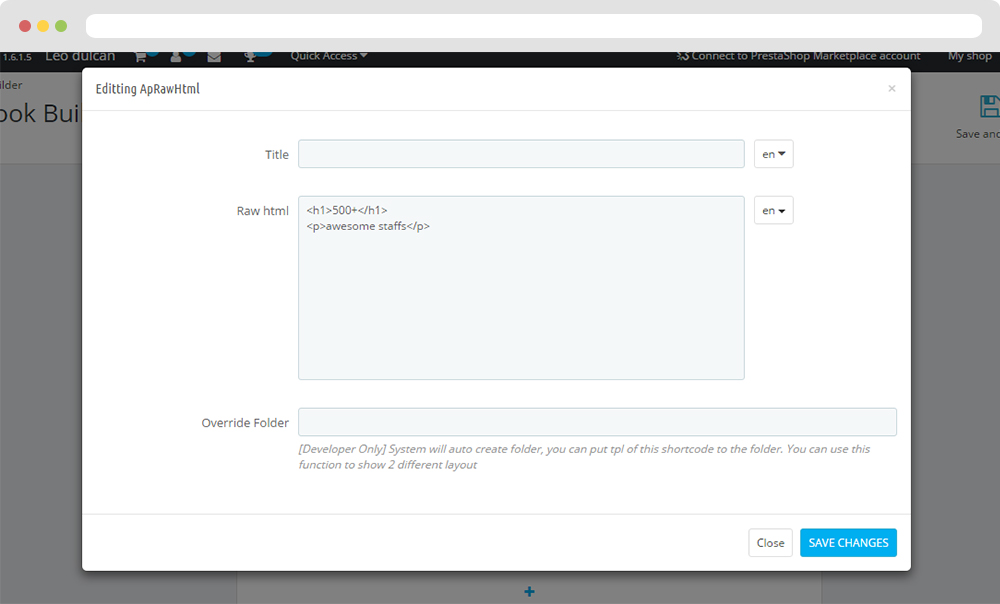
<h1>500+</h1>
<p>awesome staffs</p>
3.14 Widget Raw HTML
- Edit Raw HTML
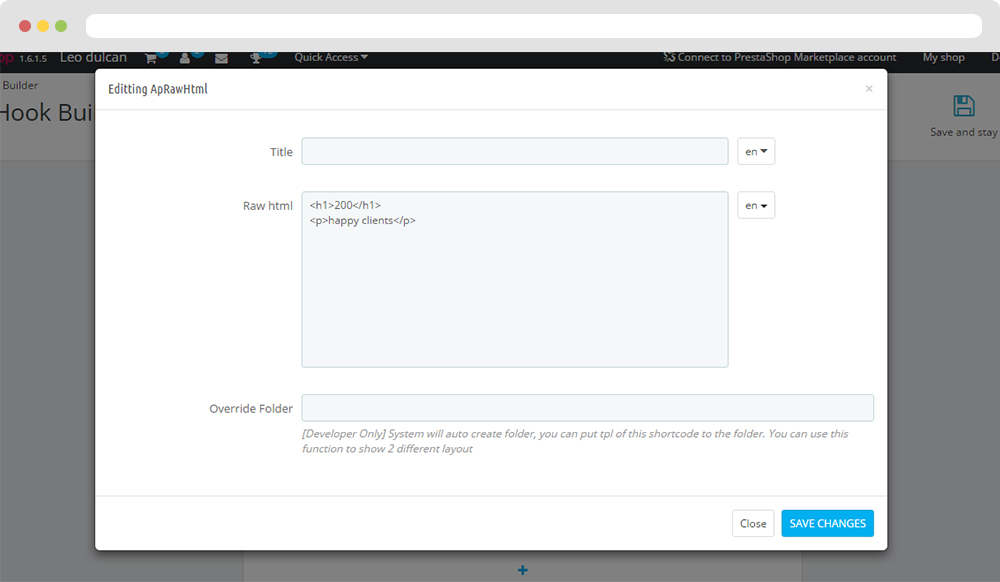
<h1>200</h1>
<p>happy clients</p>
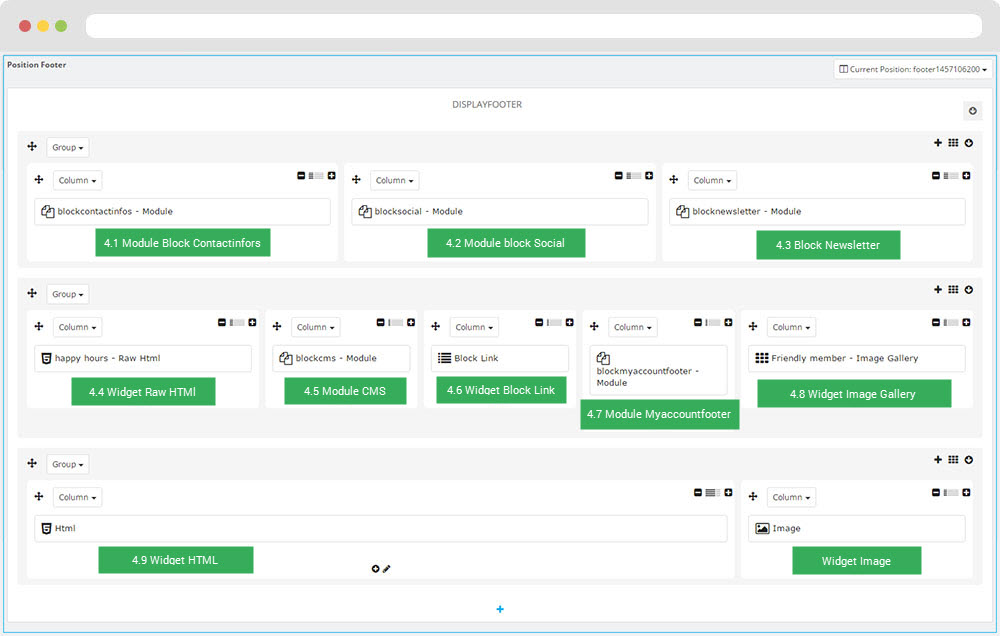
4. Display Footer
- Front End
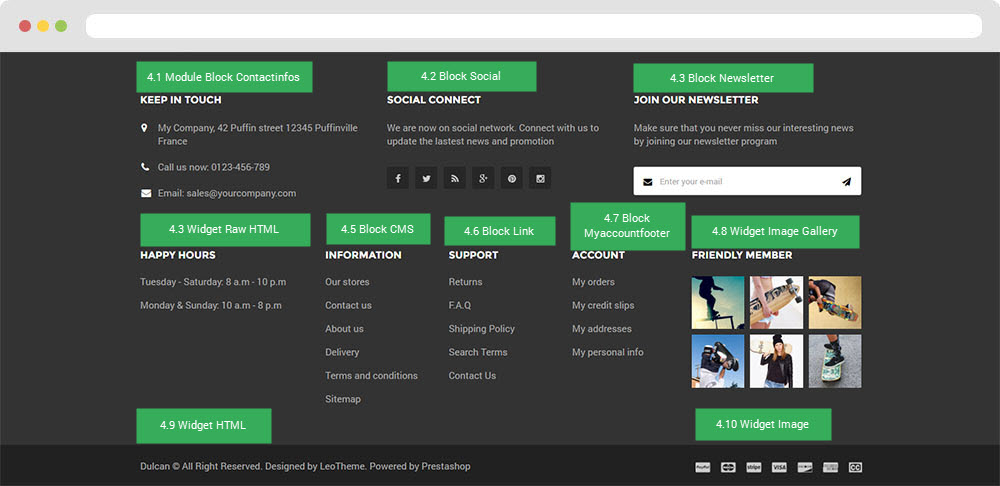
- Configure Apollo Page Builder ( Backend > Ap PageBuilder > Ap Profiles Manage > Select Shop 1 > View )
- Configure module (Backend > Modules > Block Contacinfors)
- You can configure enable/disable module
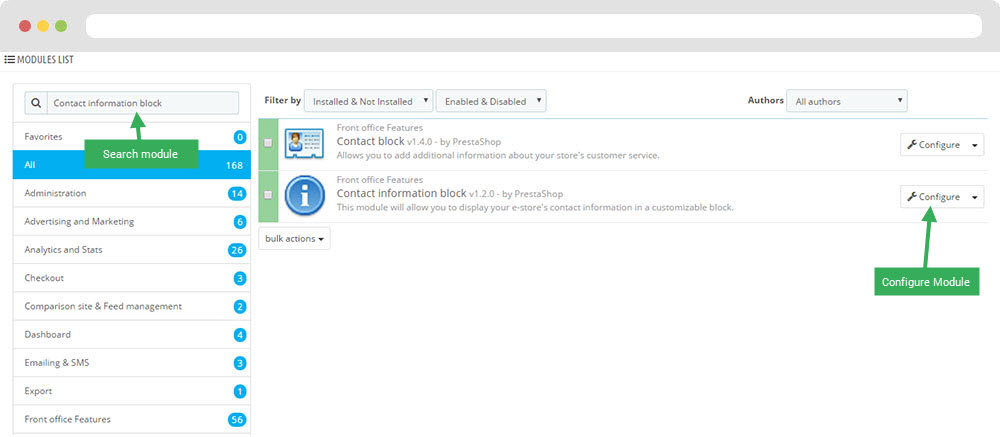
+ You can edit "blockmyaccountfooter.tpl" at: \themes\THEME_NAME\modules\blockcontacinfors\blockcontacinfors.tpl
- Configure module (Backend > Modules > Block Social)
- You can configure enable/disable module
+ You can edit "blockmyaccountfooter.tpl" at: \themes\THEME_NAME\modules\blocksocial\blocksocial.tpl
- Configure module (Backend > Modules > Newsletter block)
- You can configure enable/disable module
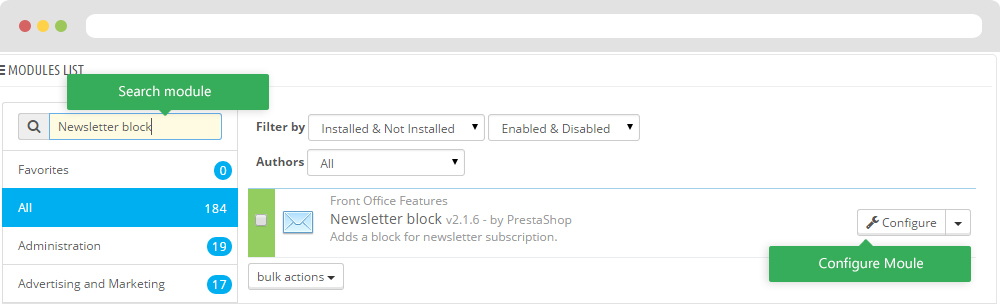
+ You can edit "blockmyaccountfooter.tpl" at: \themes\THEME_NAME\modules\blocknewsletter\blocknewsletter.tpl
- Edit Widget Raw HTML
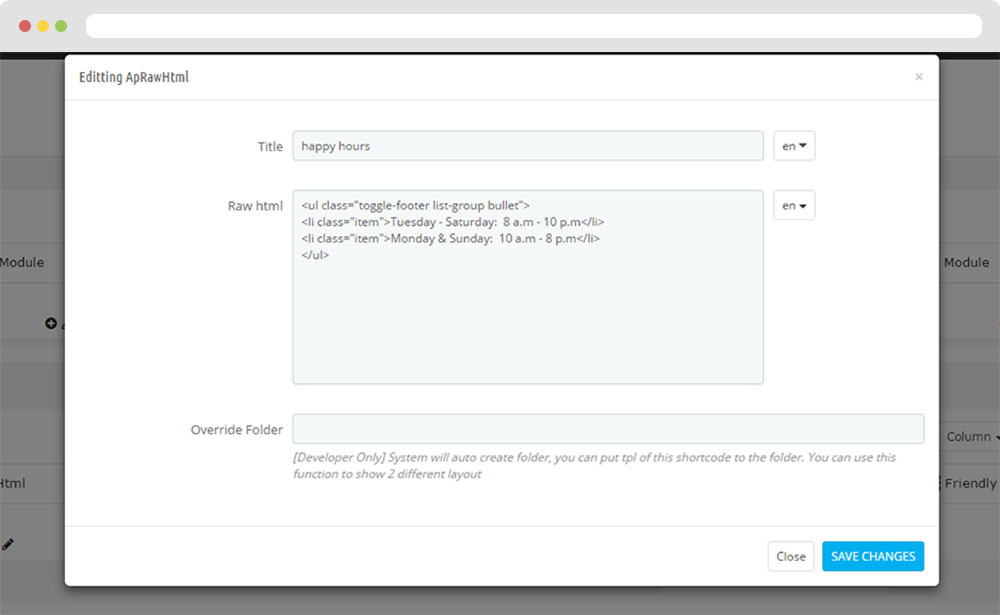
- Code HTML
<ul class="toggle-footer list-group bullet">
	<li class="item">Tuesday - Saturday:  8 a.m - 10 p.m</li>
	<li class="item">Monday & Sunday:  10 a.m - 8 p.m</li>
</ul>
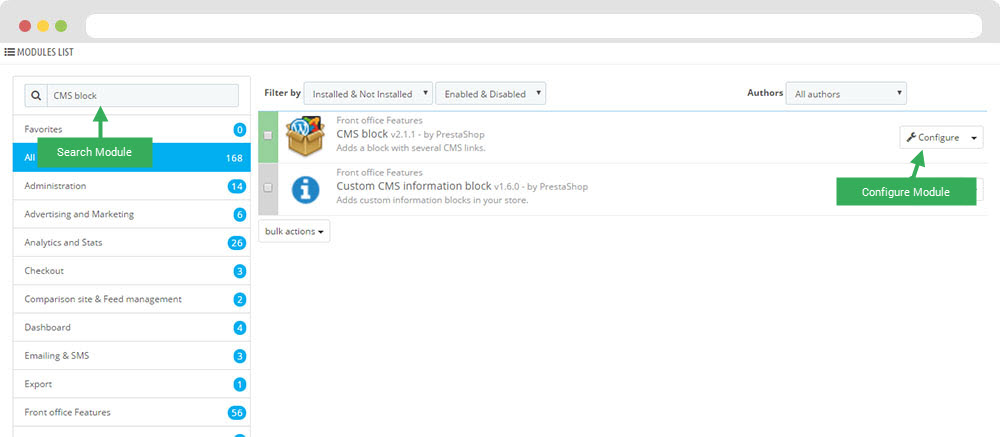
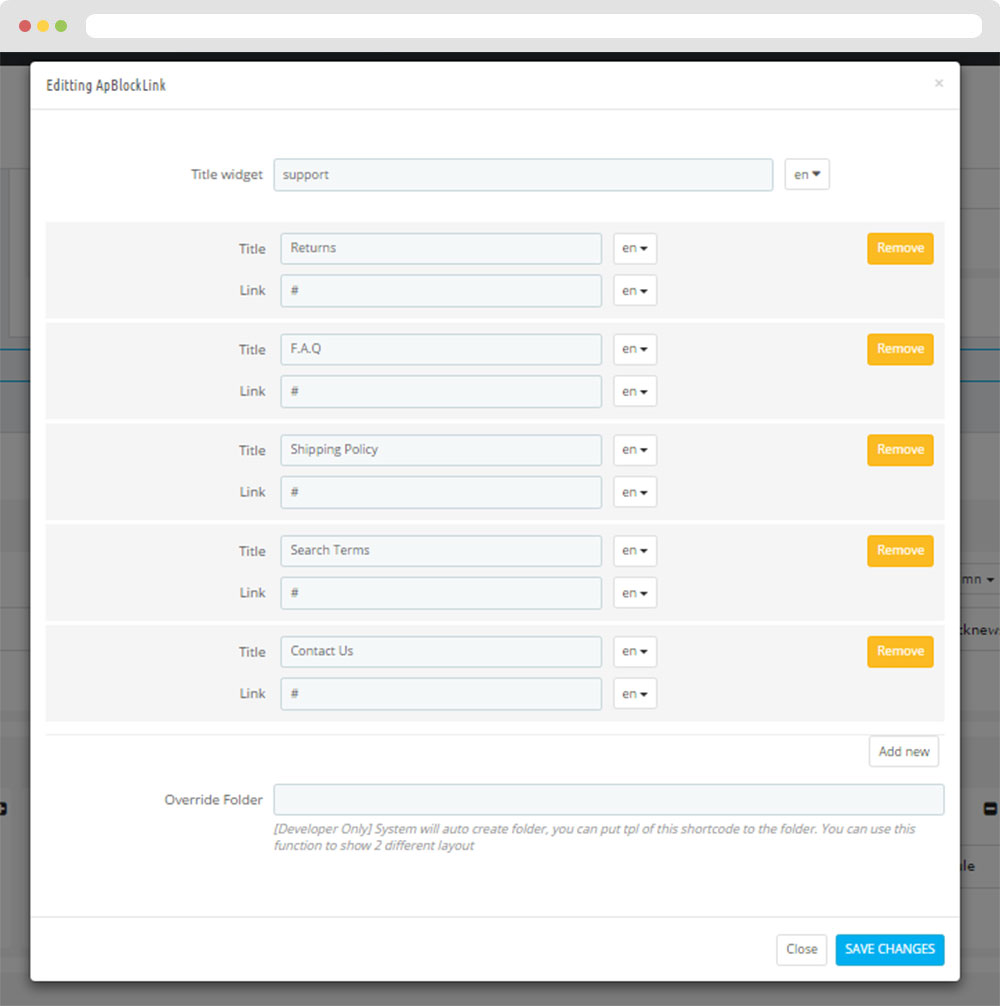
- Configure module (Backend > Modules > CMS Block)
- You can configure module
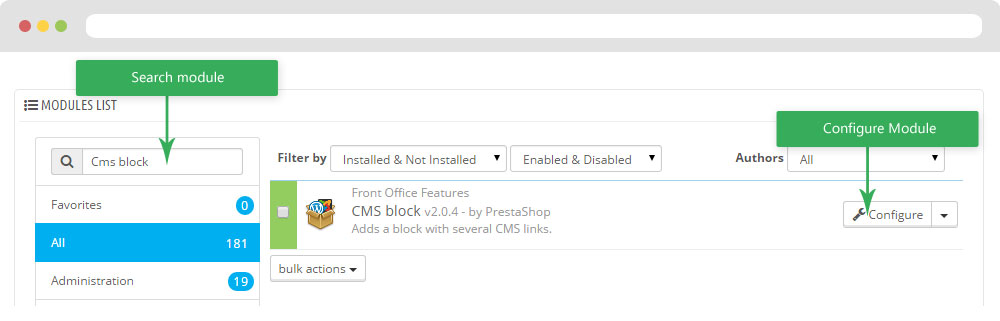
You can edit "blockcms.tpl" at: \themes\THEME_NAME\modules\blockcms\blockcms.tpl
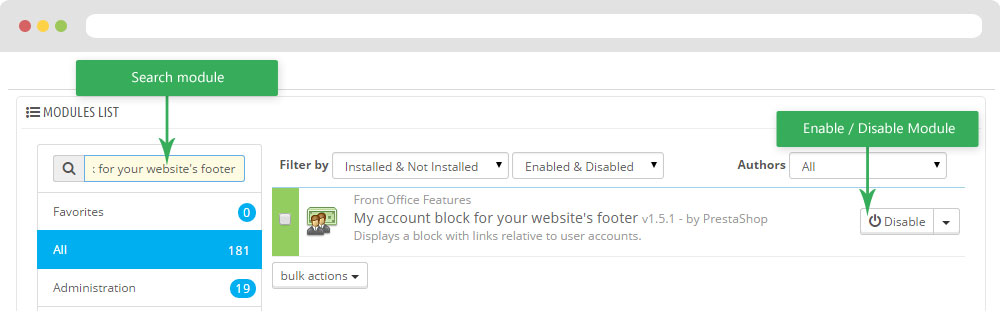
+ You can edit "blockmyaccountfooter.tpl" at: \themes\THEME_NAME\modules\blockmyaccountfooter\blockmyaccountfooter.tpl
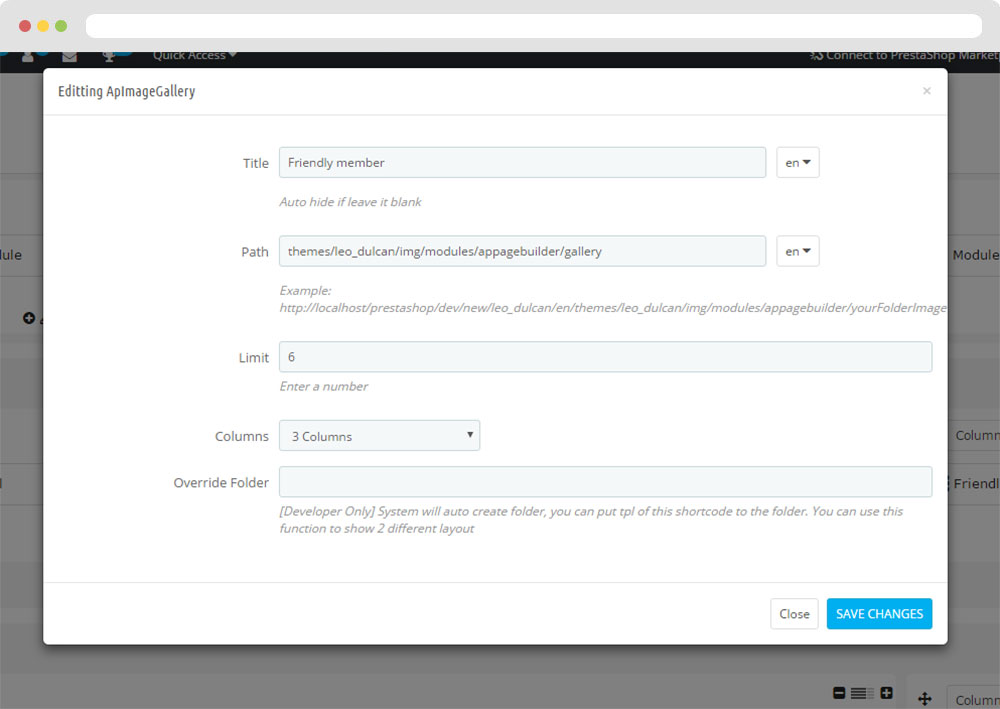
You can edit image at folder: \themes\THEME_NAME\img\modules\appagebuilder\gallery or your own path
- Edit Widget HTML
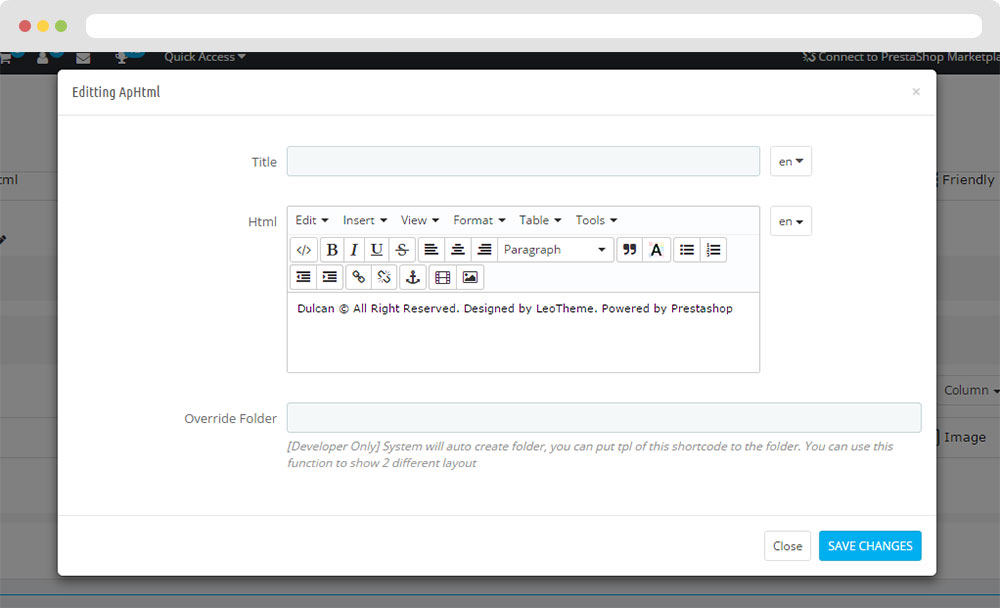
- Code HTML
<div>Dulcan © All Right Reserved. Designed by LeoTheme. Powered by Prestashop</div>
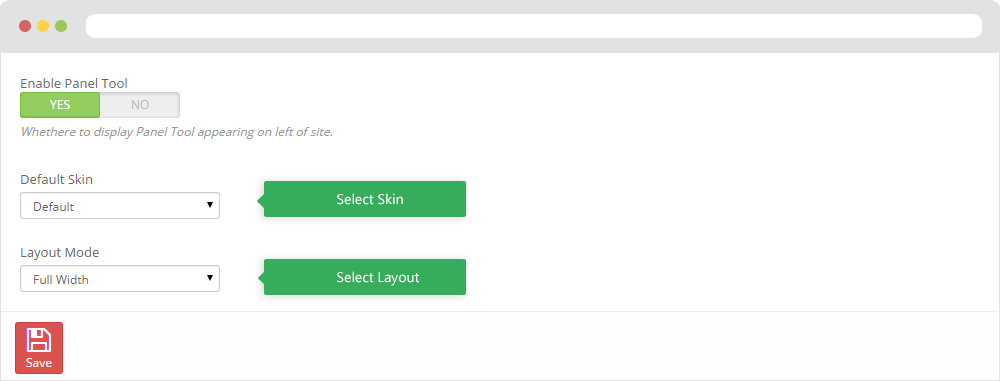
6. Tool bar
- Front End
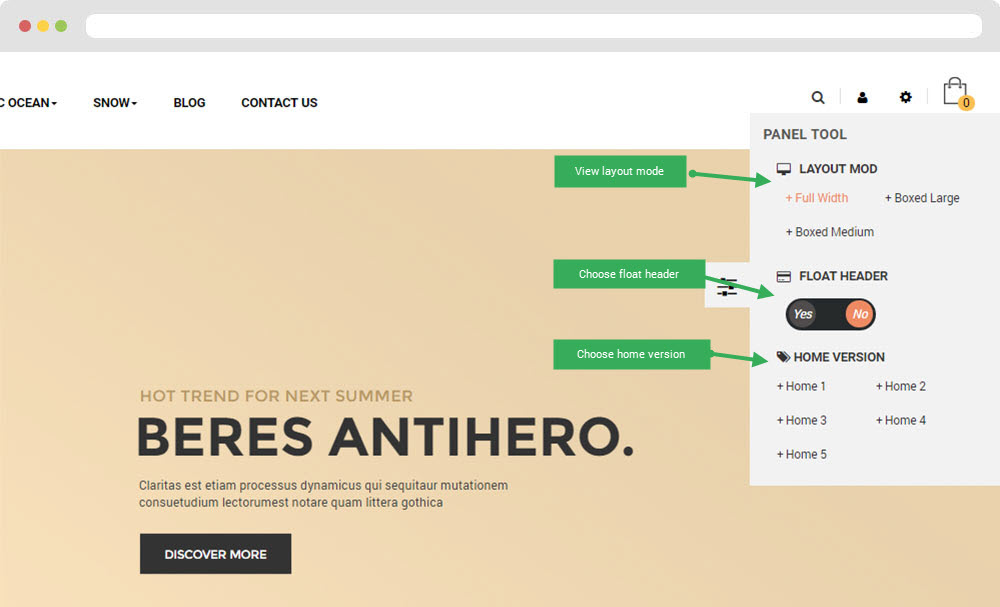
- Configure Tool bar(Backend > Modules > Leo Theme Control Panel)
Ap PageBuilder
You can read guide in link (Blog Guide)
1. Profile Manage (Backend > AP PageBuilder > Ap Profile Manage)
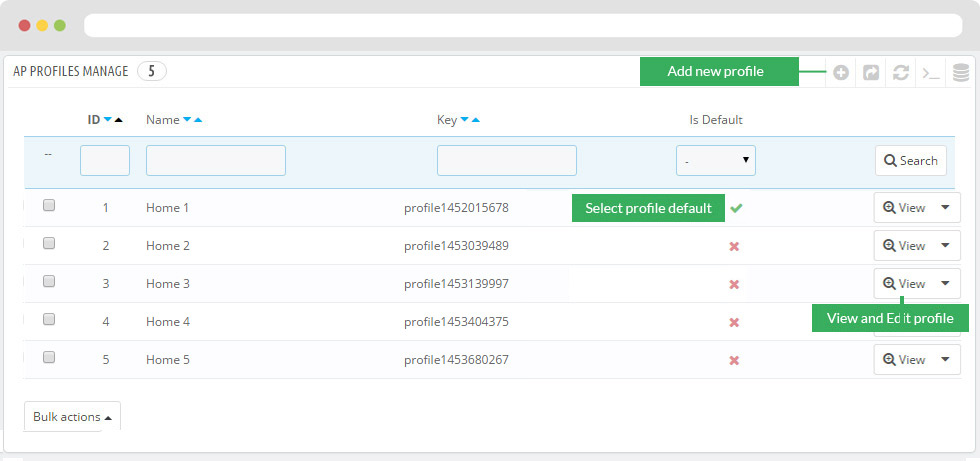
1.1 View and Edit Profile

![]()
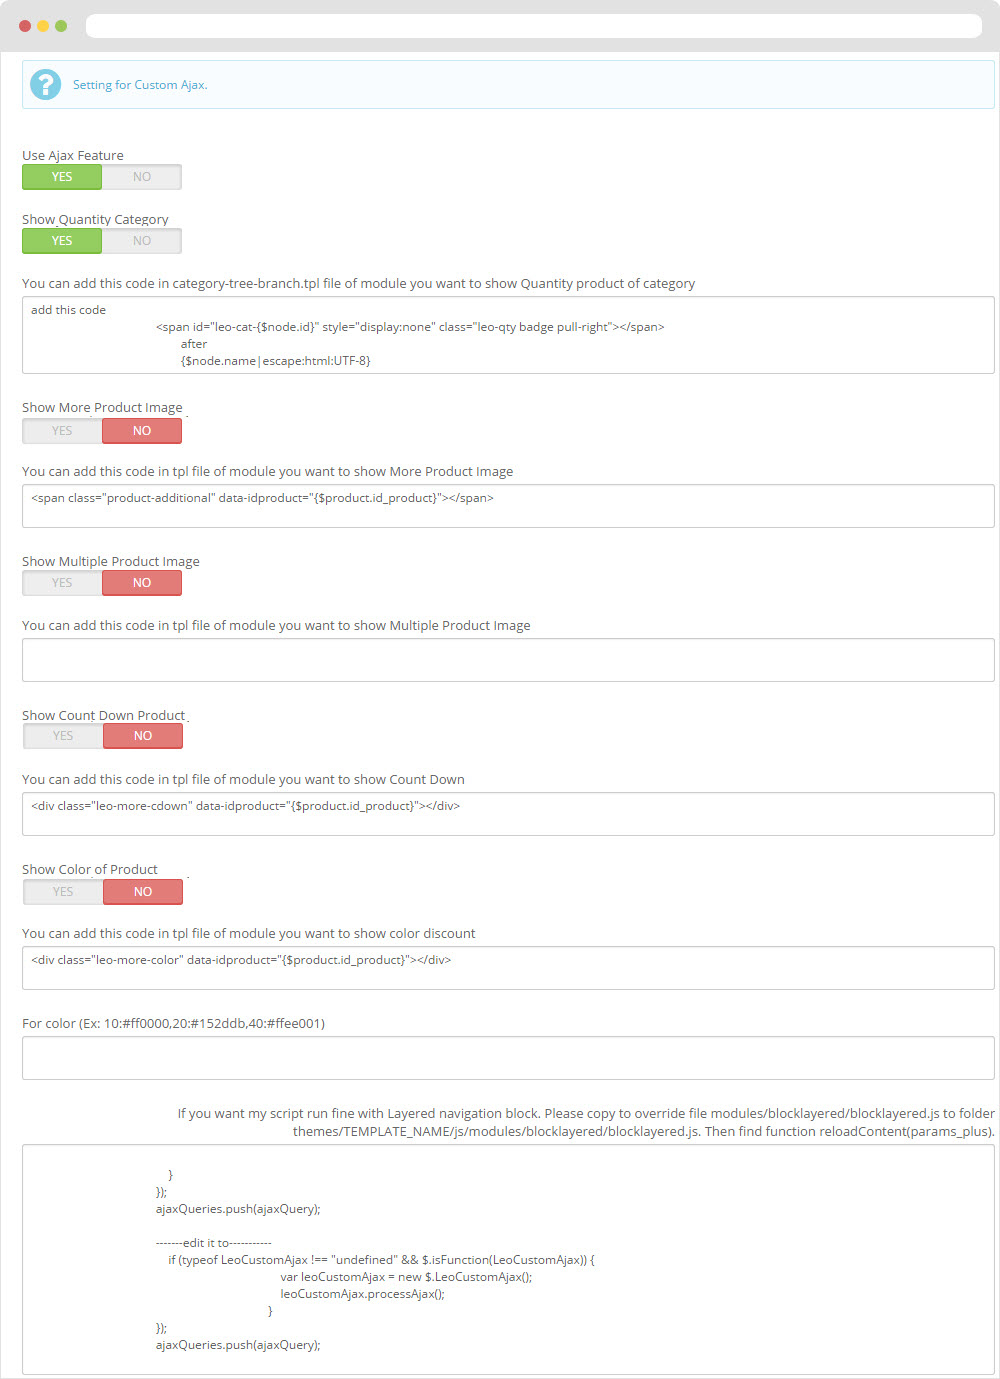
2. Custom Ajax
Front end
Configure Custom Ajax ( Backend > Modules > AP PageBuilder > Configure )
Manager Profile for shop 2
1. Leo Slide show
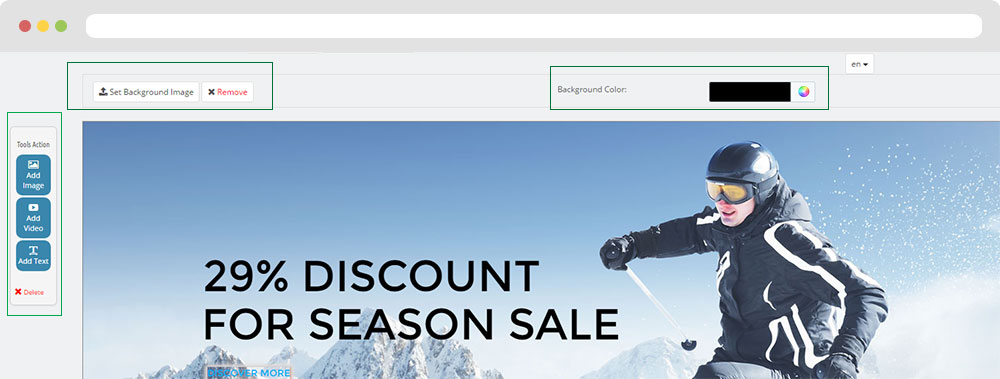
Front-office Appearance

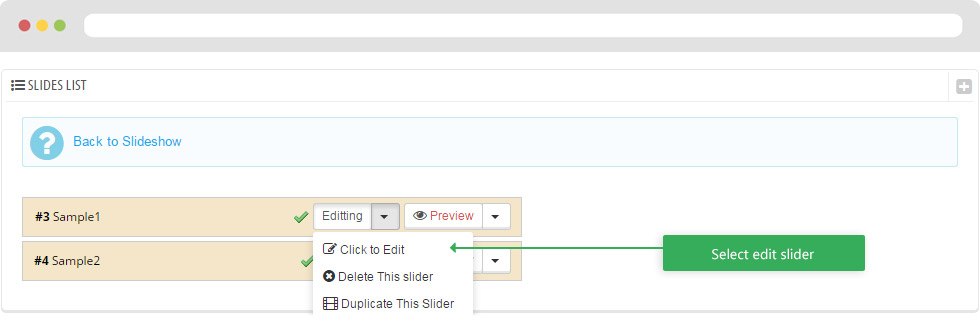
1.1 Configure Leo Slide show Back Office > Modules > Install and Configuration Leo Slideshow > Select edit Slideshow shop 2
2. Layout struct Front end
2.1 Configure Profile shop 2 ( Backend > Ap PageBuilder > Ap Profiles Manage > Select Shop 2 > View )
Manager Profile for shop 3
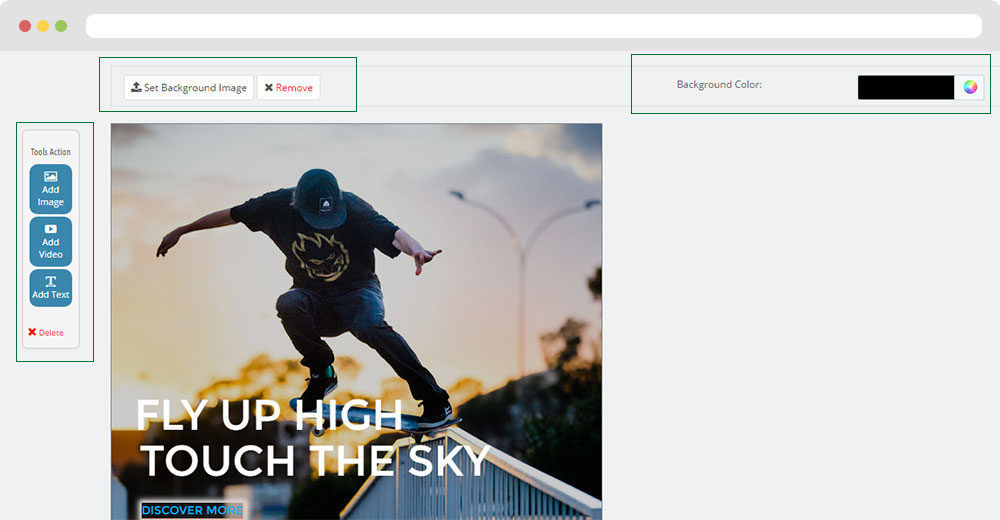
1. Leo Slide show
Front-office Appearance

1.1 Configure Leo Slide show Back Office > Modules > Install and Configuration Leo Slideshow > Select edit Slideshow shop 3
2. Layout struct Front end
2.1 Configure Profile shop 3 ( Backend > Ap PageBuilder > Ap Profiles Manage > Select Shop 3 > View )
Manager Profile for shop 4
1. Leo Slide show
Front-office Appearance
1.1 Configure Leo Slide show Back Office > Modules > Install and Configuration Leo Slideshow > Select edit Slideshow shop 4
2. Layout struct Front end
1.1 Configure Profile shop 4 ( Backend > Ap PageBuilder > Ap Profiles Manage > Select Shop 4 > View )

Manager Profile for shop 5
1. Leo Slide show
Front-office Appearance

1.1 Configure Leo Slide show Back Office > Modules > Install and Configuration Leo Slideshow > Select edit Slideshow shop 5
1. Layout struct Front end
1.1 Configure Profile shop 5 ( Backend > Ap PageBuilder > Ap Profiles Manage > Select Shop 5 > View )
Translations
10. Front-office translations(Backend > Localization > Translations)
![]()
10.1. Installed modules translations(Backend > Localization > Translations)
![]()
Information
Thank you for reading!
We hope you can create the best website with our themes.
Getting Support
If you are unable to find your answer here in our documentation, please go to our forum and post up a new topic with all the details we need. Please be sure to include your site URL as well or send us an email.
- Forum
- Ticket
- Contact us
- Email: leotheme@gmail.com
- Skype Support: trandinhnghiait
- YouTube
Our support scope
Our support covers configuration, building site as demo, trouble using any features, and bug fixes. We don't provide support for customizations or 3rd party extension.
Our support time
We try our best to monitor the email around the clock, however, this is not always possible due to different time zones. We will try to reply you as fast as we can.
Our working time is 8.00 AM - 5.30 PM, Monday to Friday (GMT+7). So if ask for help in the weekend, you may have to wait a little bit for support and please be patient.